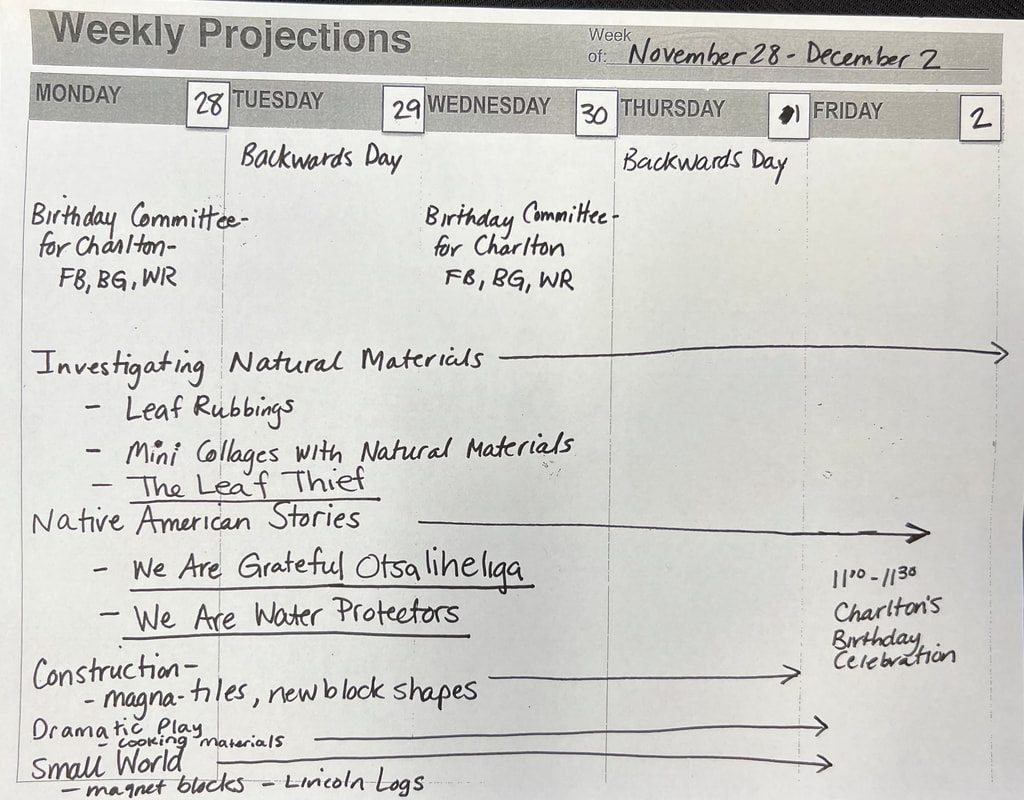
|
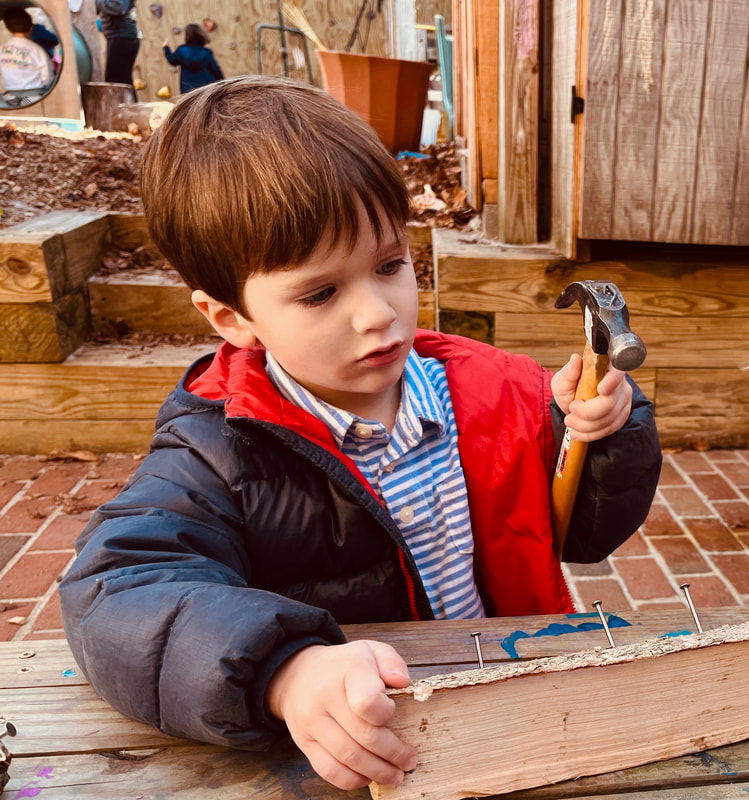
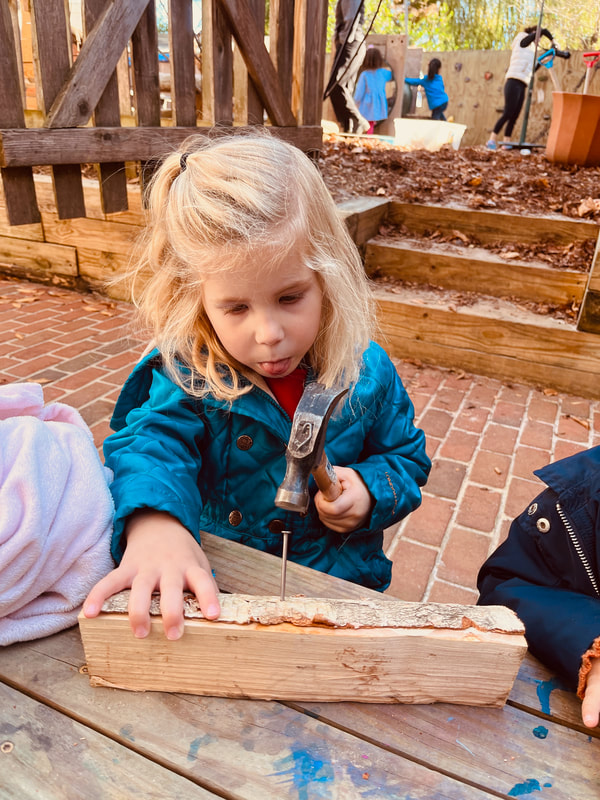
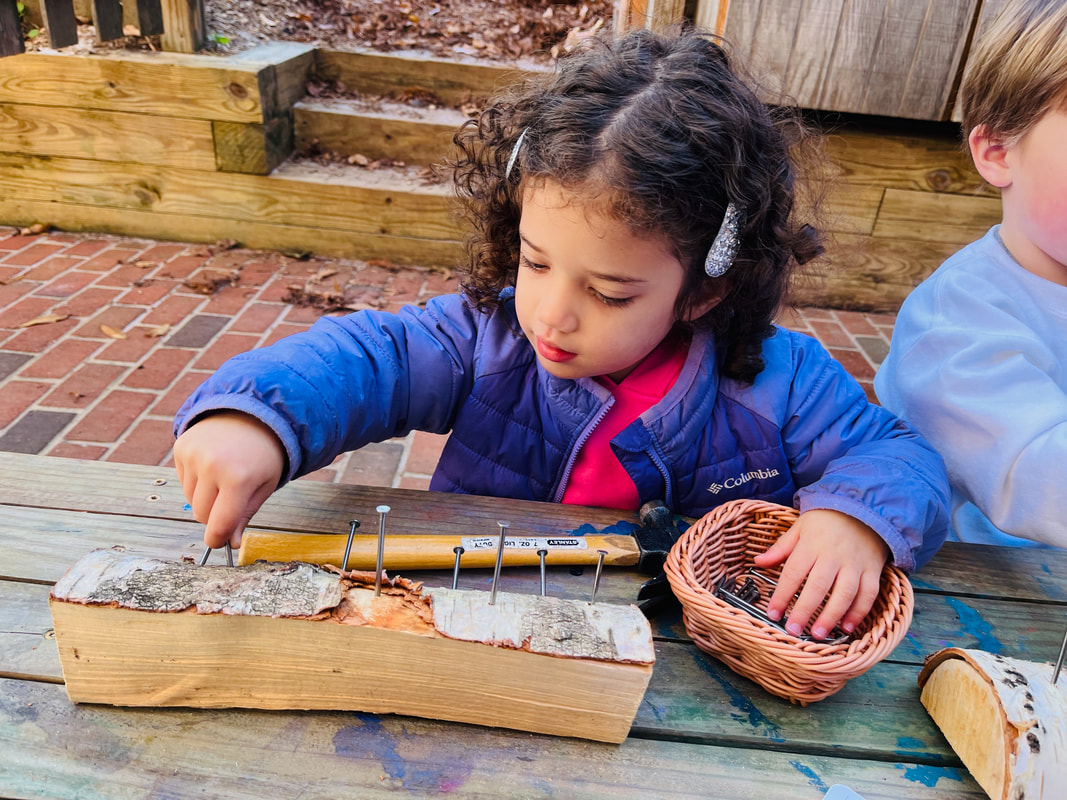
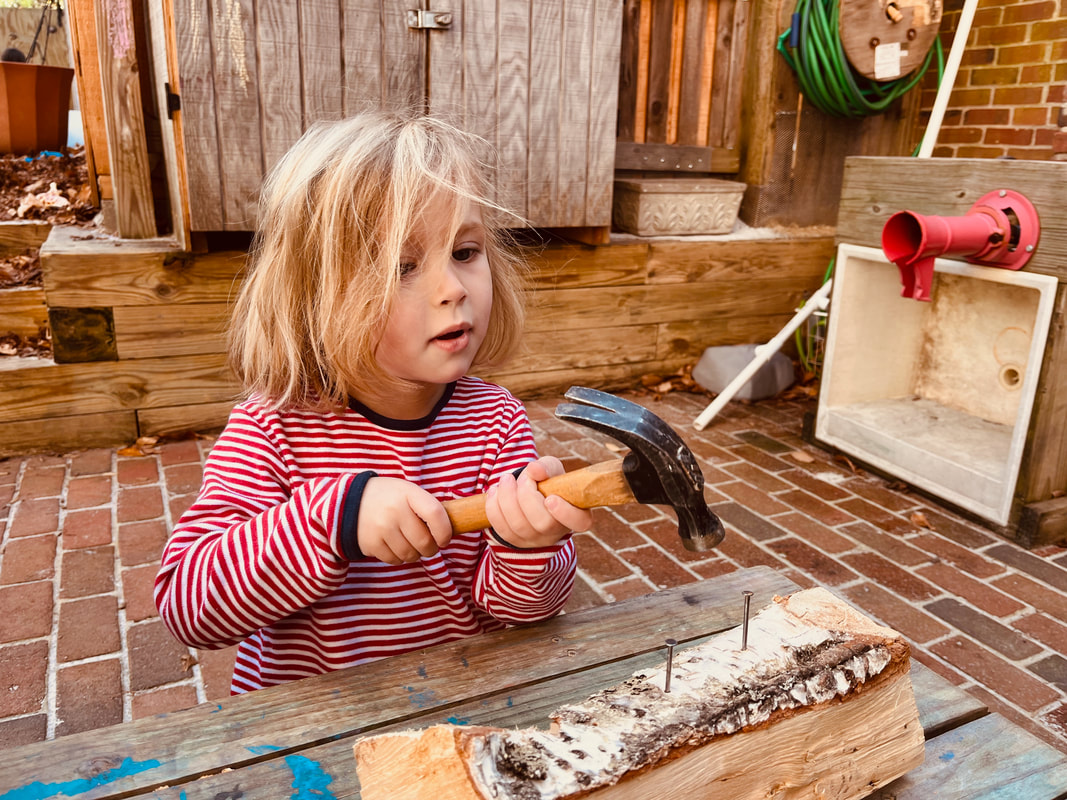
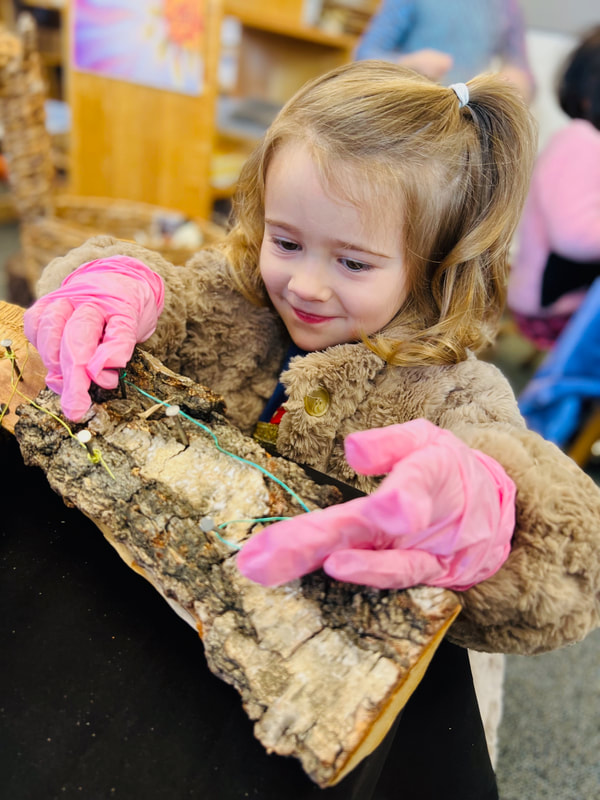
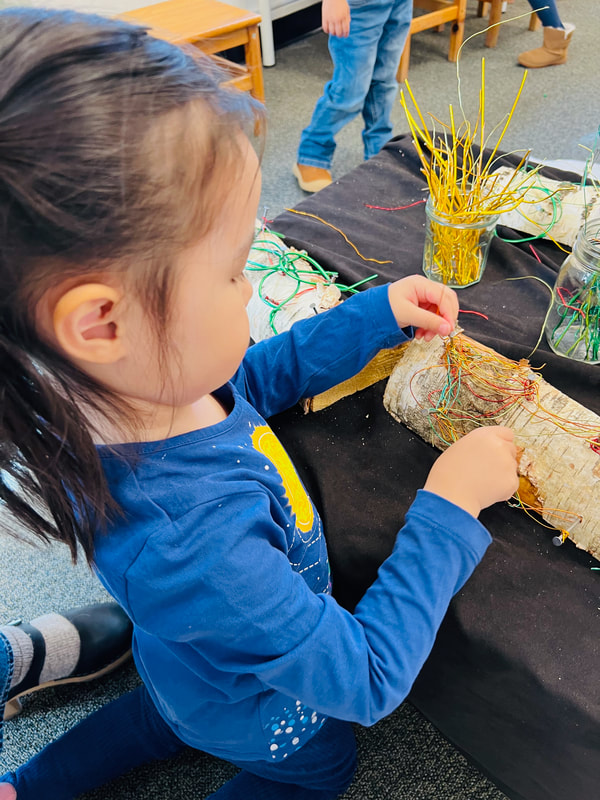
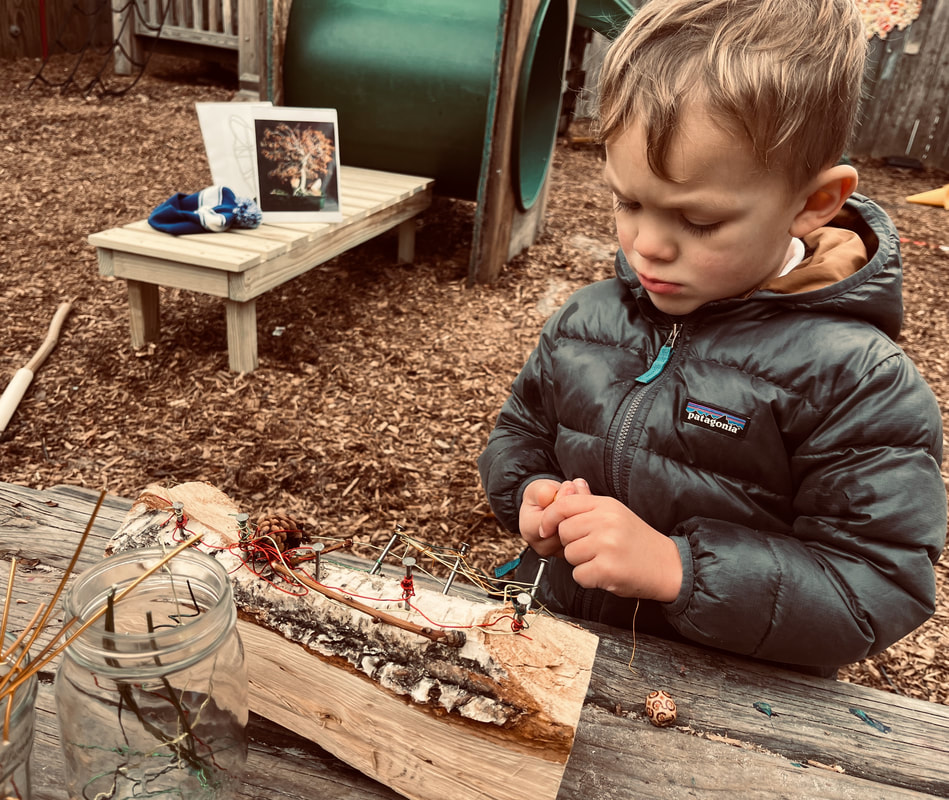
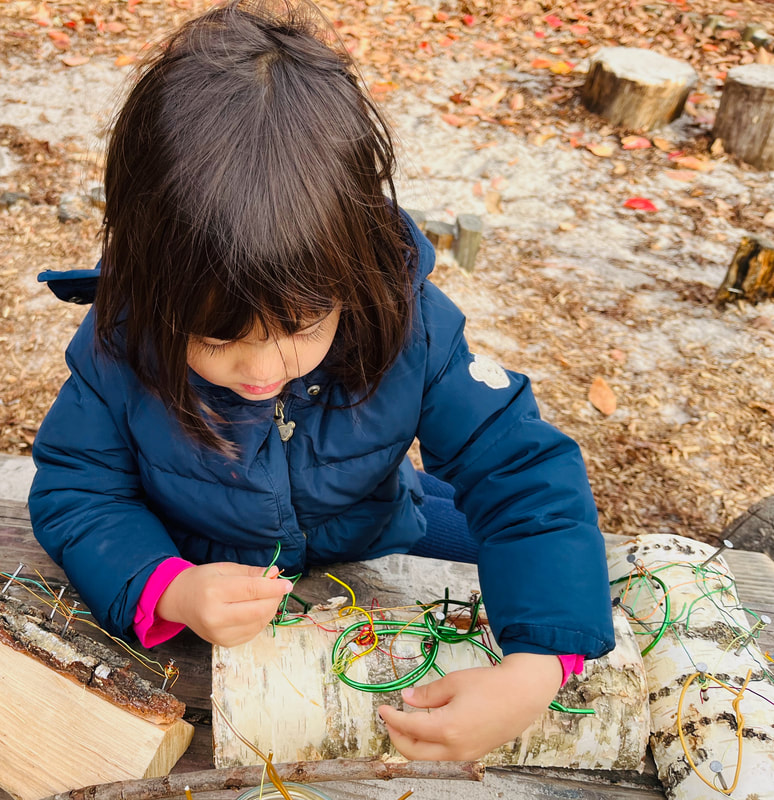
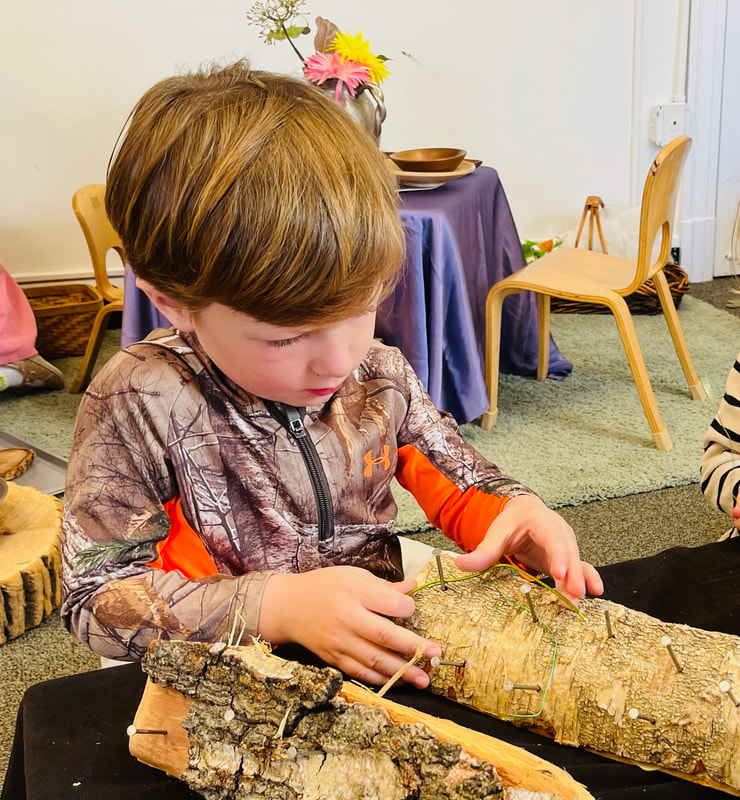
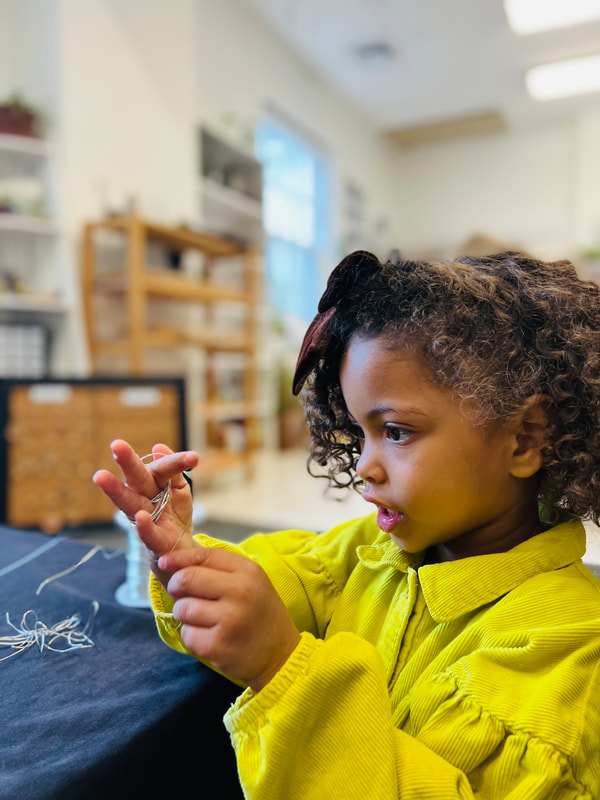
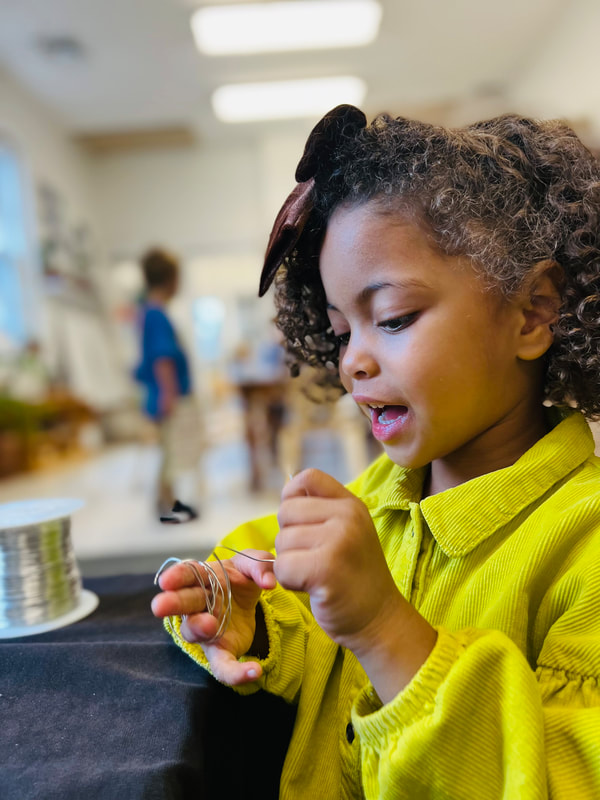
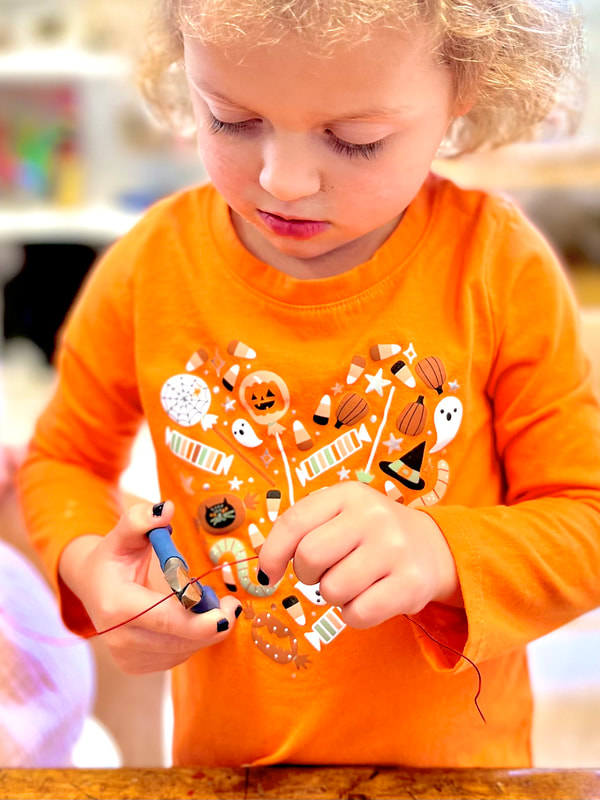
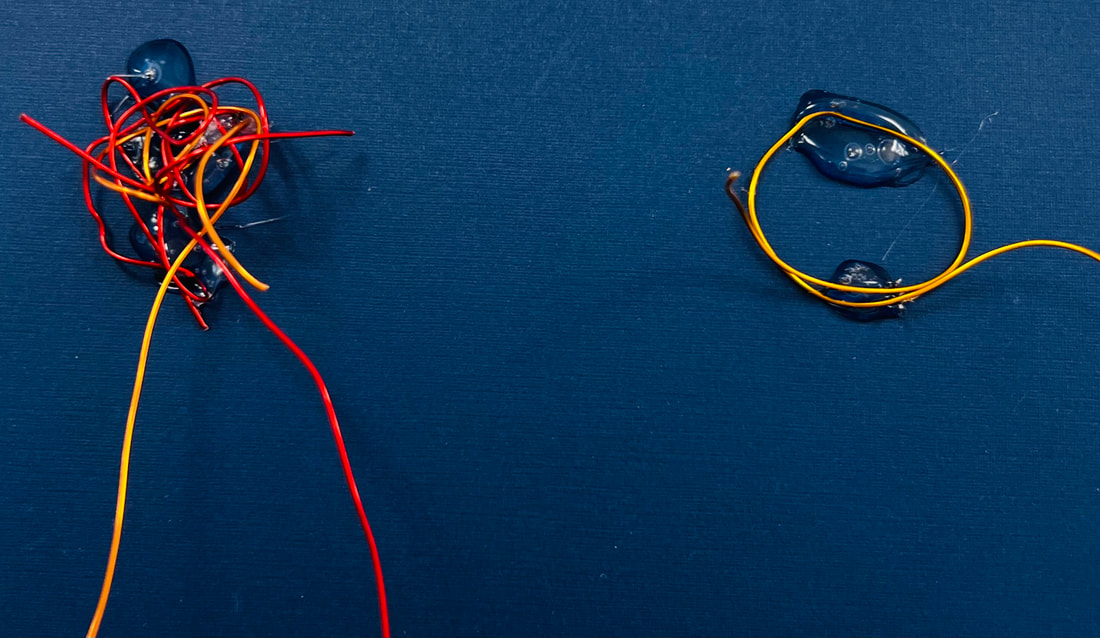
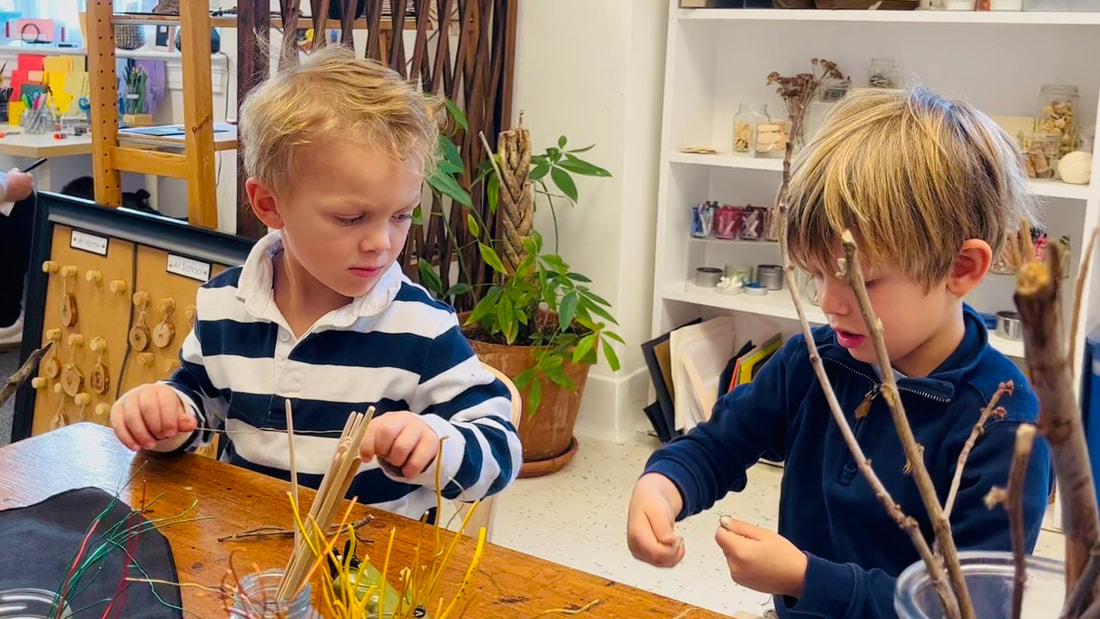
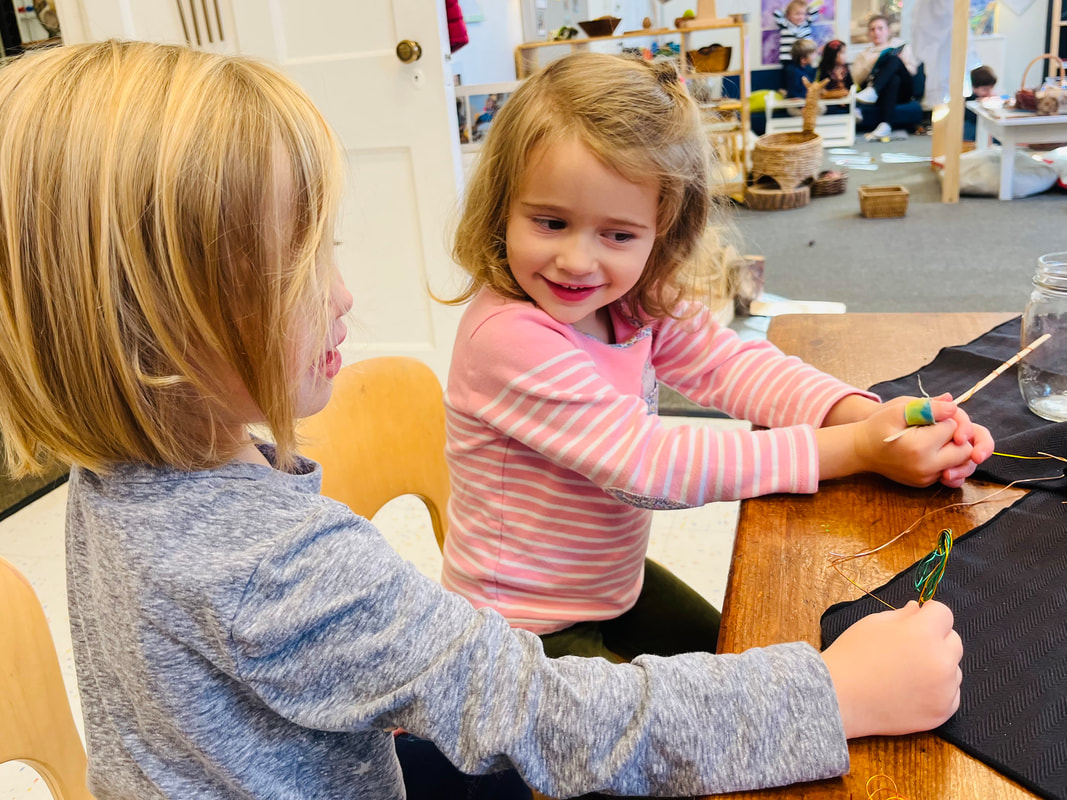
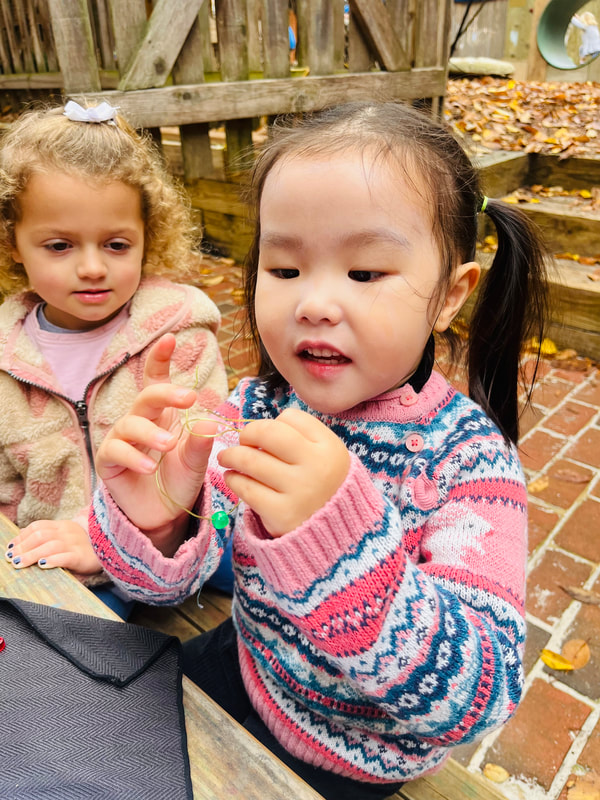
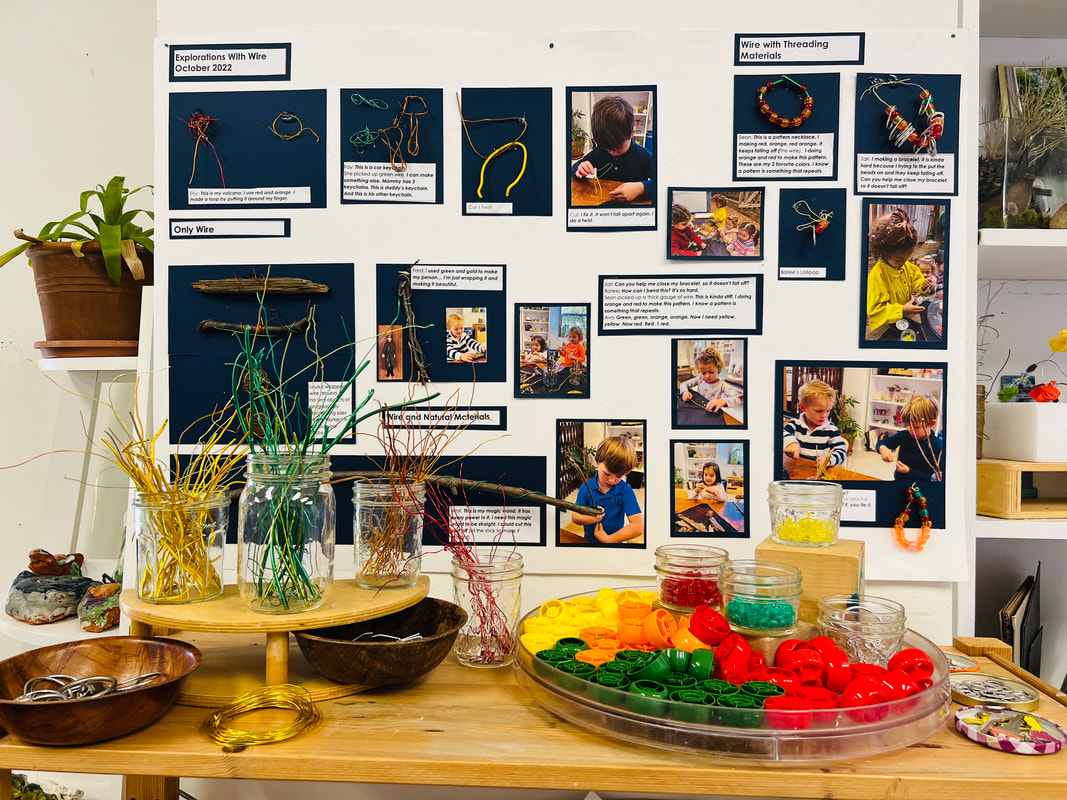
As we prepared for the Thanksgiving Feast, one of the children's tasks was to create centerpieces for our tables. Following the children's interest in nature, we decided to incorporate natural materials into our centerpieces. First, The children hammered nails into white birch logs. Then they wrapped wire in fall colors around the nails to create a base for their construction. The third and final step of the process was to add natural materials (wood, pinecones, seed pods, and feathers) to the wires, giving height to the centerpieces. As this project progressed, the children were challenged both physically and cognitively. Hammers and NailsThe task of hammering nails into white birch was an exercise in hand-eye coordination. As each child hammered their nails, they had to look carefully at their target and then complete the swing of the hammer. Cal: Hammers go up and down to go around to twist to go together. Whit: I need a screw for this. The screw twist-ses! The hammer bams! The children also thought deeply about the task. Some checked the nails to see if they were sufficiently hammered into the logs after each swing, while others would check after only multiple swings. Ford: I might need a little more on this one (nail), because it’s a little bit loose. Charlton: Now this one needs a little bit more. Screech (the Nationals mascot) is going to play here. Ford: I like Screech too! (A nail that Ford had been working on fell out of the log). I need to do this one again. Ava: I think it (a nail) needs a little more tightening. Ellie: That one (nail) fall out, so I need a bigger one. Ava: Good it's all tight now. I’m going to do another one. The task of hammering nails is often seen as a "grown-up" job, but the children were up to the challenge. They beamed with pride as they hammered and saw the fruits of their labor. Charlton: I have used a screw before, but not a hammer. Ford: Whoa! I haven’t used a hammer before, but at my grandpa and grandma’s they have a special truck with a screw. Mimi: Oh, that’ so cool, because I never did that (hammering nails) before....Where’s the space to put this one? This one can’t get out because I hammered it in! Isabelle: No one does this, because my mom’s not strong enough, My daddy’s not strong enough...because my hands are strong. Wrapping Wire and Adding Natural Materials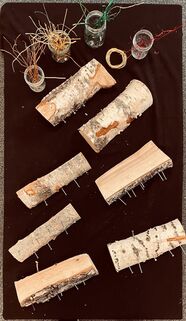 Wrapping wire also gave children another opportunity to develop their hand-eye coordination and fine motor strength. The small muscles that wrapping wire engages are the same muscles that are used for a number of other tasks like snapping snaps, buttoning buttons, painting, drawing and writing. The children all approached the wrapping of wire with their own unique eye for design. -Fay and Ford wrapped wire from nail to nail in one horizontal line and then repeated the same sequence on a parallel set of nails. -Seon wrapped wire on two side-by-side nails and made repeated layers of different colors on each pair. -Mimi made "bracelets" of individual wires and then fit them around the nails. -Isabelle wrapped wire around wire and then added it to the nails. -Whit created a zig zag from nail to nail. After wrapping the wire around the nails, it was time to build the height of our centerpieces by adding natural materials. The children perused the materials and carefully chose their items. It wasn't just a matter of choosing materials though, as they also had to hypothesize about attaching the materials to the nail and wire structure they had already built. This required mathematical and scientific thinking. Seon: I need to think about it. I’m going to put the wire first and then the pinecone later. First I need to find some red wire. Oh, this is too long. I need to find a shorter piece. I’m trying to stand up the wire. Look I am doing it... I’m standing this one up by twisting the wire. I’m standing the wire up. I twist it very hard because it is thick. I put the pinecone under the wire. I connected the wire to the nail. Isabelle: Maybe a little one (bead) for the little wire. Mimi: I want to add it to this one. I actually made it! Our Thanksgiving Feast Centerpieces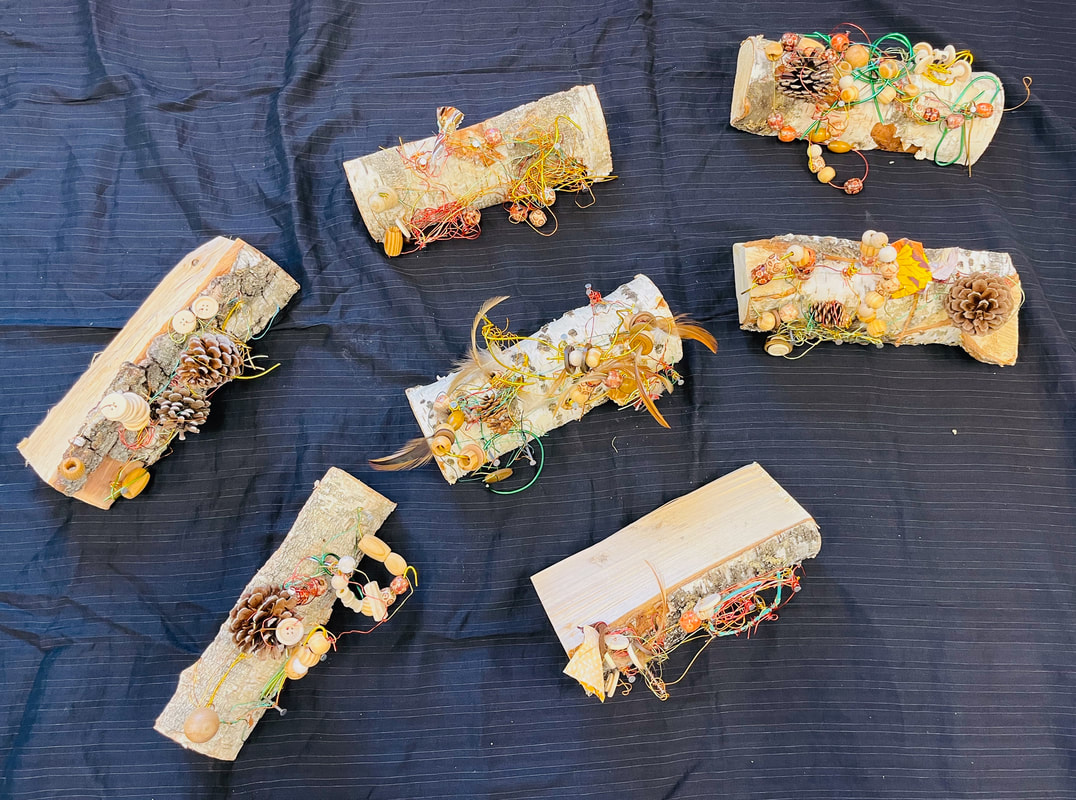
0 Comments
"I know why the leaves turn red and orange. Because it’s fall. Because the snow day is coming." - Bailee
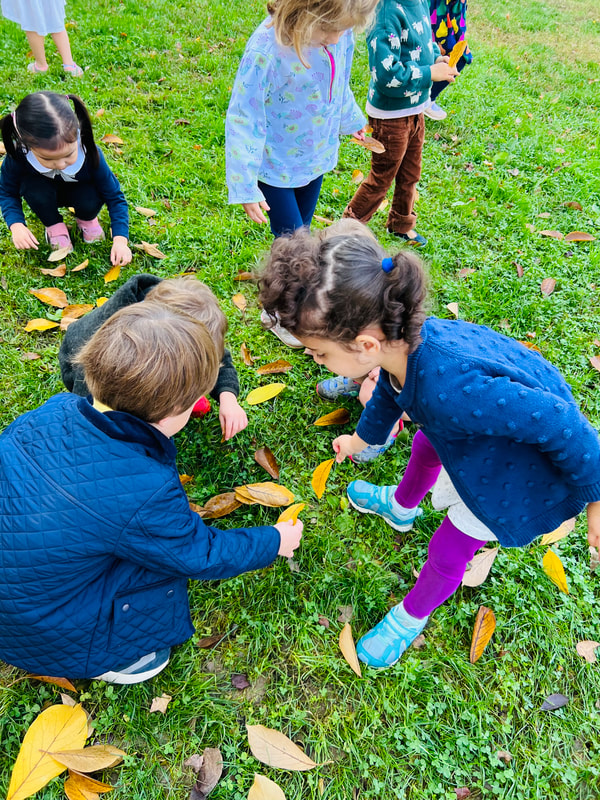
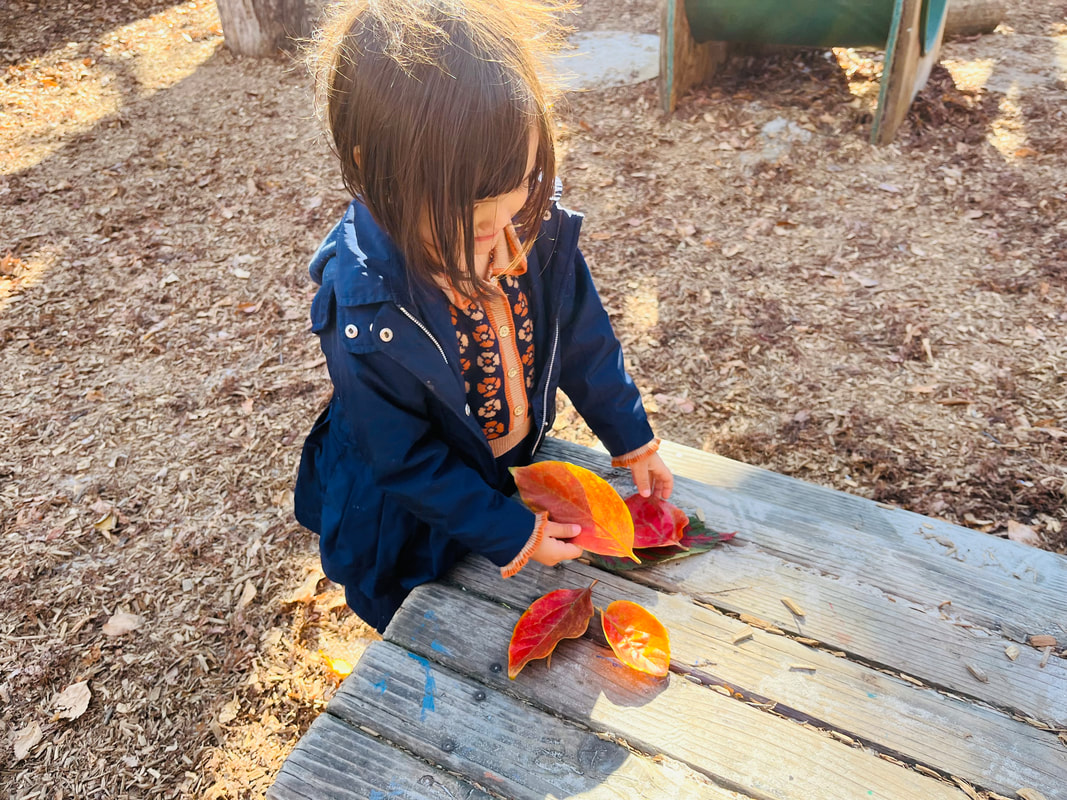
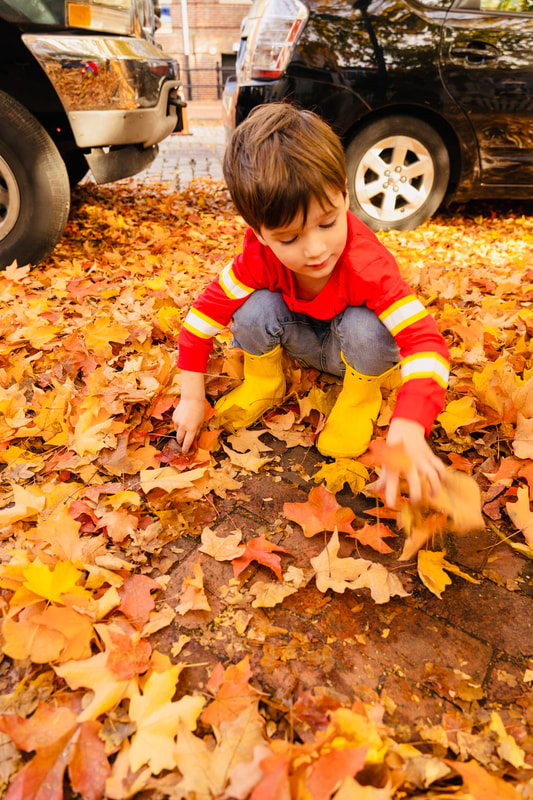
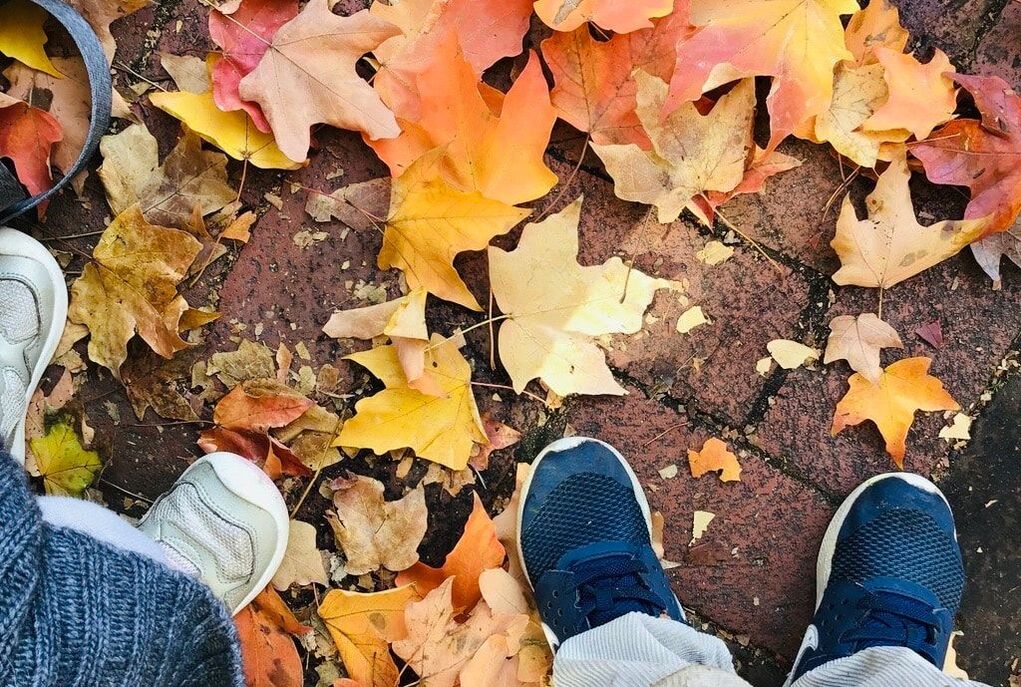
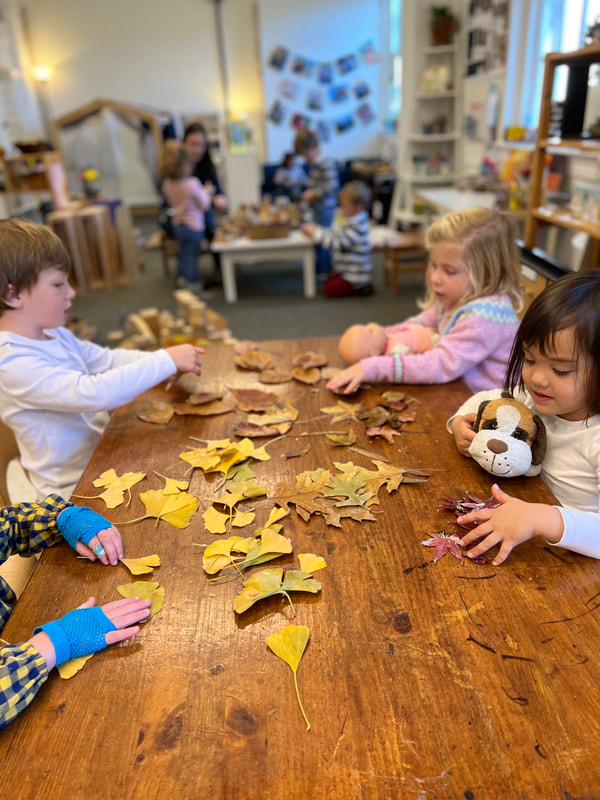
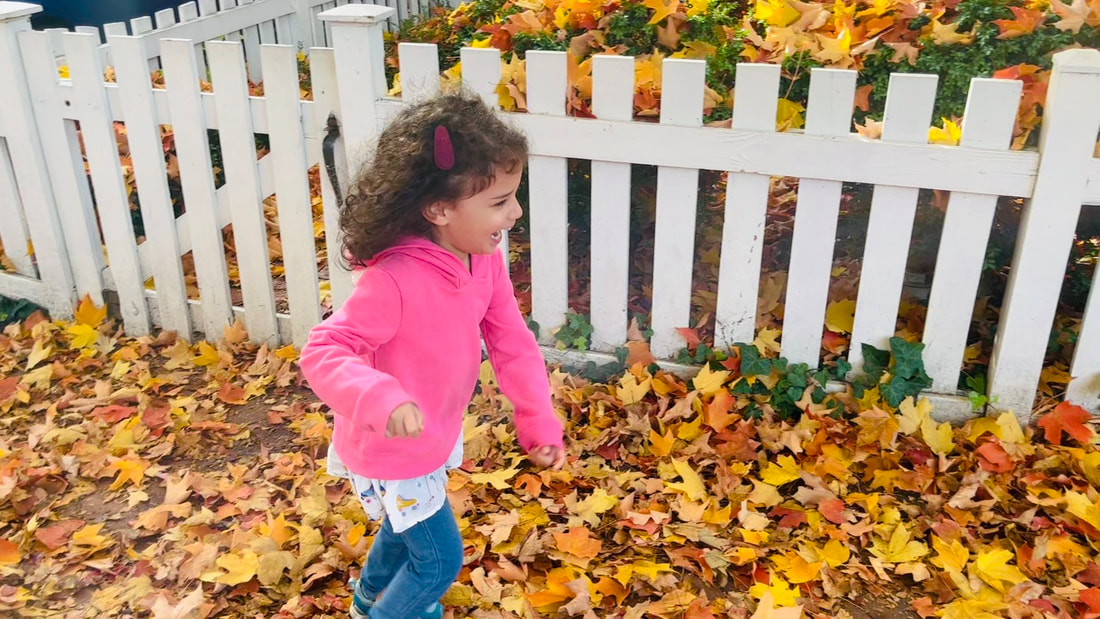
Leaves have been of ongoing interest for the children. They have noticed them falling to the ground outside. They have discovered them on their way to school and brought them in to share with their friends. They have noticed the changing colors of the leaves, particularly on the vibrant orange Persimmon tree outside of the studio window. Following their interests, leaf experiences continue to be incorporated into our days both indoors and outdoors.
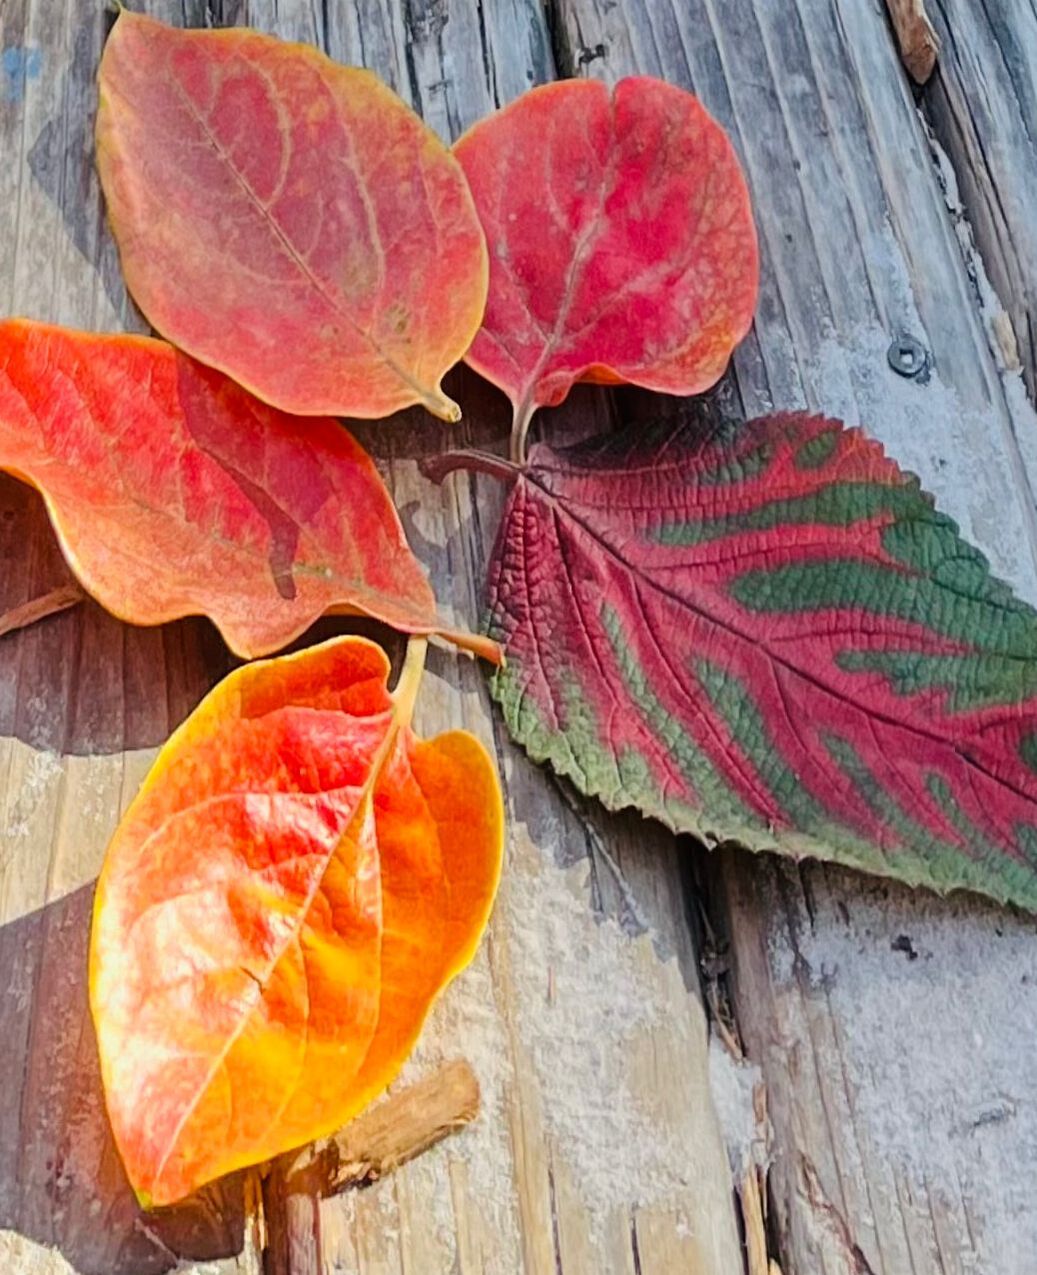
Inspired by Andy GoldsworthyJoci, our pedagogical coach who works closely with our class, had been noticing the children’s interest in leaves and brought in a book by one of her favorite artists for the children to view. The book titled, Andy Goldsworthy: A Collaboration with Nature included photographs of Goldsworthy’s art in nature. His intricate designs use a multitude of natural materials including but not limited to leaves, ice, rocks, sticks, clay, feathers, and bark. The children noticed Goldworthy’s unique style and attention to detail. 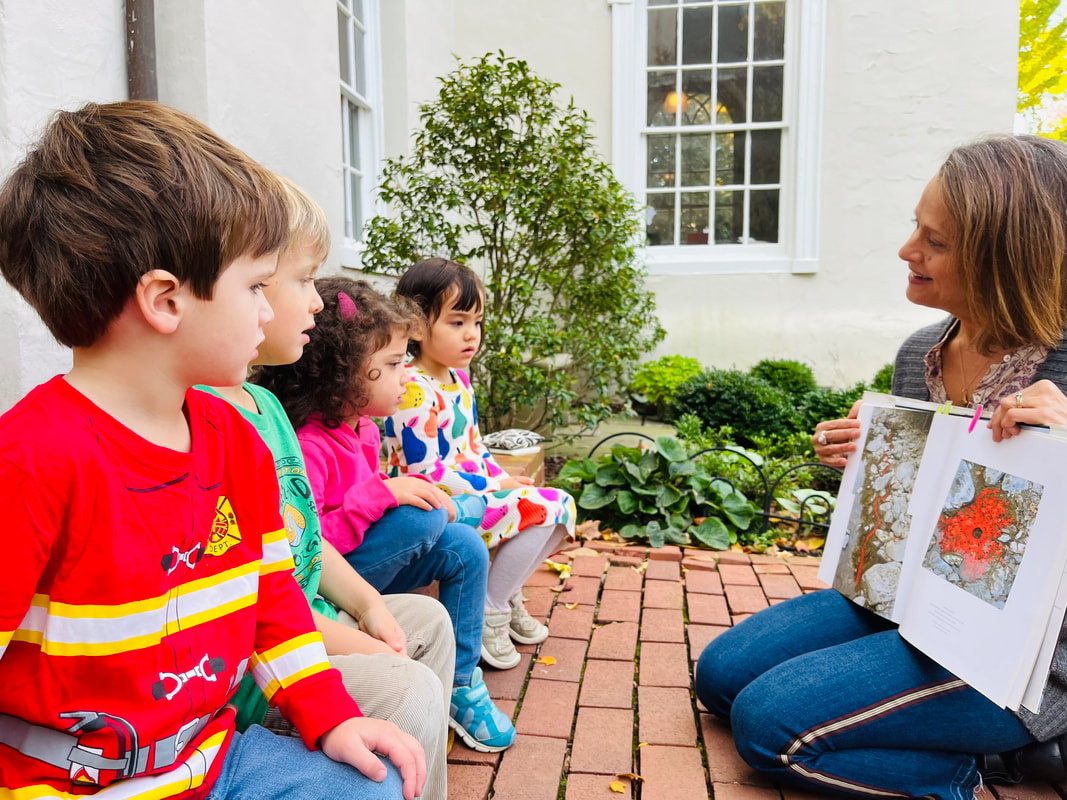 Cal, Charlton, Ava, and Mimi observe Andy Goldsworthy's nature art with Joci.
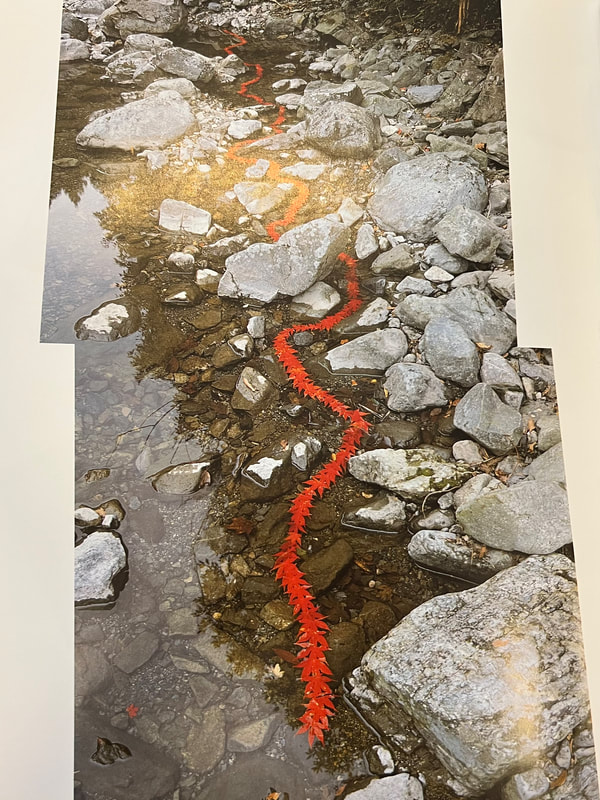
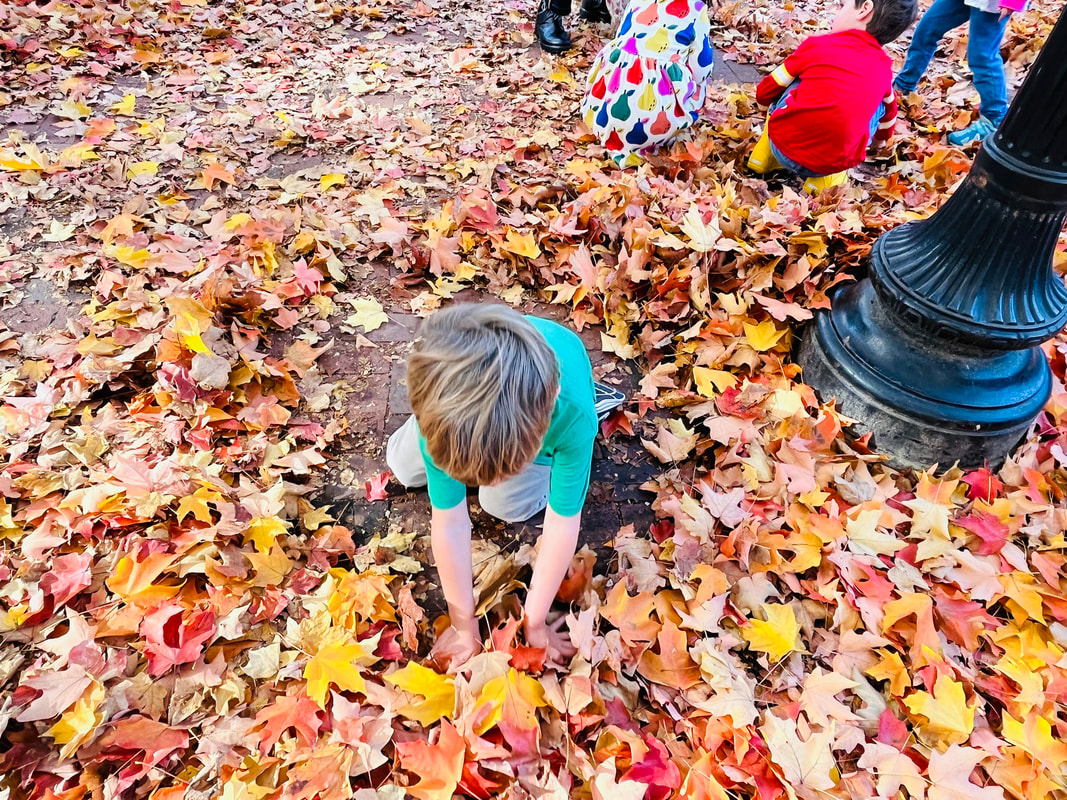
Inspired in particular by Goldsworthy’s arrangement of leaves, Joci and Karen took a small group of children to the front of the school where hundreds of colorful leaves blanketed the grass and sidewalk. The children began making arrangements by clearing a space in the leaves. "Clear all the leaves. All the leaves. Let’s make it very long and clear. " - Cal
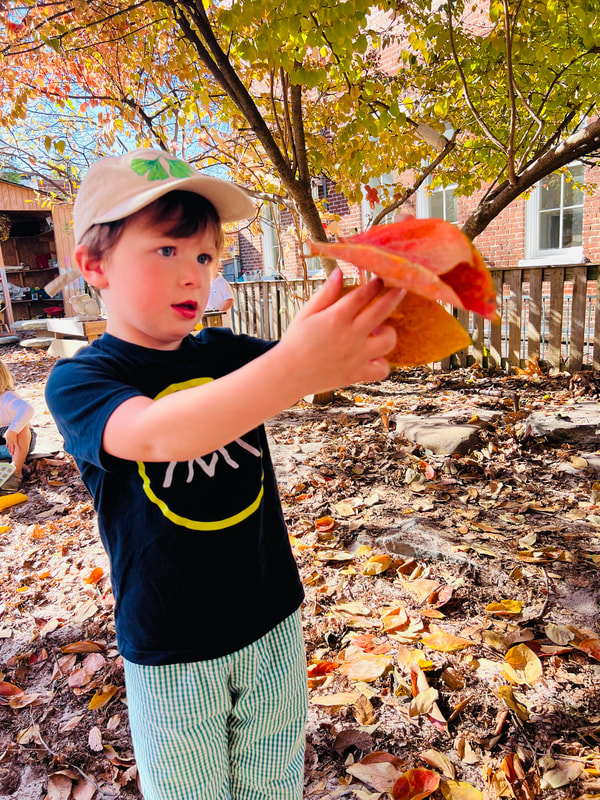
Cal, Charlton, and Ava clear spaces in the leaves and enjoy their abundance. The children then chose leaves for their arrangements and decided how to compose them.
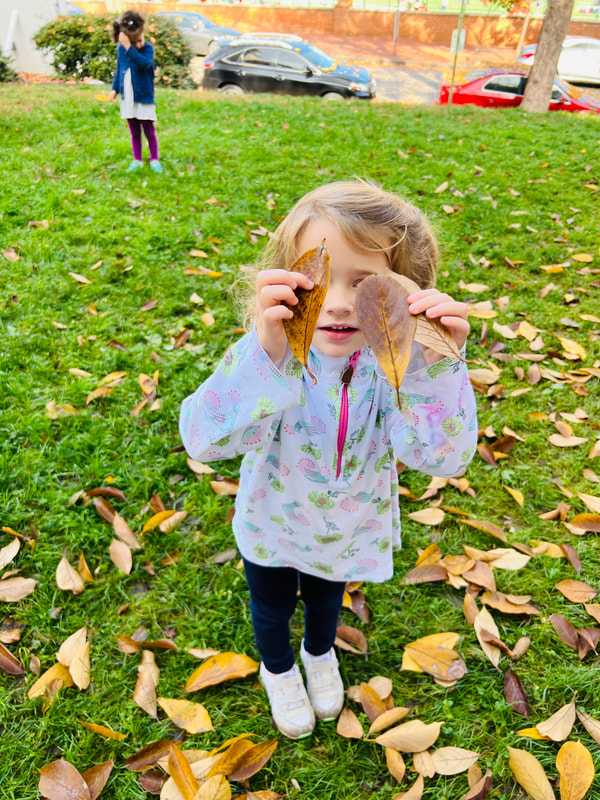
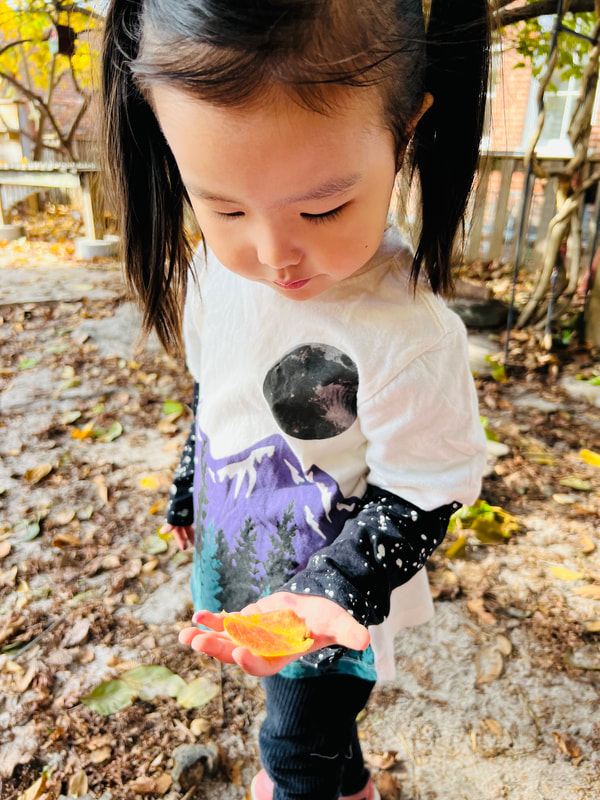
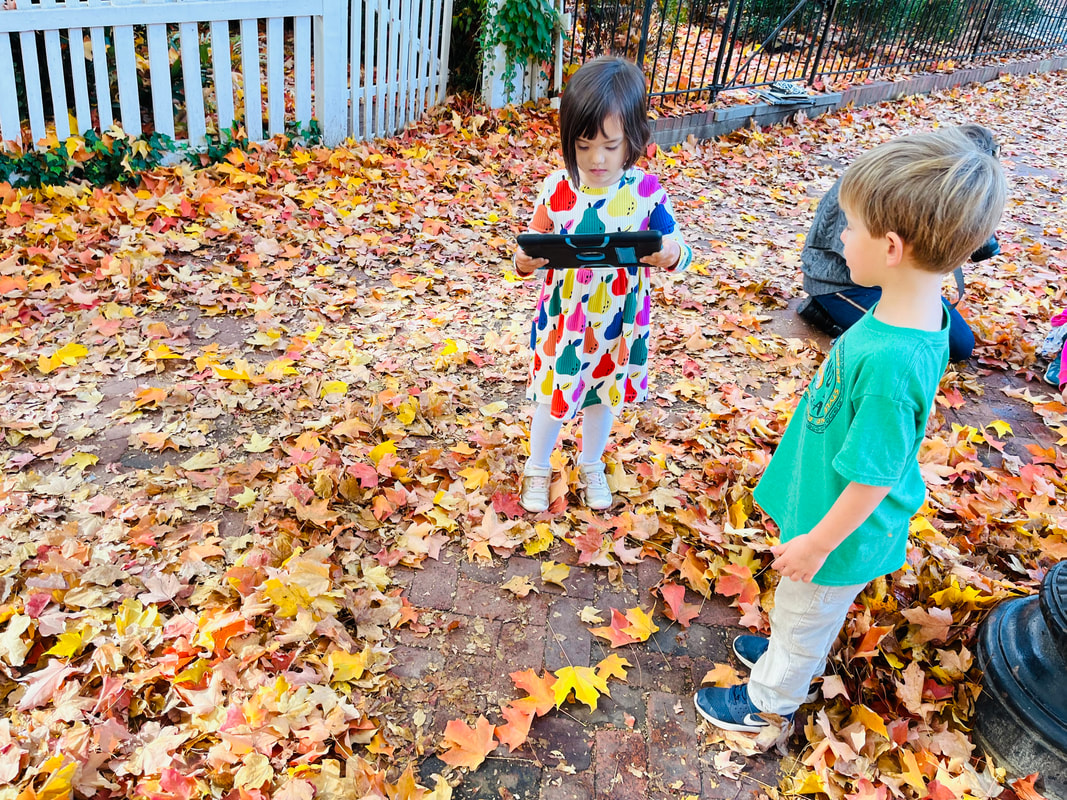
 Ava counts the leaves in her design. Just as Andy Goldsworthy preserves his art with a camera, the children used the camera on the school iPad to document their designs.
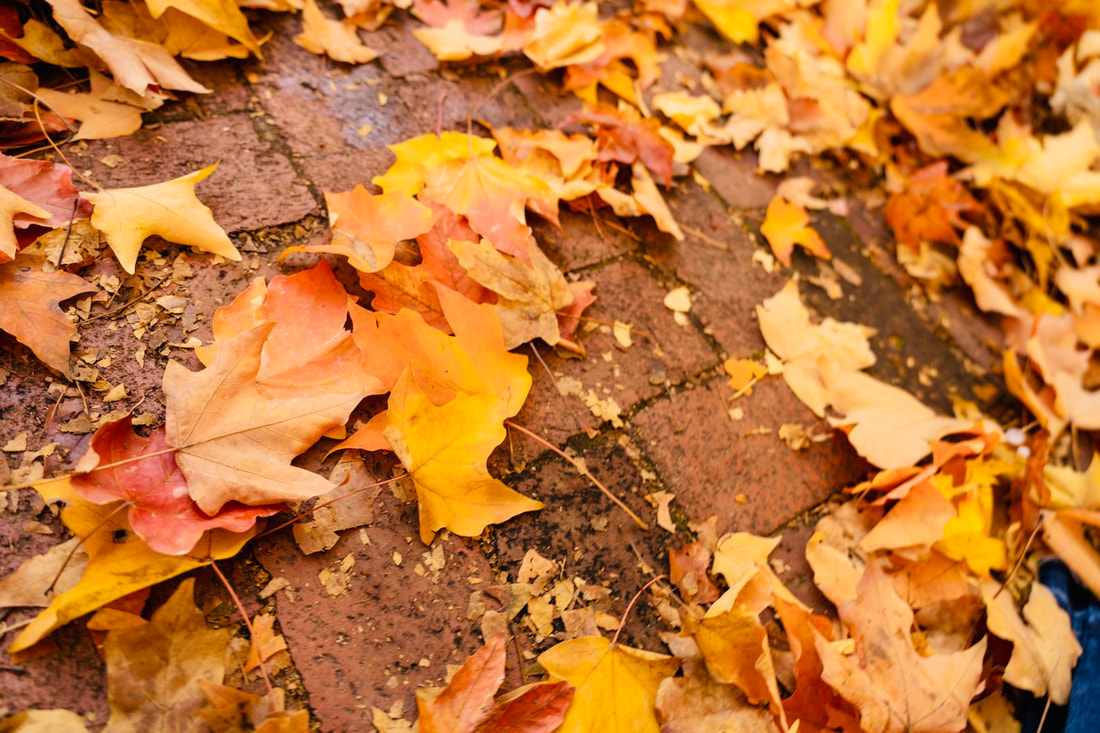
Mimi and Charlton's pictures of their leaf designs. The children were overjoyed to be surrounded by leaves with the freedom to explore their crunchiness and squishiness. One of the best things about the fall.
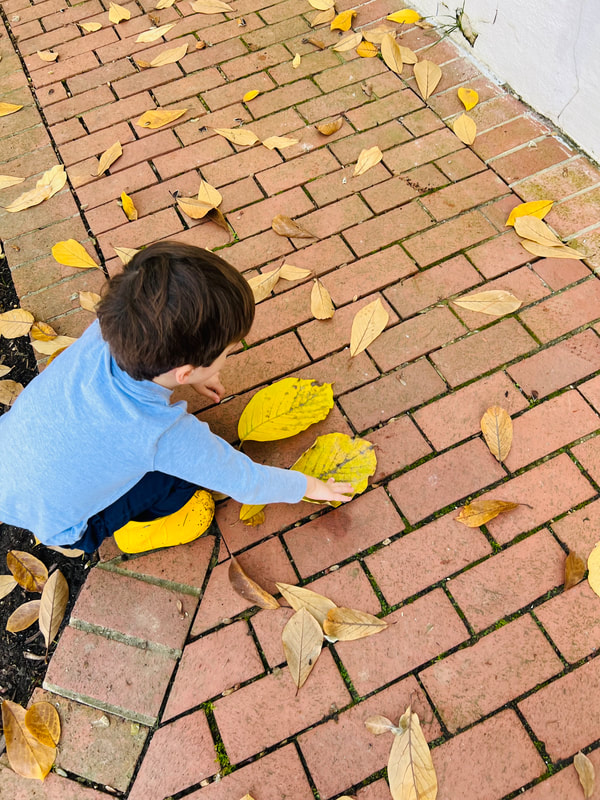
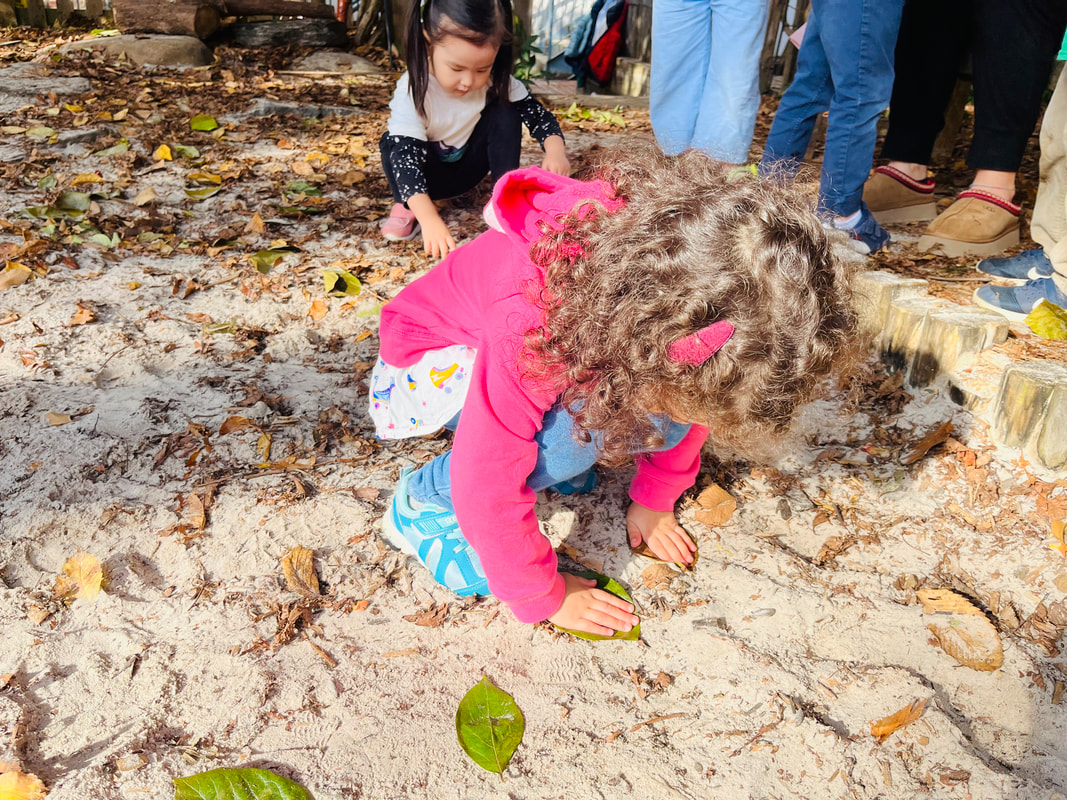
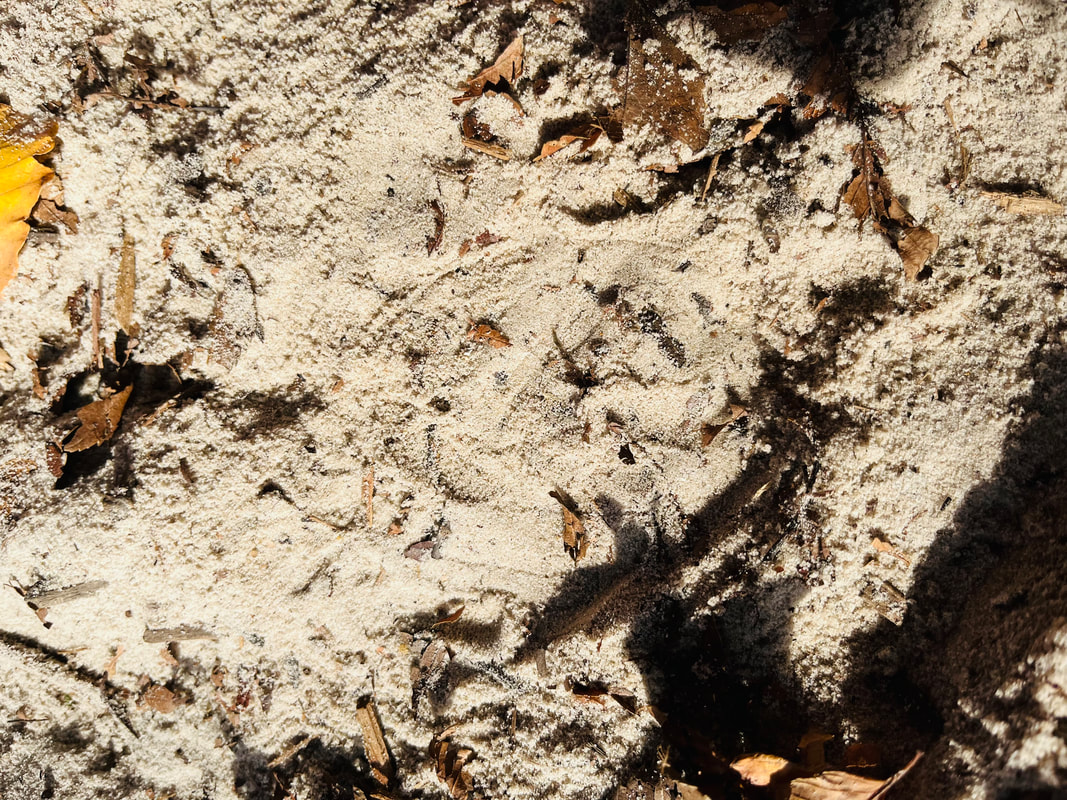
 Later in the outdoor classroom, the children applied some of their new knowledge and discovered they could make prints with leaves in the sand. An interesting idea that we may apply to clay and print making in the near future.
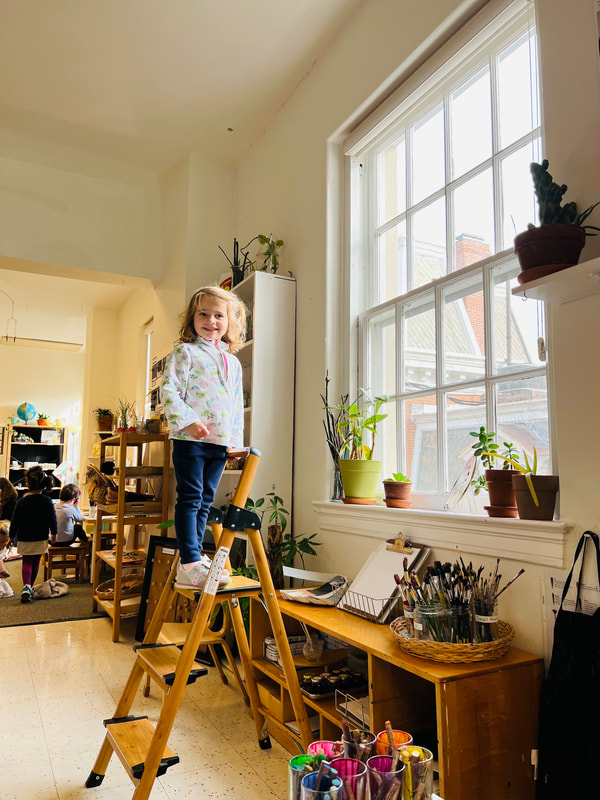
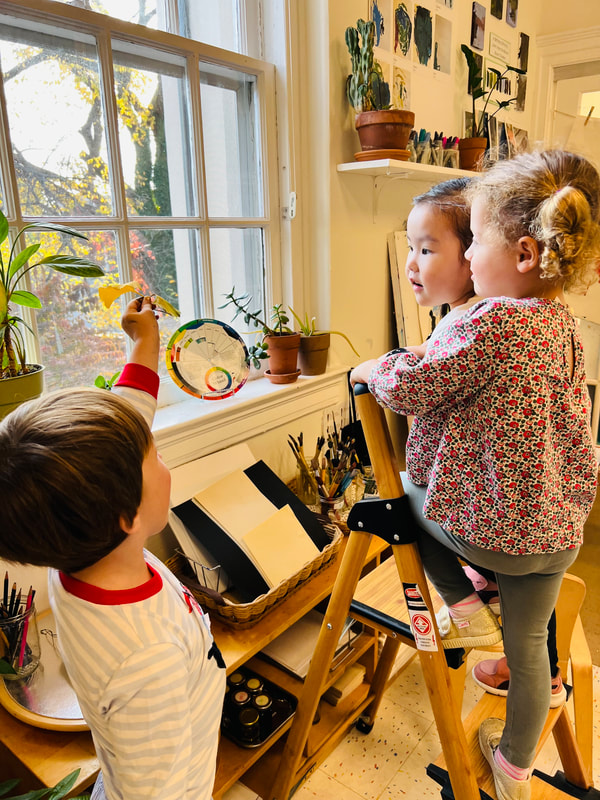
Observing Leaves from the WindowThere are hundreds of different images of the child. Each one of you has inside yourself an image of the child that directs you as you begin to relate to a child. This theory within you pushes you to behave in certain ways; it orients you as you talk to the child, listen to the child, observe the child. 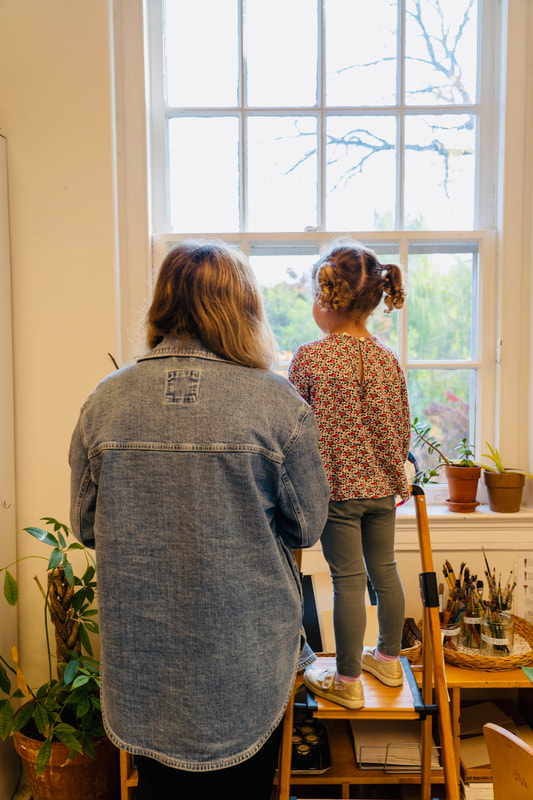 The idea of the Image of the Child is one of the key tenets of the Reggio Emilia philosophy. Everyday we think about changes we can make in the environment and in our relationships with the children to strengthen our image of them. One way we did this recently was when they were noticing the changing colors of the leaves out of the windows. They were grabbing chairs to try and stand on, but couldn’t quite get the view they desired. Observing this, we provided them with step-ladders to position them up higher. The children were hesitant at first, as ladders are usually only something adults are allowed to use. But our image of the children trusts that they are capable. Once they realized they could freely use the ladders, they fearlessly climbed up and had so much to share about what they saw.
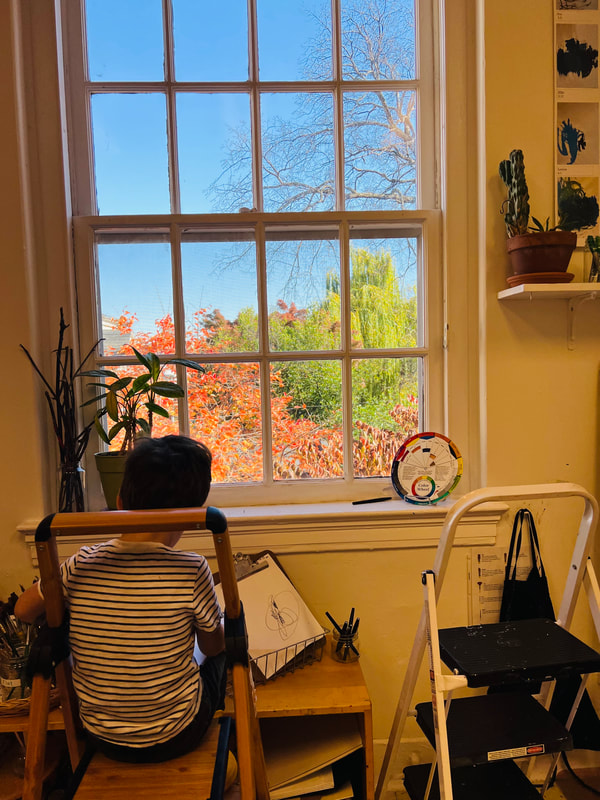
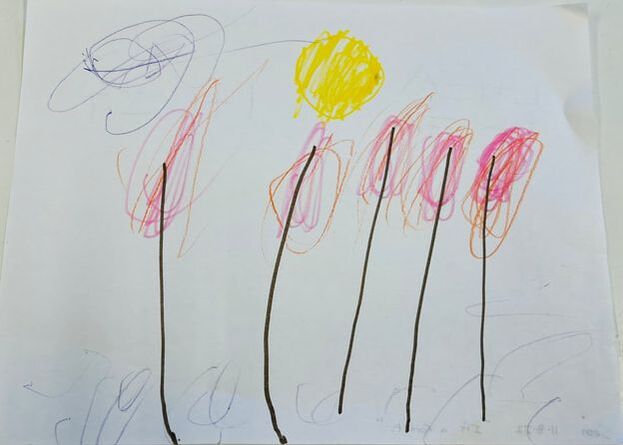
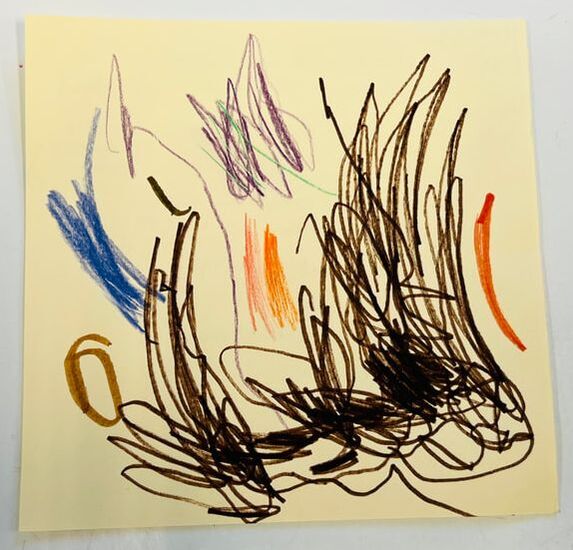
Some of the children felt inspired by what they were seeing out the window and decided to draw.
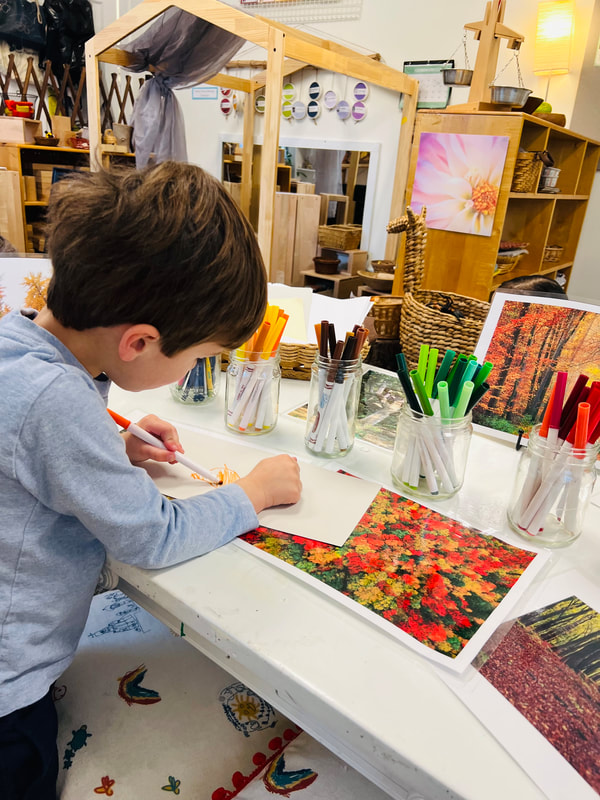
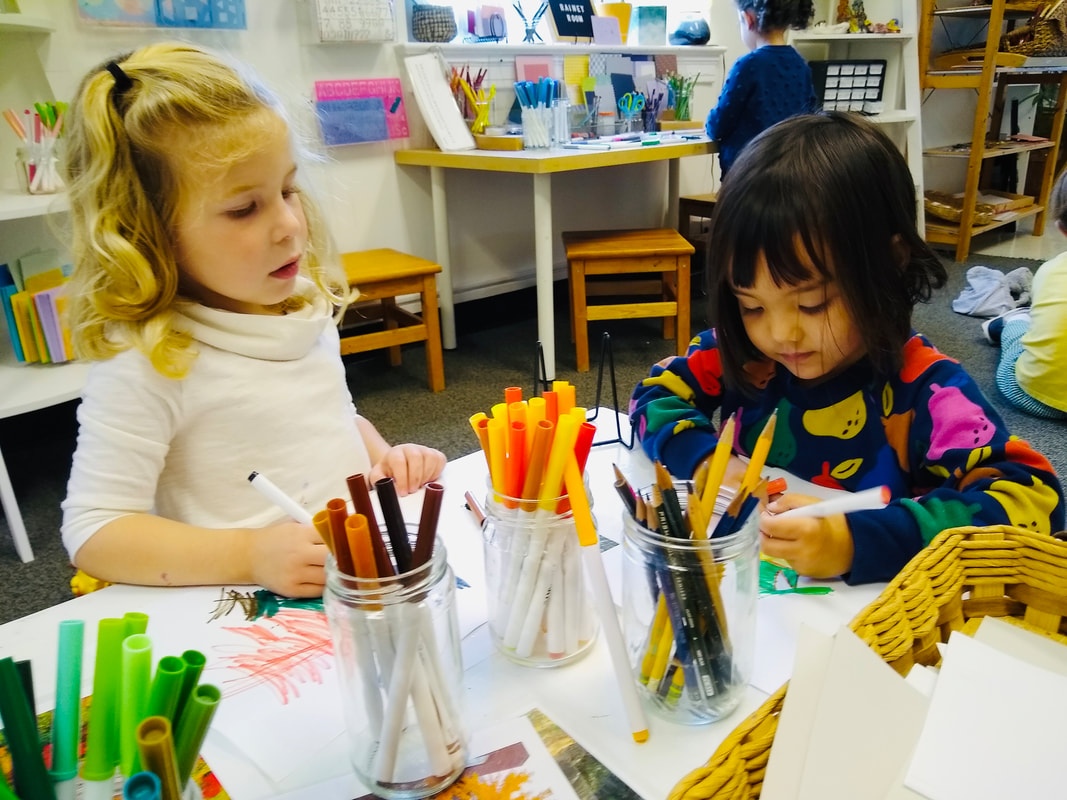
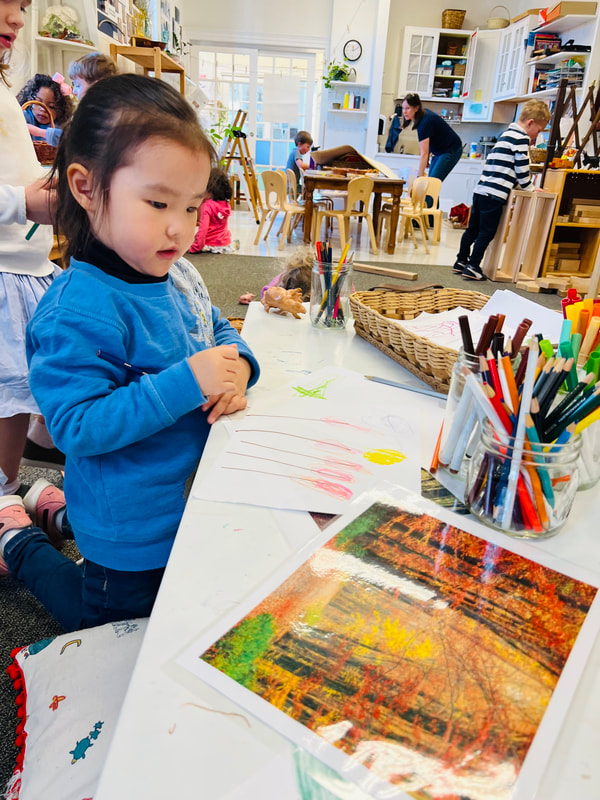
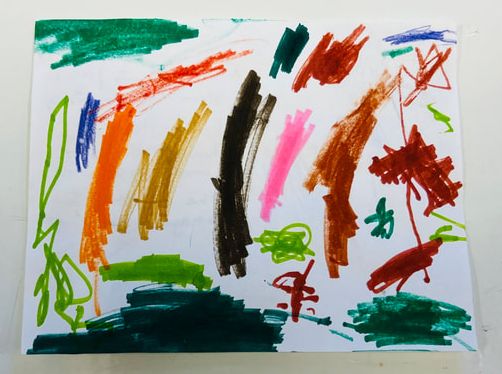
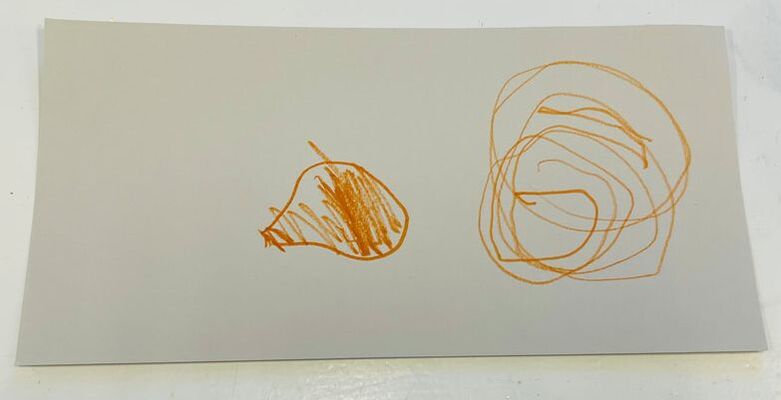
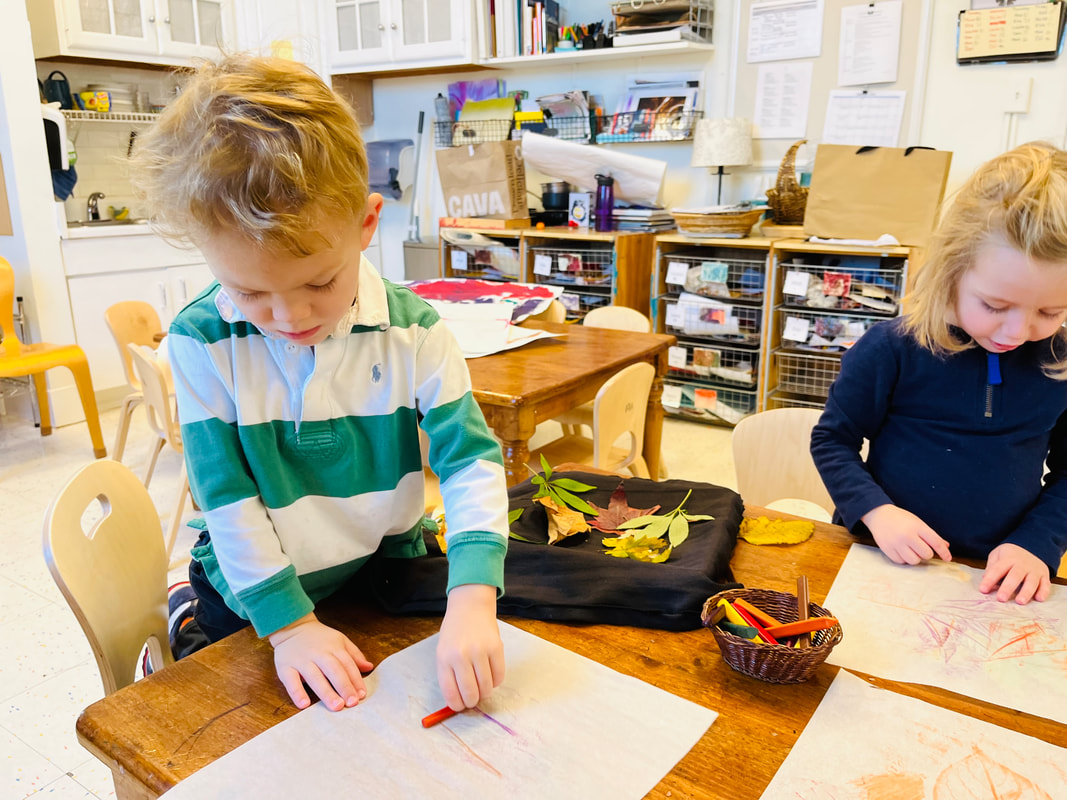
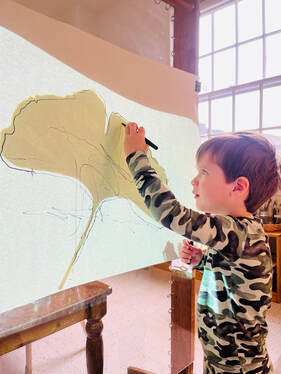
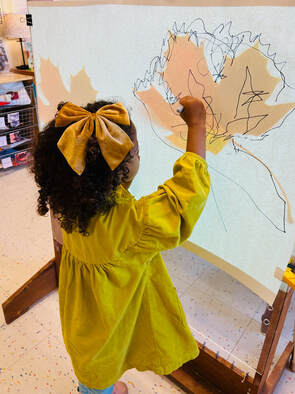
Drawing Autumn Leaves and ForestsObserving the leaves from the window led to curiosity about the various colors of leaves and where leaves can be found. We found images of fall forests and the children used an array of paper and mark making materials to create their own.
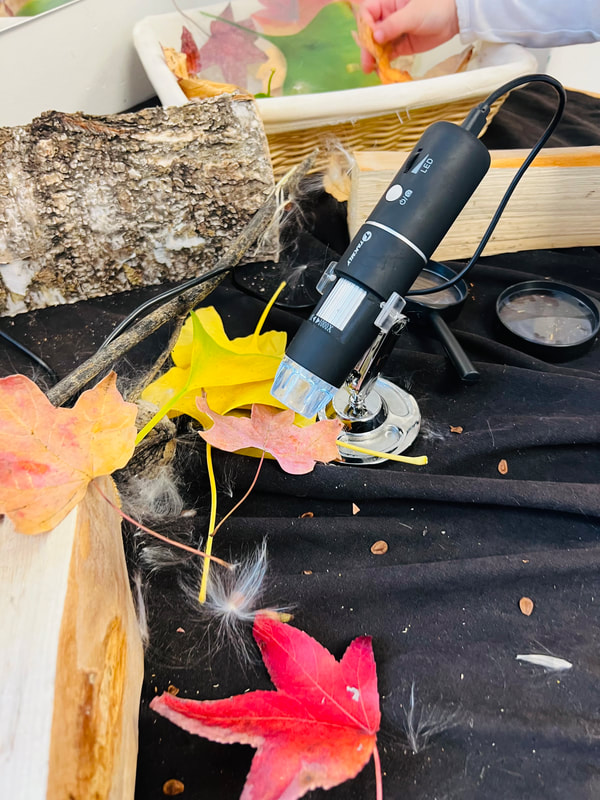
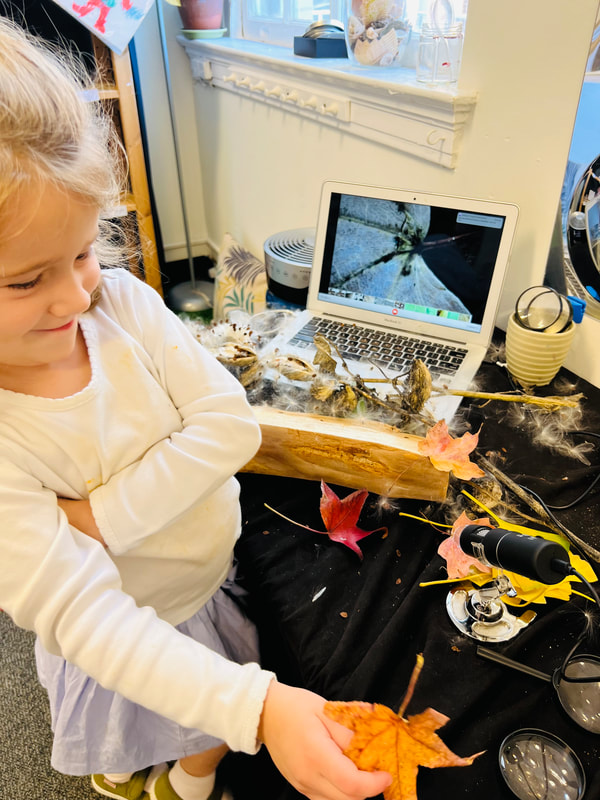
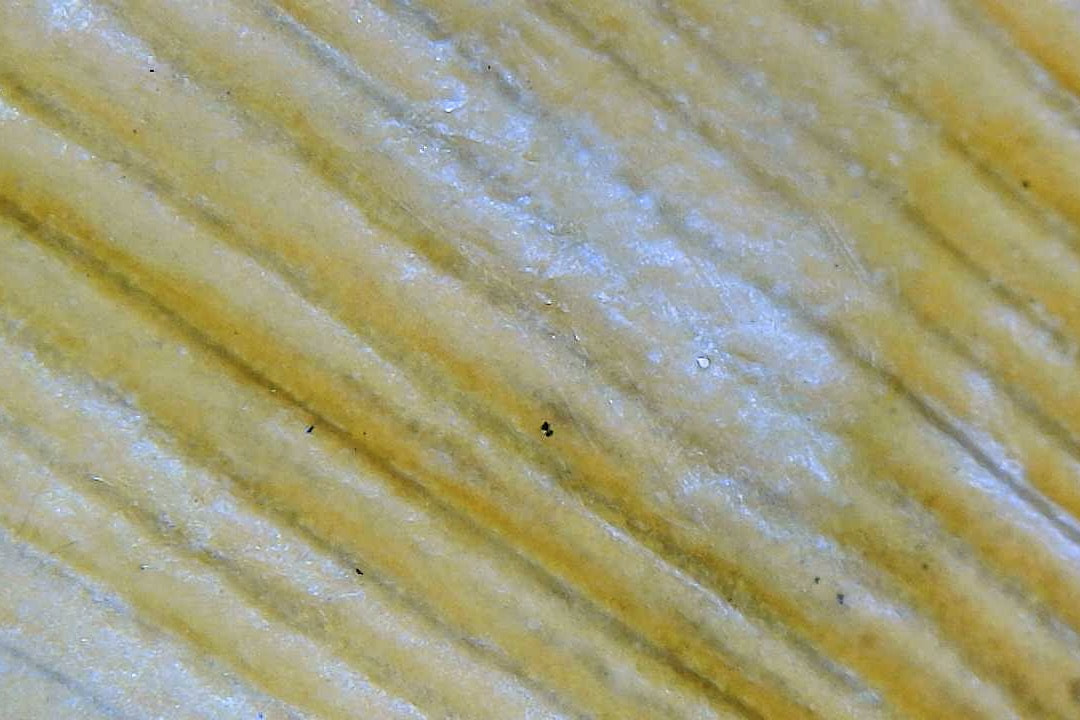
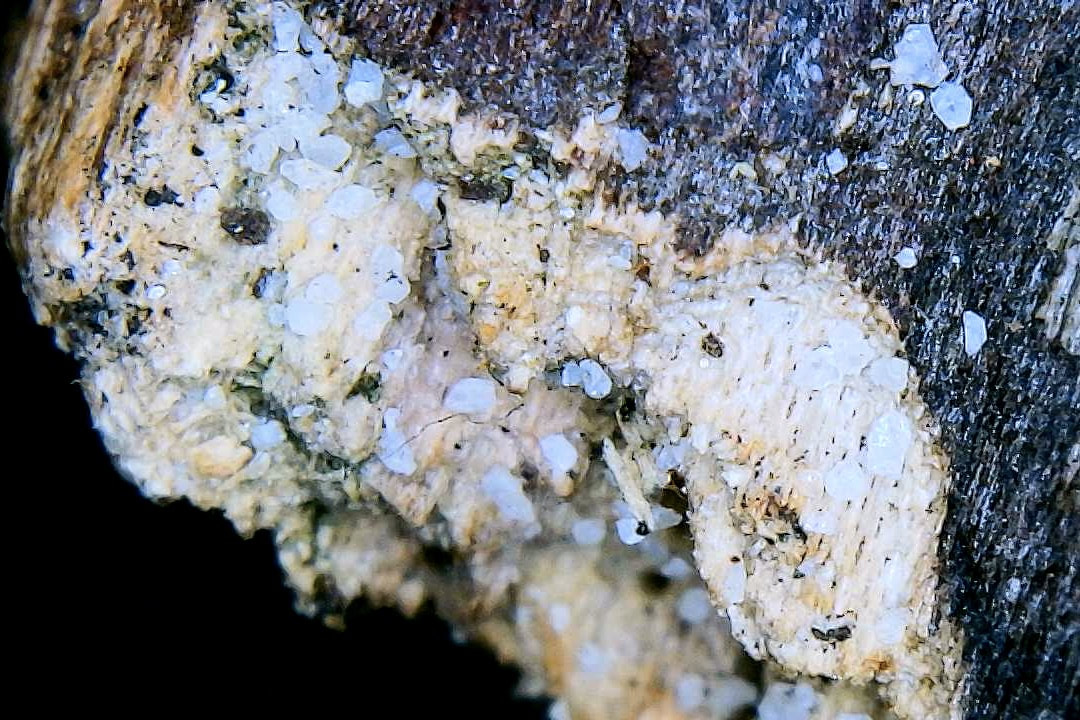
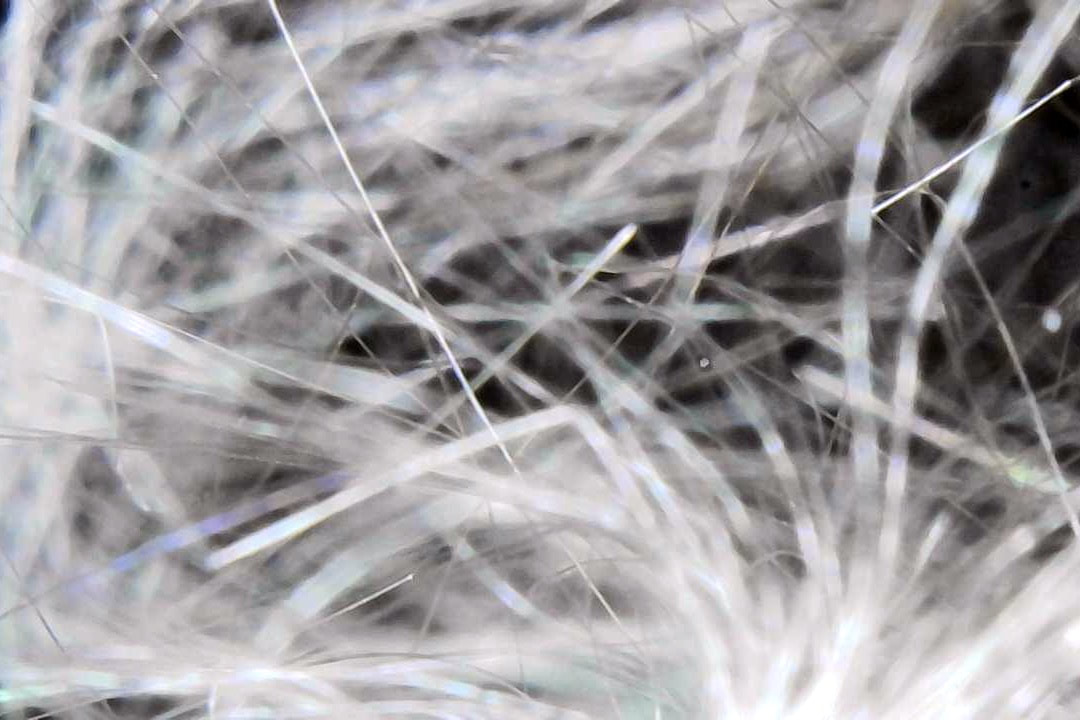
Leaves Under the Digital Microscope
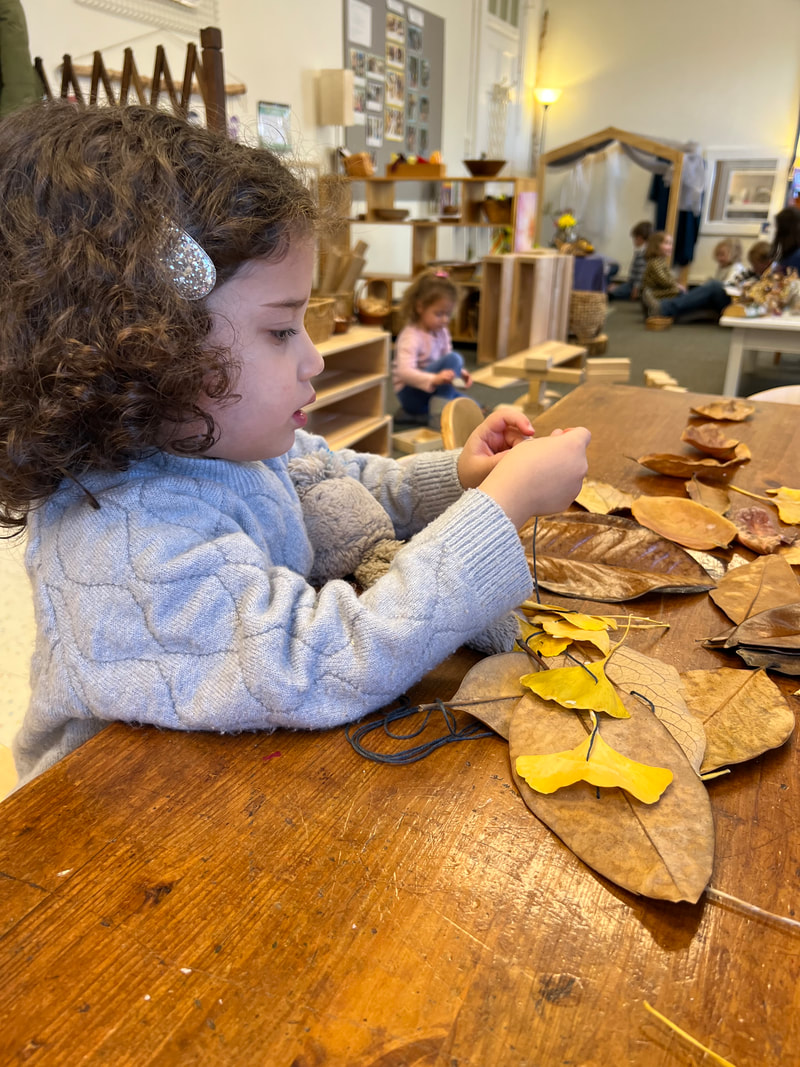
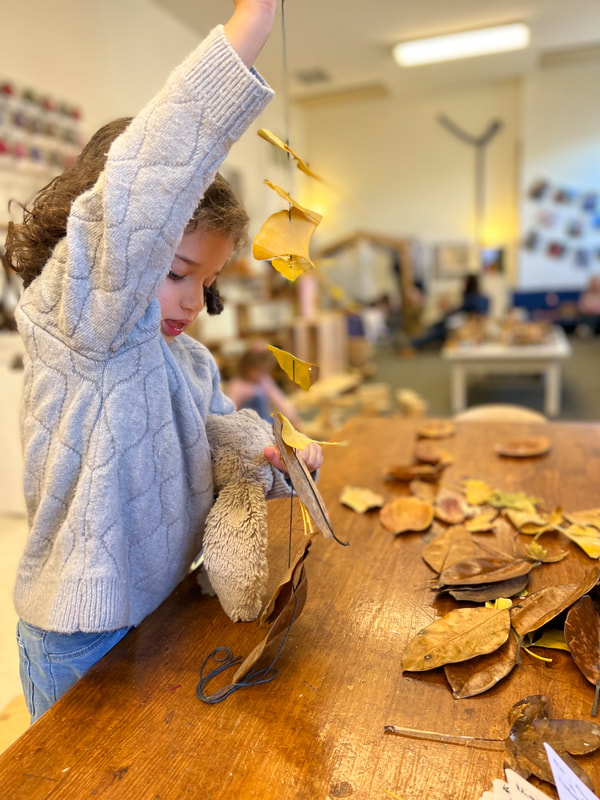
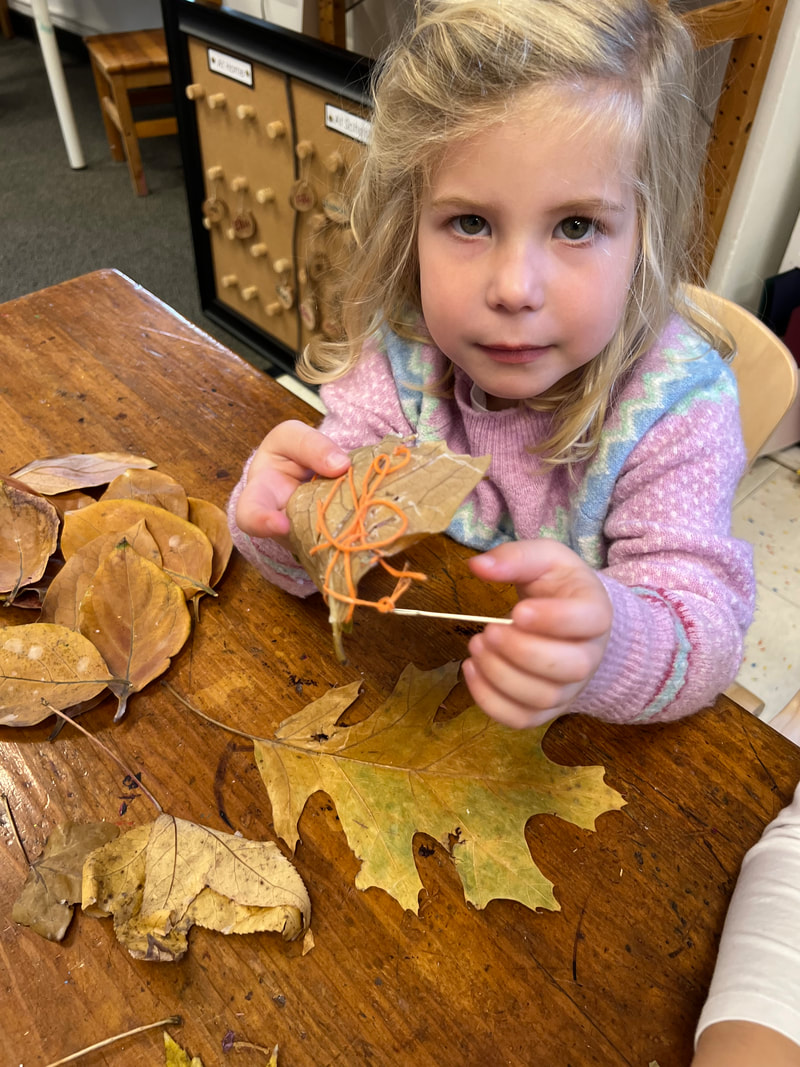
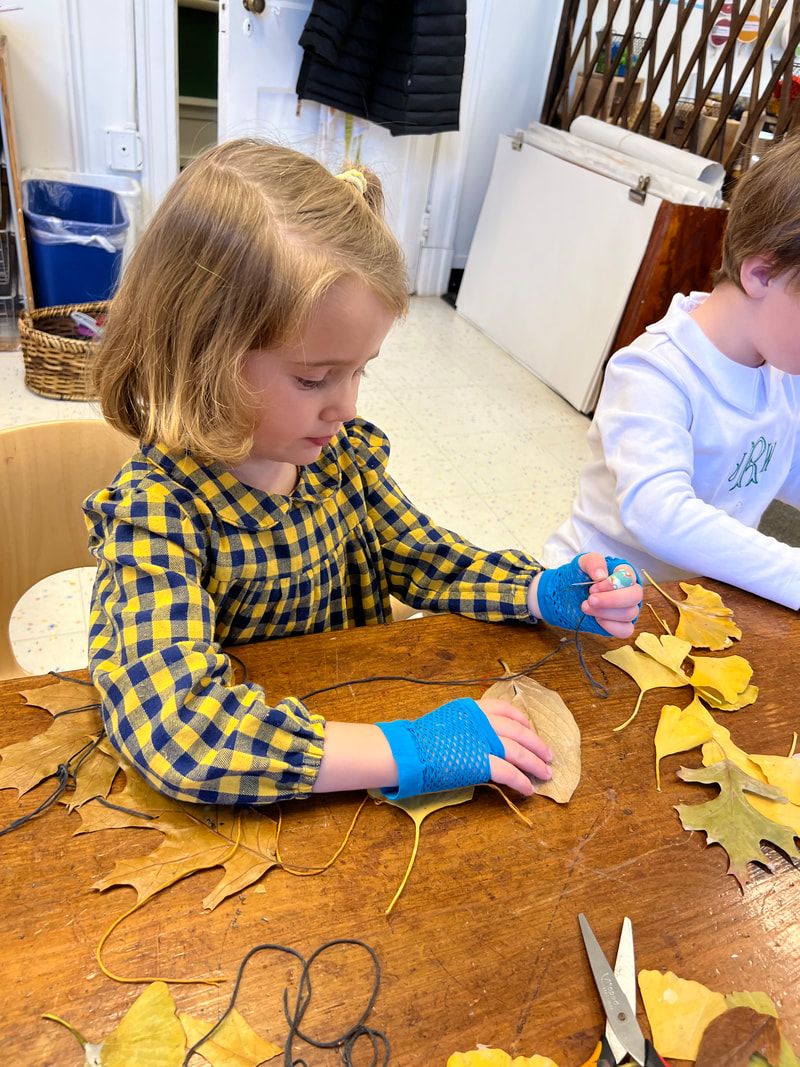
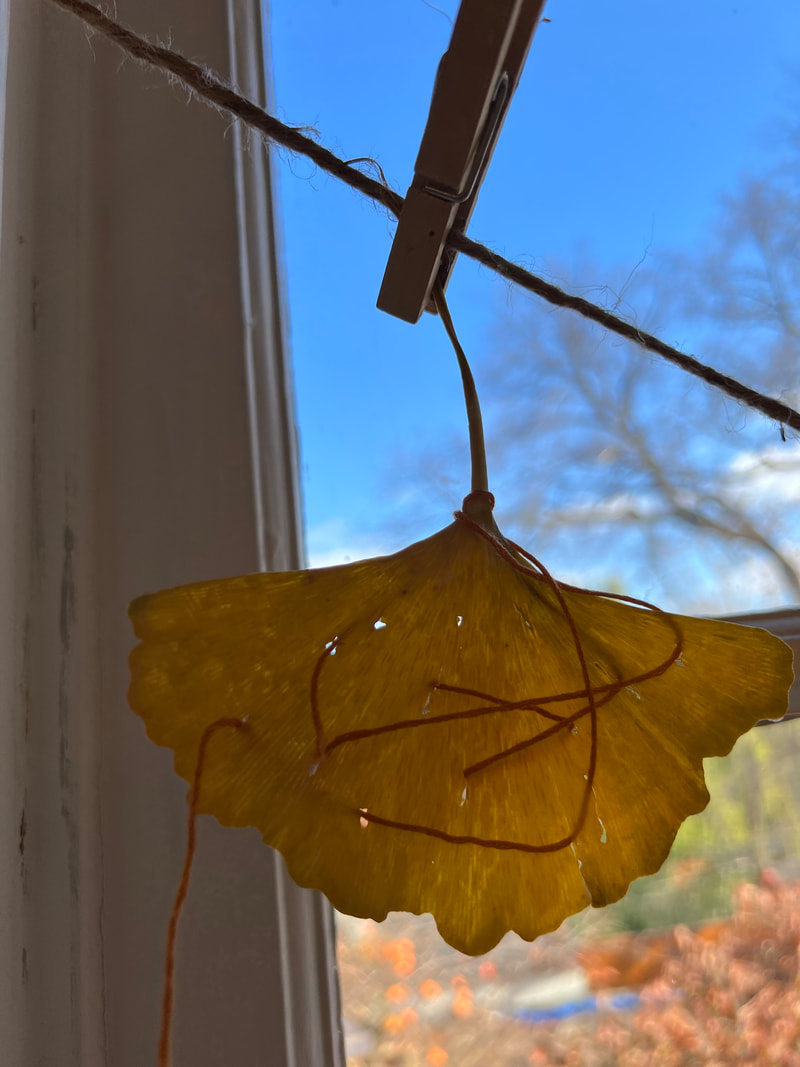
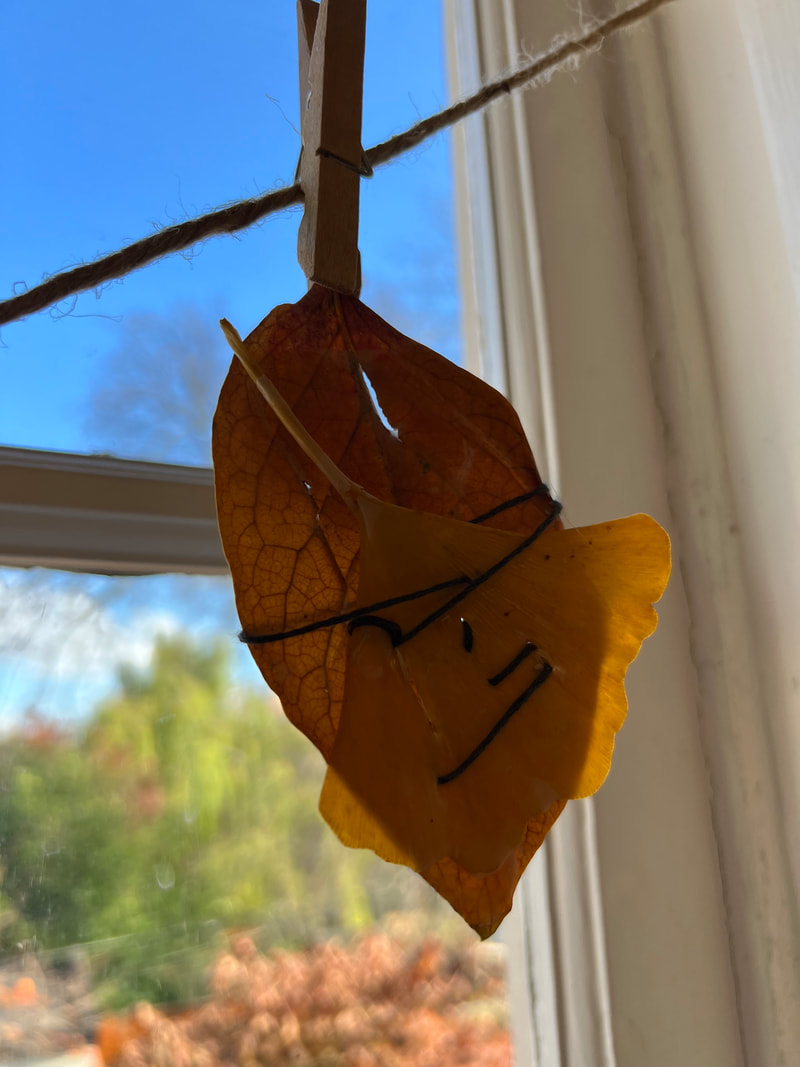
Preserving LeavesPart of the beauty of fall is the impermanence of the leaves. Their color on the trees only lasts for so long before they fall. But, what if there were a way to preserve that color for a bit longer? One way we found was by using beeswax. The process of preserving leaves provided opportunities to explore ideas such as liquid vs. solid, hot vs. cold, wet vs. dry and living vs. non-living. The children collected fresh and colorful leaves and carefully dipped them into warm beeswax. After coating them in a thin layer, they watched as the air quickly dried the wax. Their conversations gave insight into some of these new ideas and observations: Choosing Leaves to Preserve Fay: This has a different color in it. A little green. Whit: This one has a little dirt on it. Whit: I see the sides. It’s getting boiled. It smells hot. It’s like it’s soup. Fay: It’s like a pop. I’m going to do this red one. Whit: This is getting hot. I’m doing all of the gingko leaves. Ford: That’s the first time I did a small one. Watching the wax melt Bailee touching the hard wax: I’m gonna break it so it melts. Whit: This is sticky. Bailee: It’s starting to melt. Turn it turn it turn it. Dipping the leaves and letting them dry Bailee: It’s still dripping. Only the leaf can touch it (the hot wax). It doesn’t hurt the leaf. Ford: How did it (the wax) dry so fast? What if we hold it in there too long> Charlton: I put wax on it and it dripped off. Mimi: It’s not dripping anymore. It’s a very beautiful one. Is this one I already did dry? Mimi touches the leaf: Almost. This one is wet. It’s so slimy (touching the dried leaf with beeswax on it). Fay: It’s so tiny (the leaf). Maybe we should look at it with the microscope. After it dries. Fay: Okay it’s dry now! Sewing Preserved LeavesNow that we had preserved the leaves, we asked the children what we might do with them to be able to display their beauty. Recent sewing projects were top of mind. "What should we do? Should we sew them?" - Ava  Leaves after being preserved in beeswax.
The children's leaf sewings are hanging in the window in the studio. The light shines through in the morning to reveal the colors that have since begun to disappear from the trees. 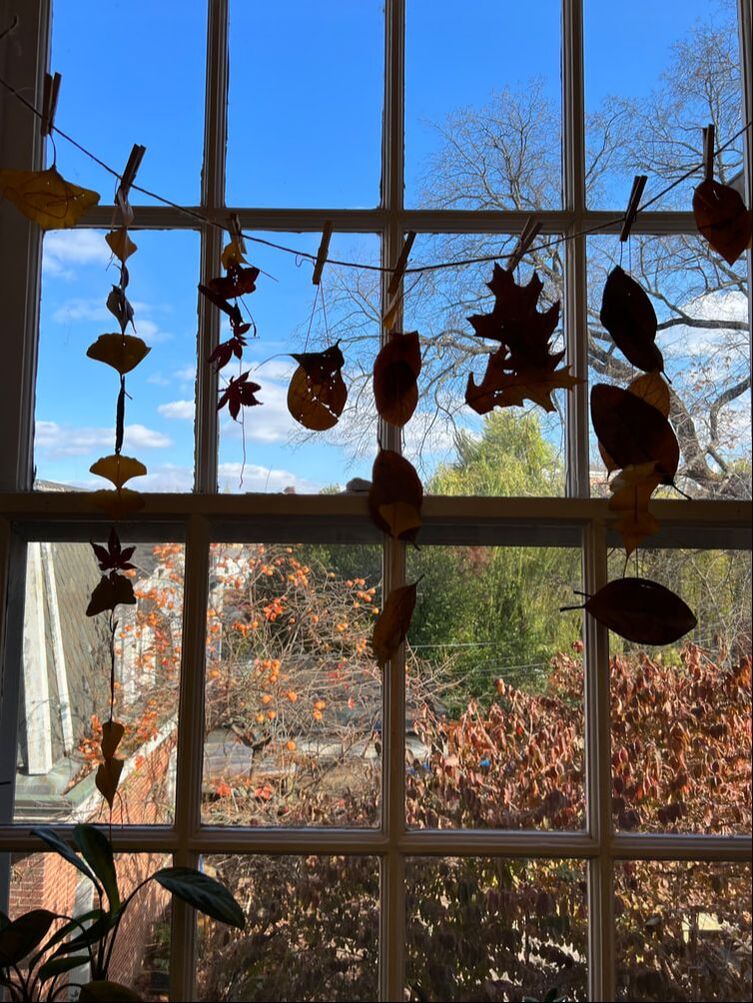 The children's preserved and sewn leaves.
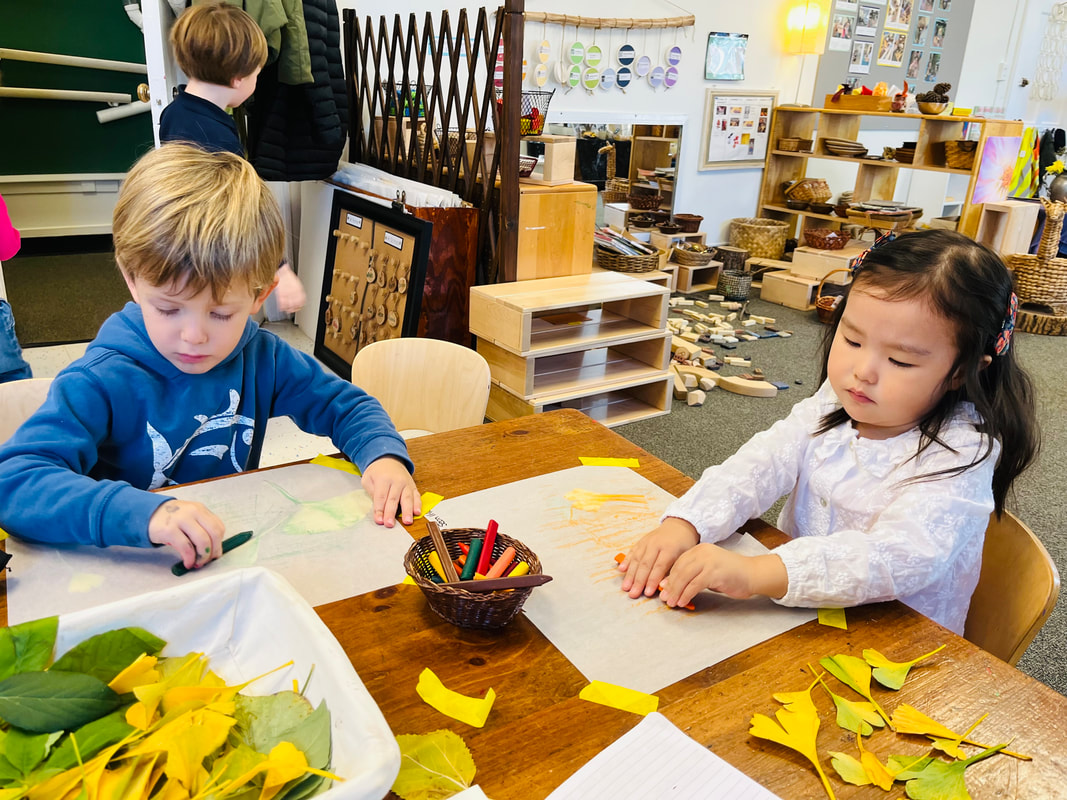
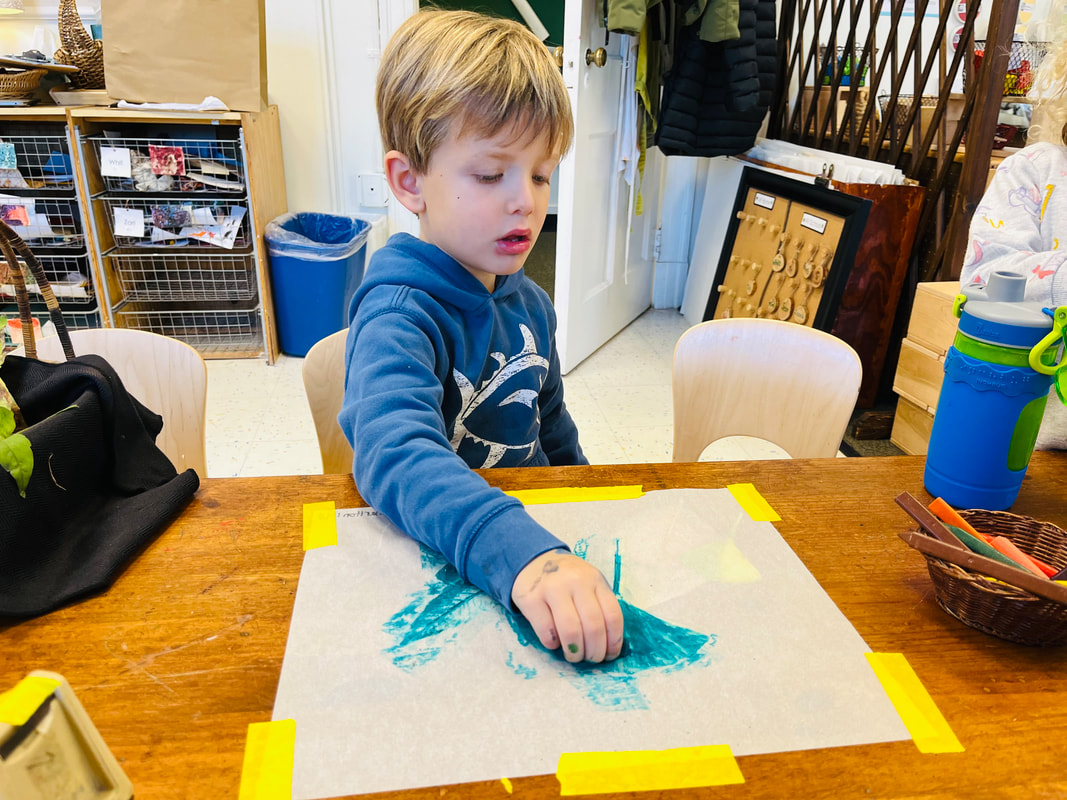
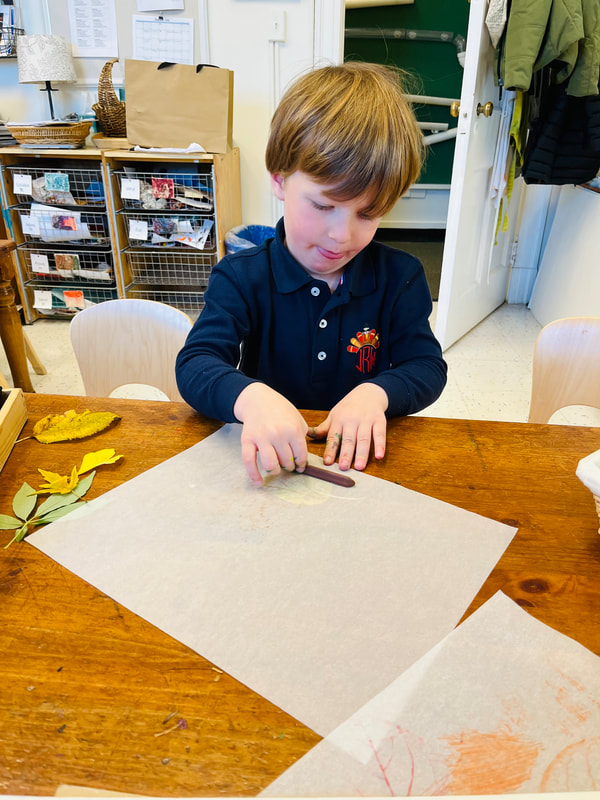
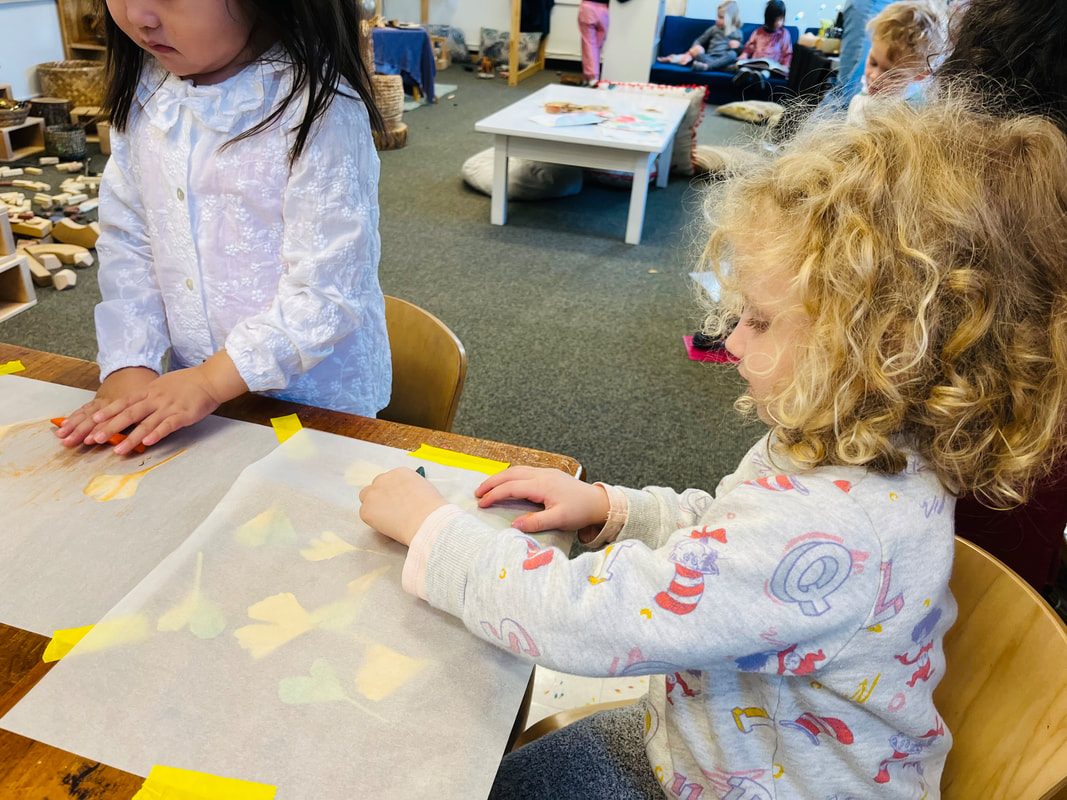
Leaf RubbingsOne day while we were exploring leaves under the digital microscope, Fay suggested an idea that she had done at home: leaf rubbing. We found tracing paper and placed them over fresh leaves. The children rubbed crayons over the paper, revealing the shapes and patterns of the leaves underneath.
Seon: It’s still not working. Seon: You rub it on the side. I’m doing it. I’m rubbing the leaves. Seon looked at Charlton's leaf rubbing and identified his leaves: Ginkgo, gingko, sweet gum. And a ginkgo! Charlton counted his leaves: 1, 2, 3, 4…..4! Seon: We both have the same, but they are kind of different. His are big, mine are small. Charlton: I only love leaves. Ginkgos don’t have veins up. They don’t. Seon: Look at mine. It’s so beautiful. Karen: It’s so vibrant. Seon: What’s vibrant? Karen: Vibrant is bright. Charlton: Mine is bright, too!
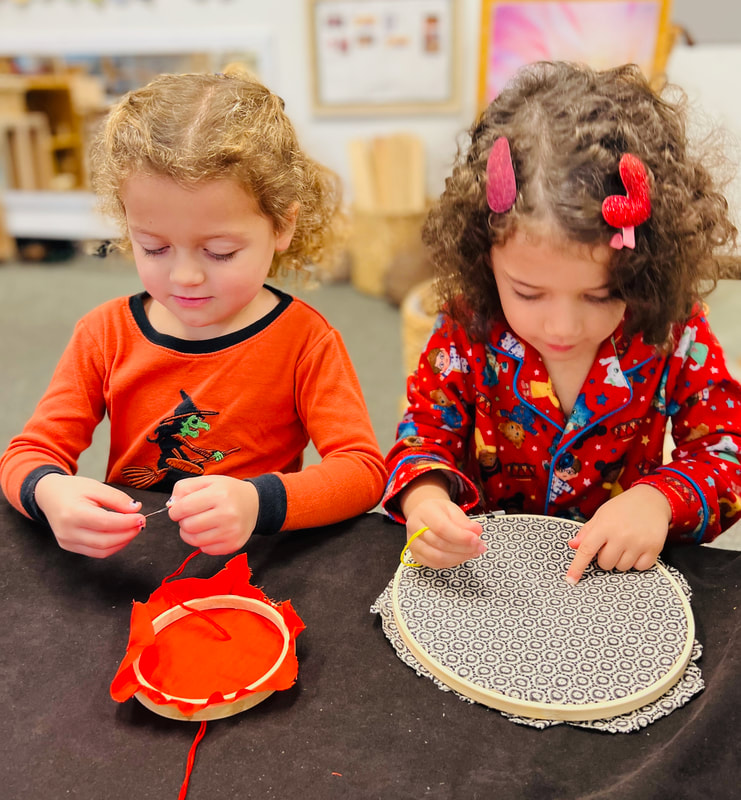
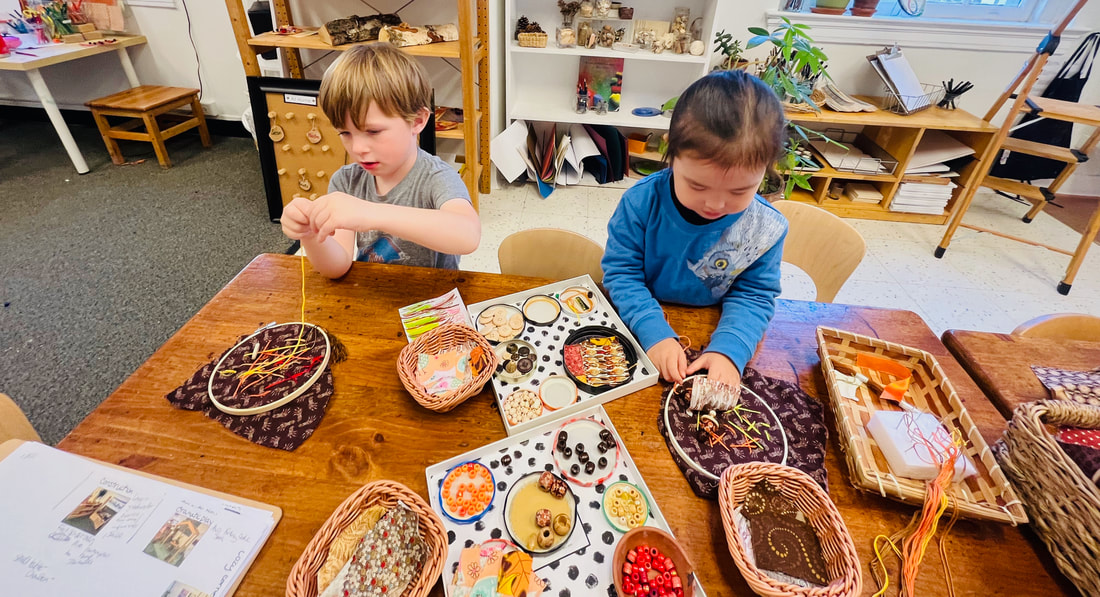
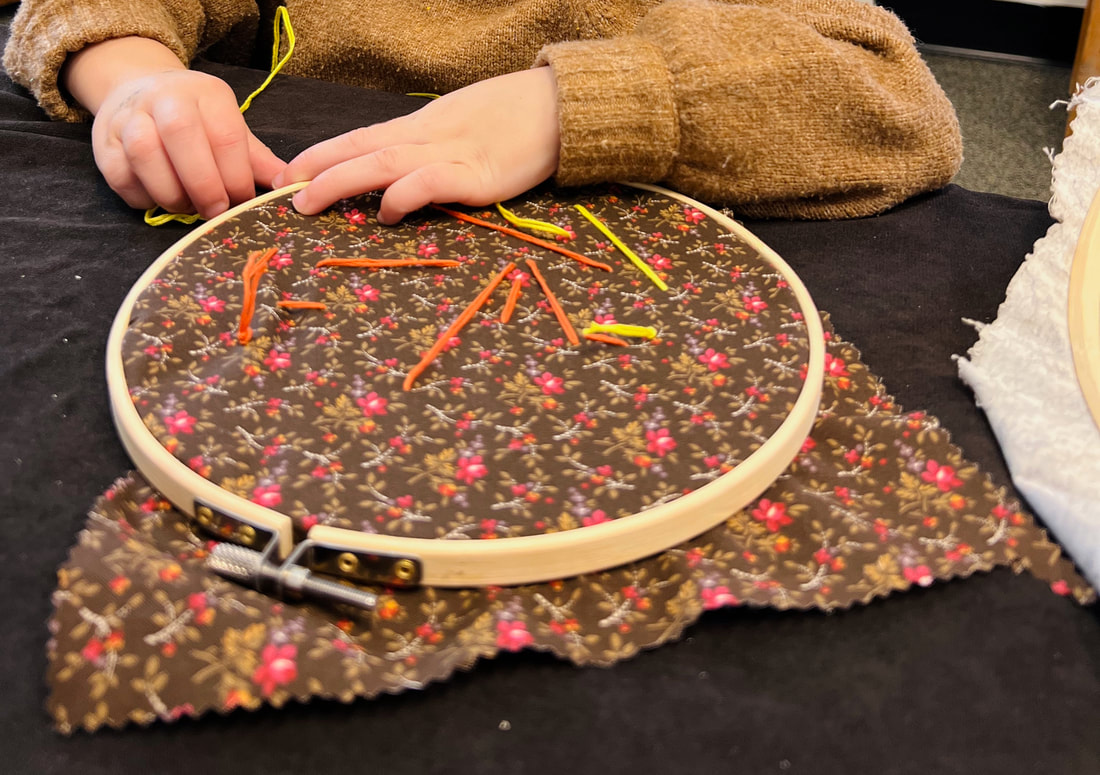
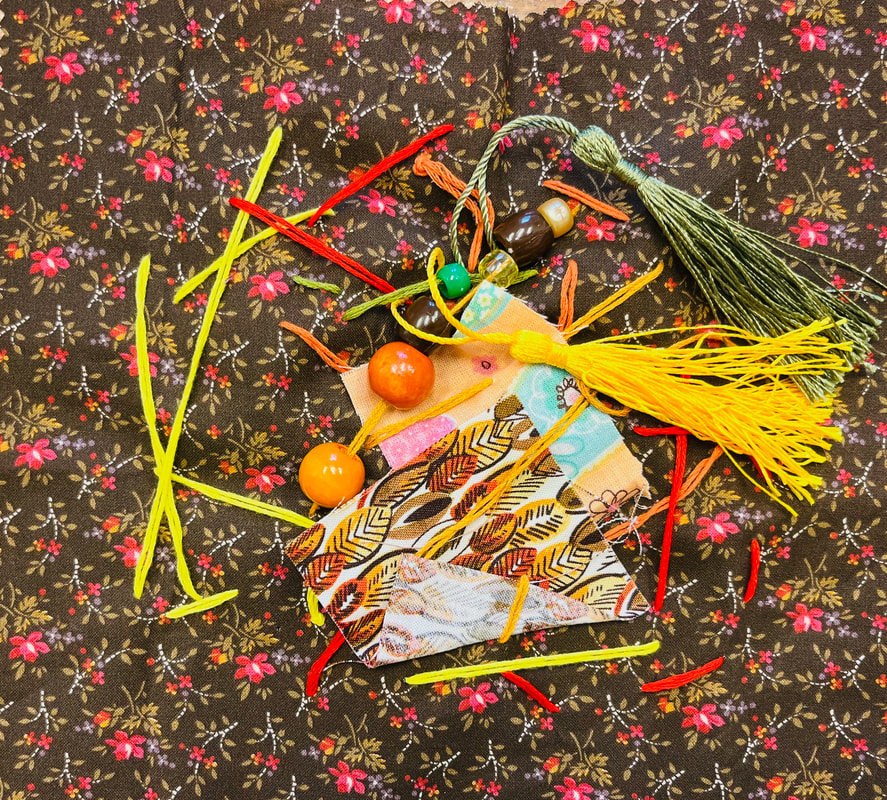
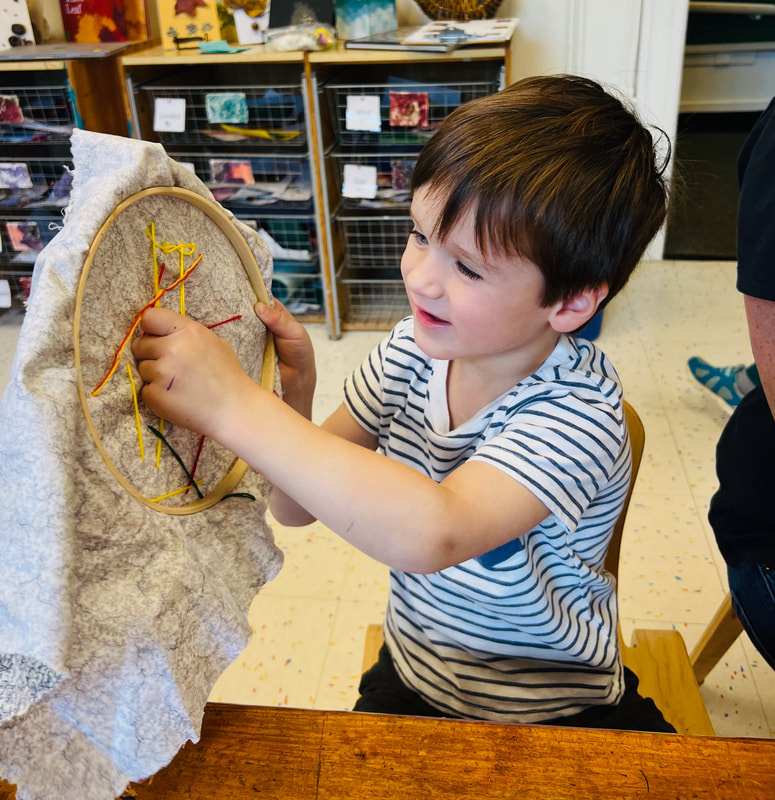
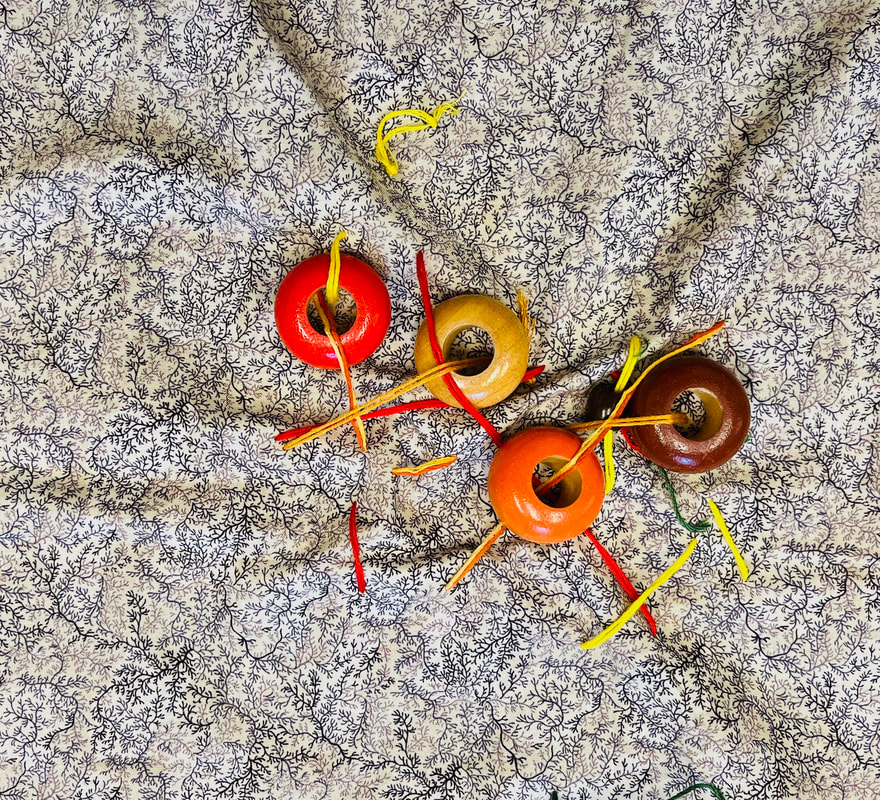
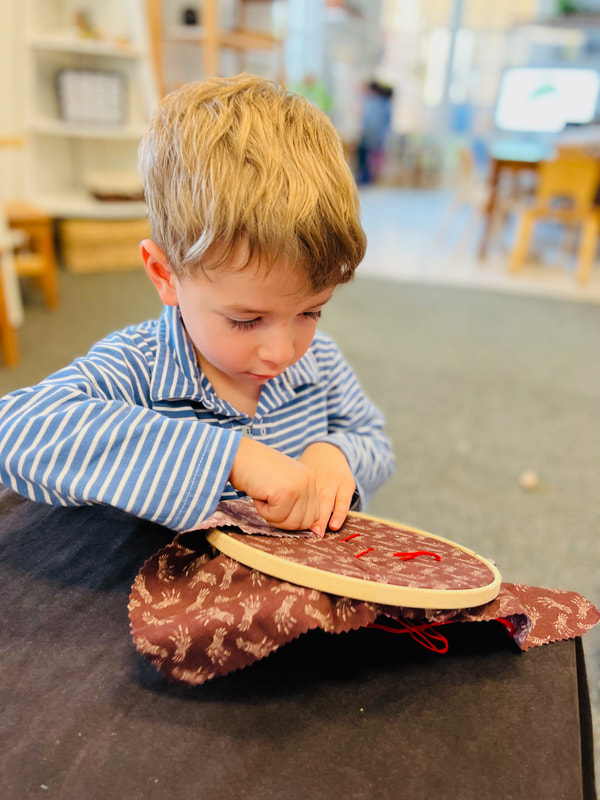
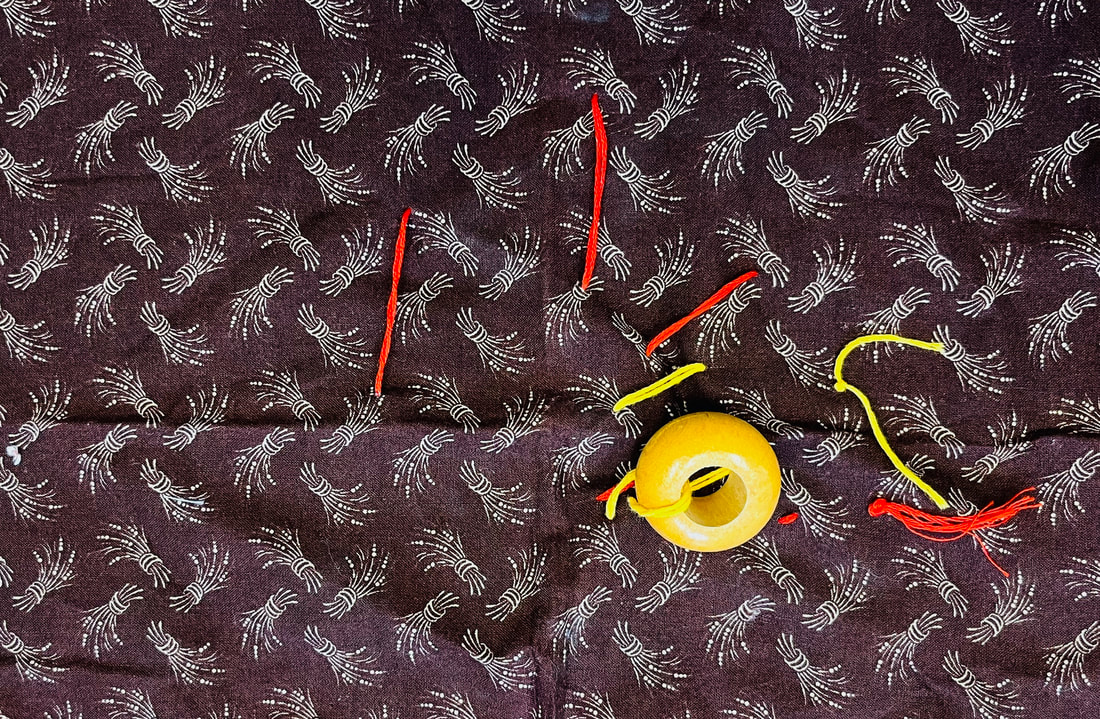
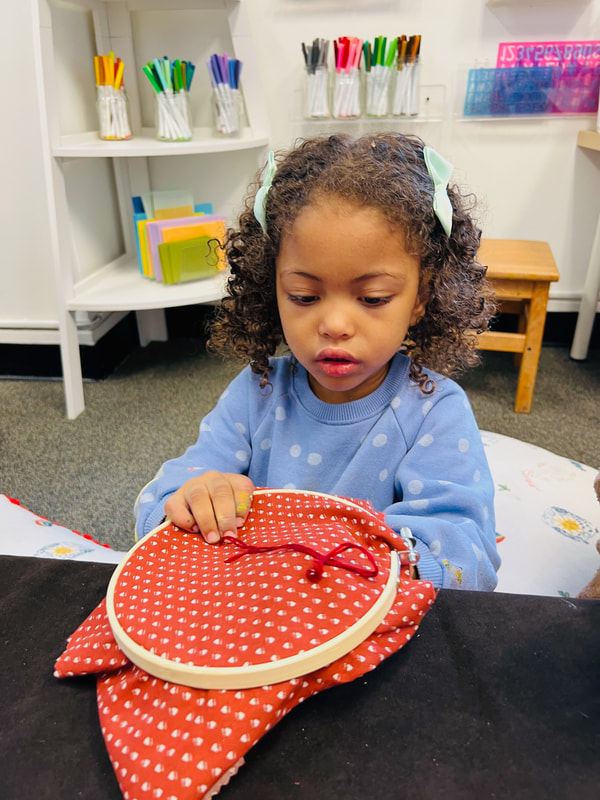
Ellie: I want a different leaf. Ava: Look at this one (holding up a single leaf). Karen held down the tracing paper over Ellie’s leaves. Ellie: I do the stem. Watch out for you hand Karen. Ellie looked at her work: This one too darky (brown). Ford joined the table. Ford: It’s a lot of leaf rubbing. Ford: I need another crayon, ‘cause I need purple. Ellie: I put one red in the middle. No, I need orange now. Ford: I’m making a line (the main vein of the leaf was prominent in the crayon rubbing). Ford looked at his paper: How did I do that? Ford added two more leaves under his paper and continued to use the crayon. Ford: I made three lines. These leaf rubbings will be another way to preserve the beauty of the leaves in our classroom after all the leaves have fallen outside. Please find our projection for next week below. Also, the blog for Thursday will be coming soon as it is a bit longer than usual and we wanted to incorporate a activities from yesterday and today. Thank you for your understanding and we hope you have a wonderful weekend! 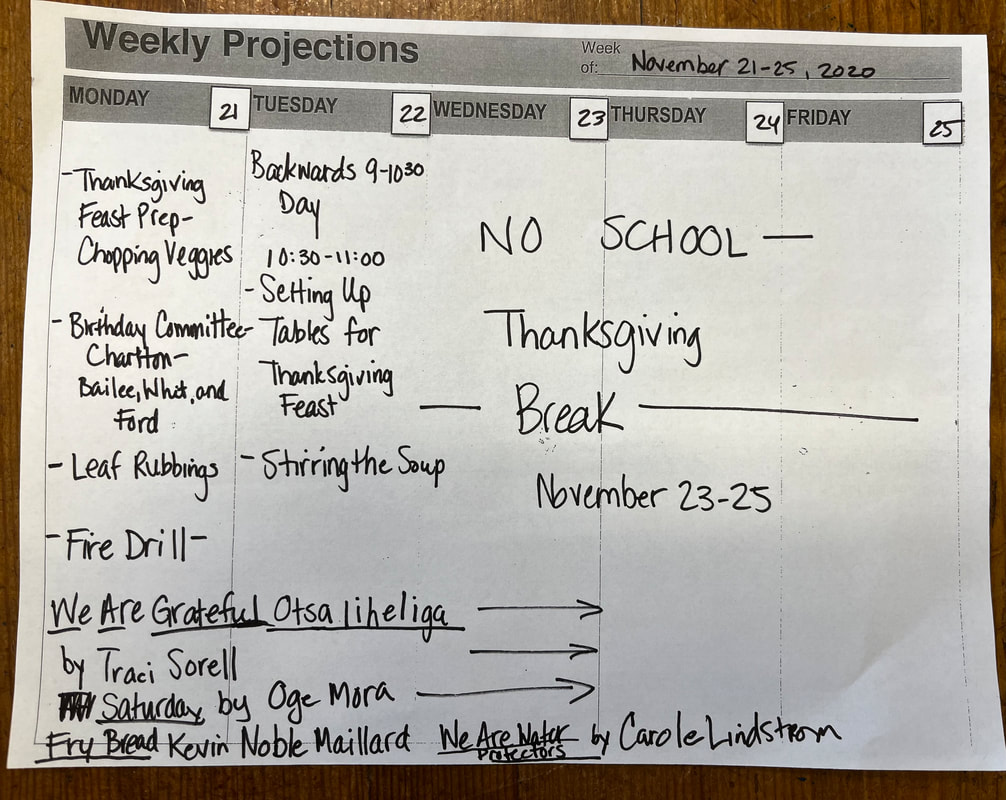 Sewing, as a studio experience, asks children to engage in a number of learning concepts. While sewing, children are building social skills and emotional intelligence. Sewing also provides a unique opportunity to develop fine motor strength and hand-eye coordination. While sewing, children engage in deep cognitive processes as they work out the process of sewing and the designs that they intend to create. Building self-confidence, persistence, and patienceCharlton: This is how you sew. I know how to sew. Ellie noticing the threads are tangled: It’s tricky. I’m sewing! It’s stuck. It’s a spider web. Seon: I do it on my own. What is this (picking up a fabric square) for? This is my favorite color. Red. It's kinda red and orange. I’ll find the same spot. I’m starting to pull it. I’m making something. I’m gonna keep sewing. Ford: I string beads. Ava: I’m making a spider web. I use the needle. Bailee: It’s tangled. As the children sewed, it was evident that they were focused on the task at hand. 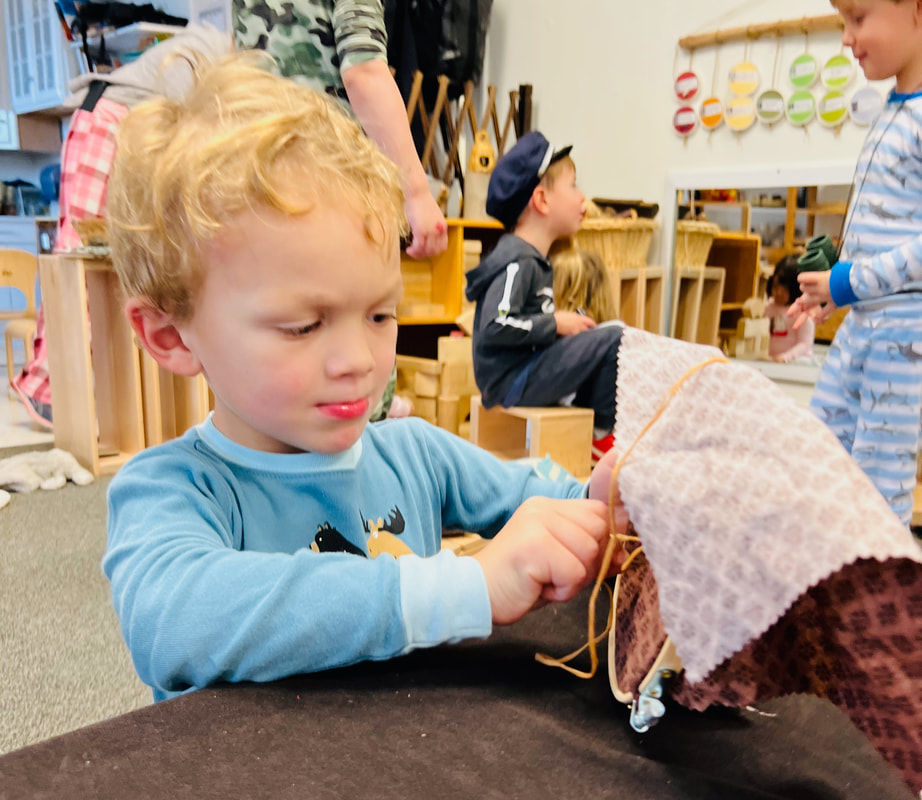  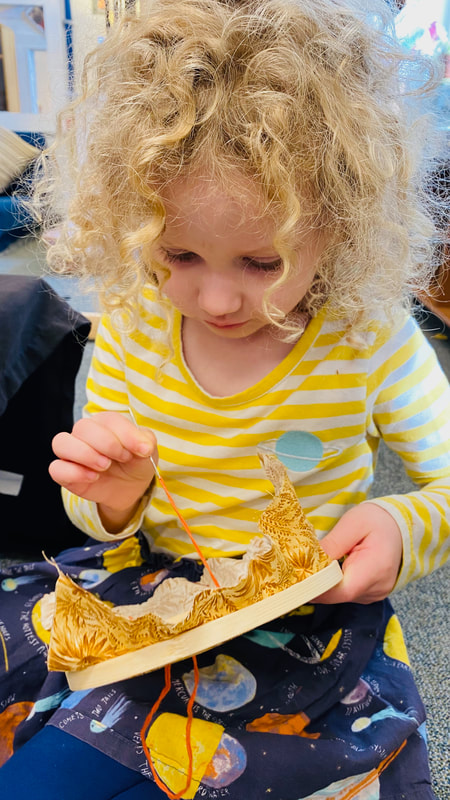 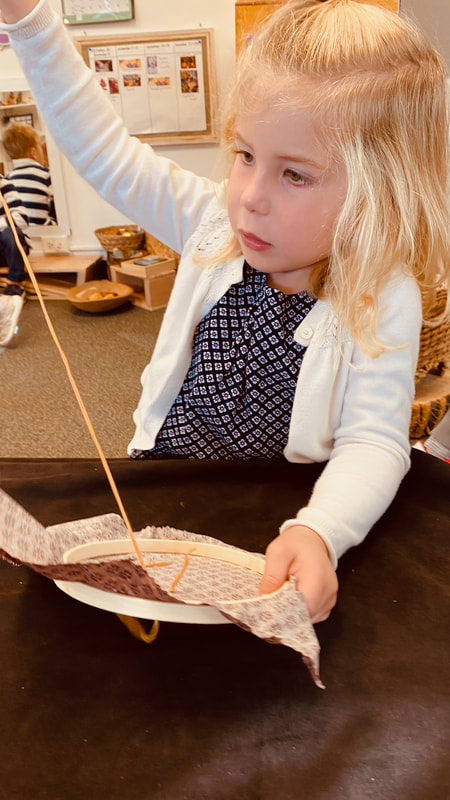 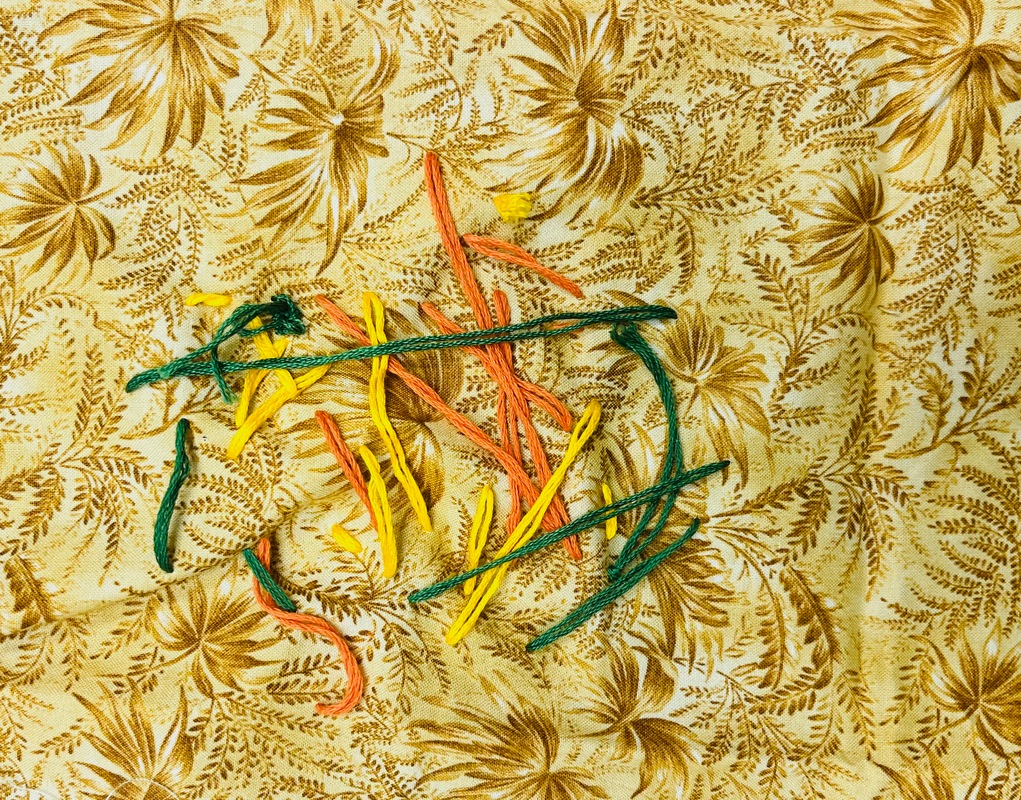  Many of the children showed persistence, returning to their sewing projects over the course of several days. They began with simple stitches and then as time went on, the combination of their stitches became more complex, layering over earlier stitches. The addition of beads, pieces of fabric and tassels added even more intricacy to the designs. Fay's Sewing Project from Beginning to End Communicating thoughts and needsWhile sewing, conversations naturally arose between the children. 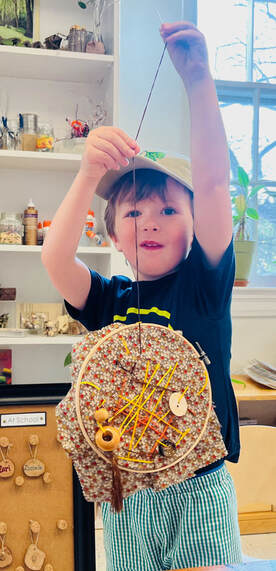 Whit: I need another color (of thread). Fay passed the threaded needles to Whit: I got it for you. Whit: She passed it to me. Thank you! Fay observed Whit sewing: Whit, you’re a doctor. Whit: No. I want to be an artist...I need a tassie (tassel). I don’t like this (the tassel) there. It’s too low. Whit looked at his piece reflectively and decided to adjust the position of the tassel by moving it lower within the sewing hoop. When he was satisfied with the placement, he declared: I would hang it up in my room. Fine motor strength and hand-eye coordinationSewing is a team effort for the child's body. It is a partnership between each child's sense of sight and the small muscles of their fingers that make each stitch. Mimi: I pull it through and it go around here. Ava: I made a big big tambourine. I use the needle. I poked it and I poked it and I poked it. 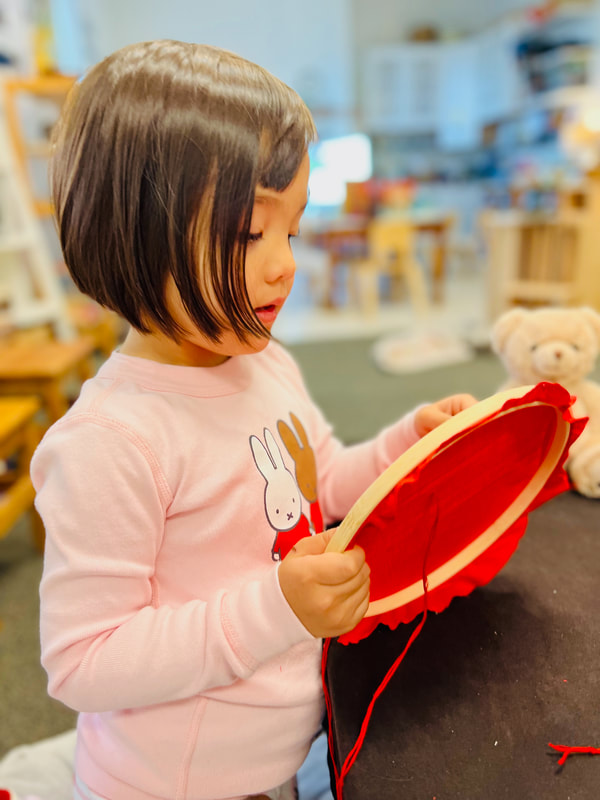 Thinking MathematicallySewing involves complex mathematical thought. Children are estimating the length of each stitch they can make with the thread that they have. They are estimating the number of beads that can be accommodated on a length of thread. They are making critical decisions regarding spatial awareness, size, shape and pattern. Rawls noticed that Cal was adding large beads to his piece: I want the big beads, like Cal’s.
Ellie added a variety of beads to her sewing. When she had added enough beads, she looked at the string before making her decision: I done, Karen. I need to cut it (the string). 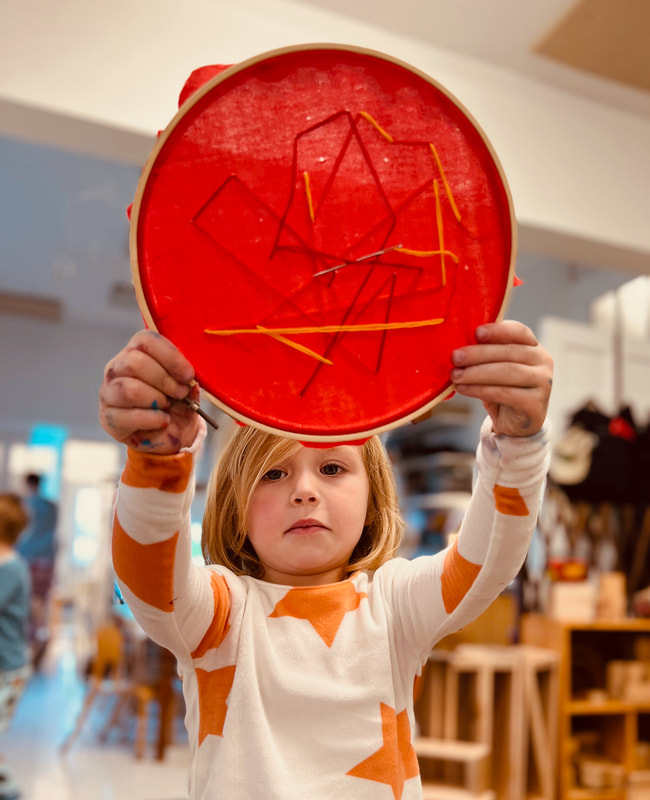 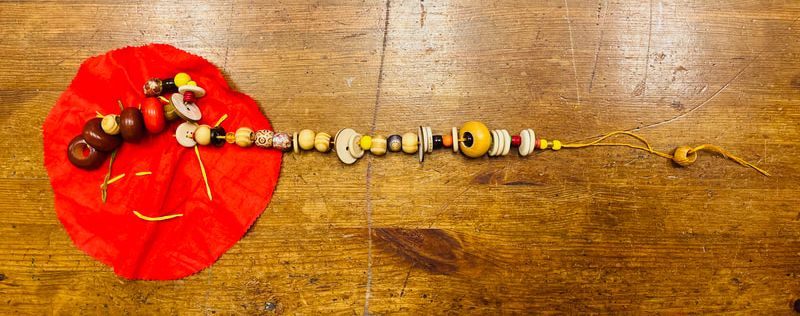 Sewing has been such a popular activity that we're excited to see how we can incorporate it into our upcoming days and weeks.
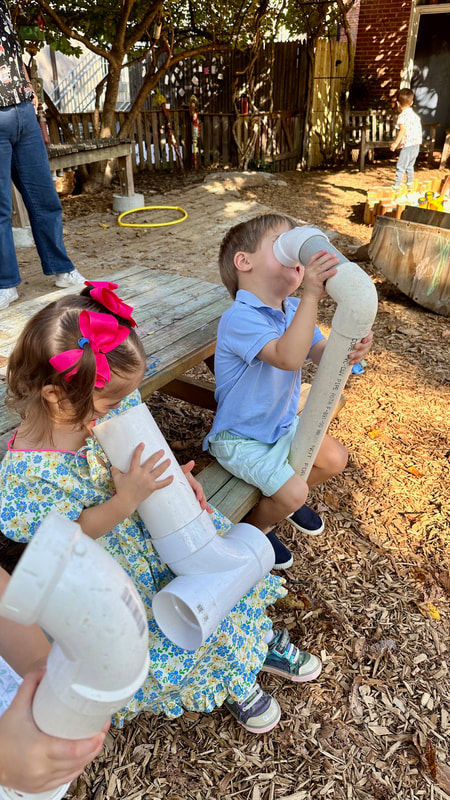
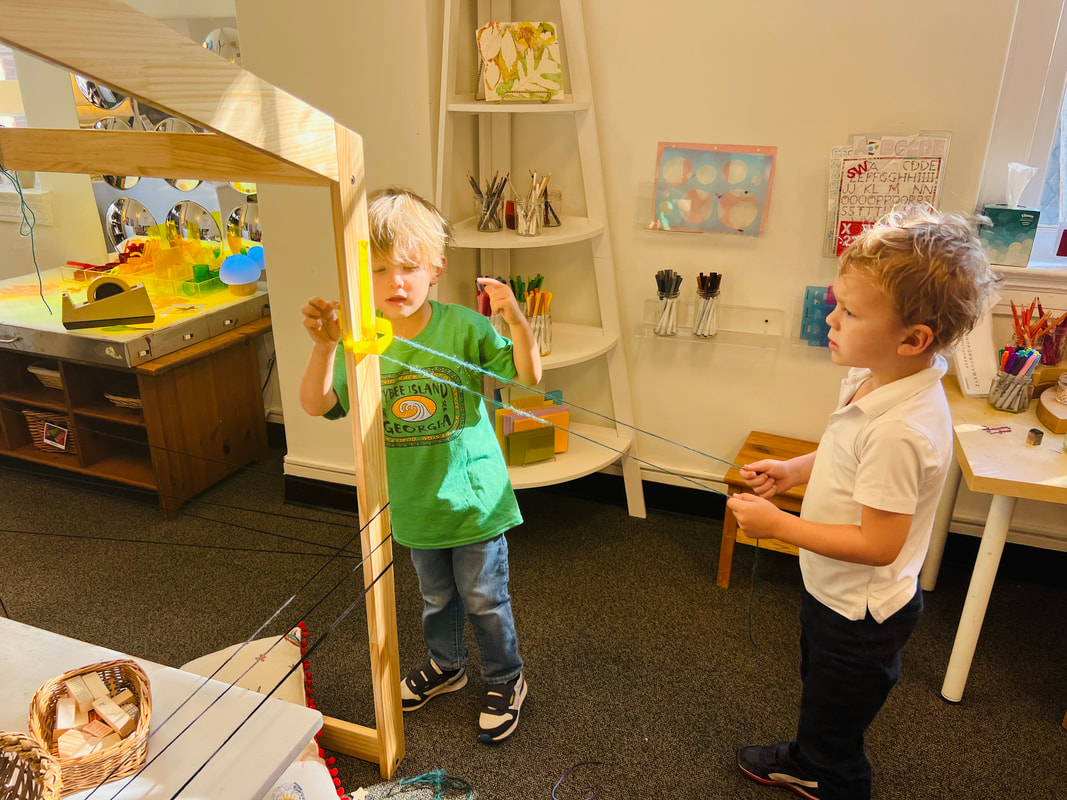
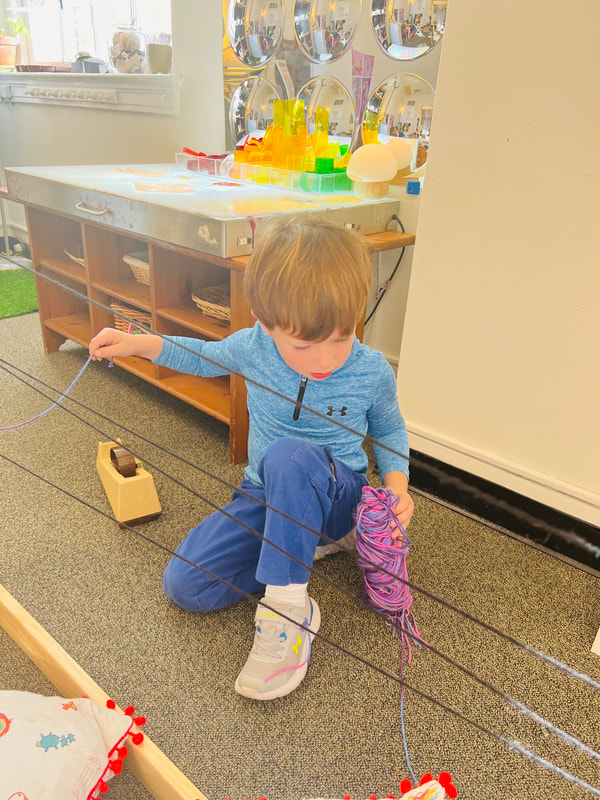
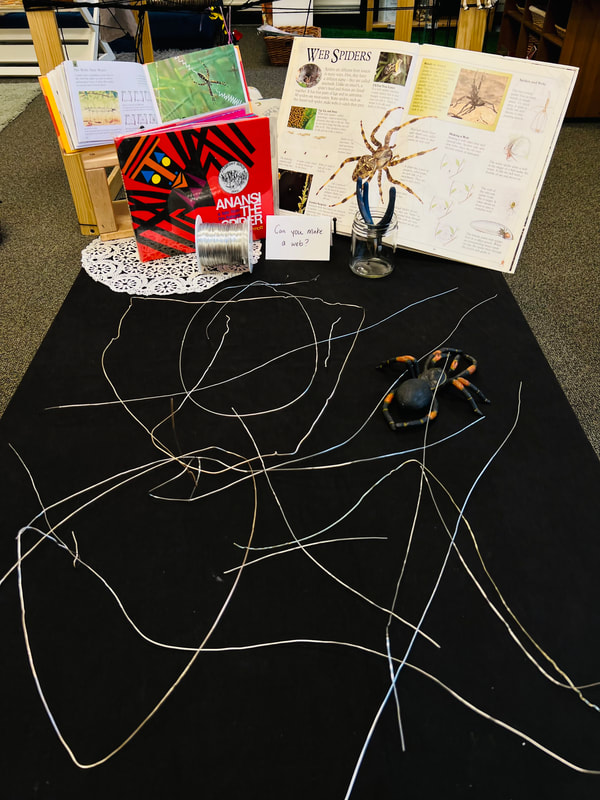
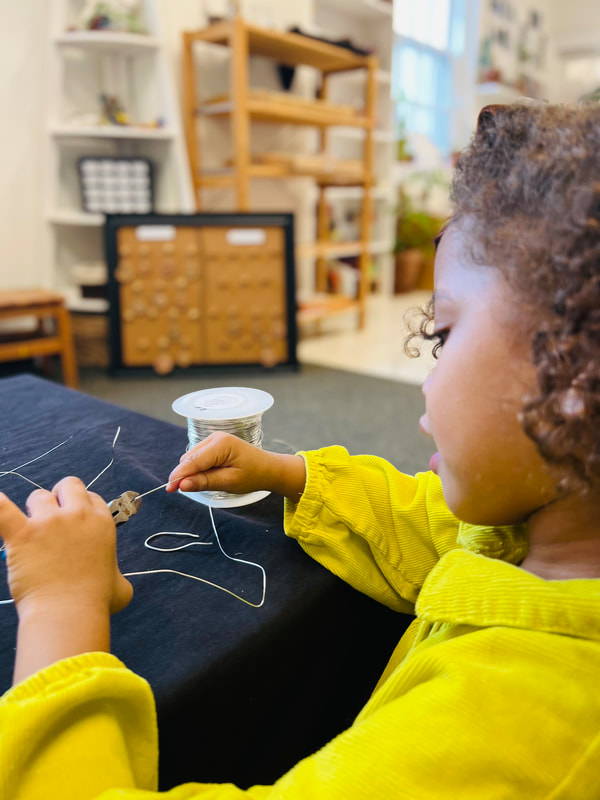
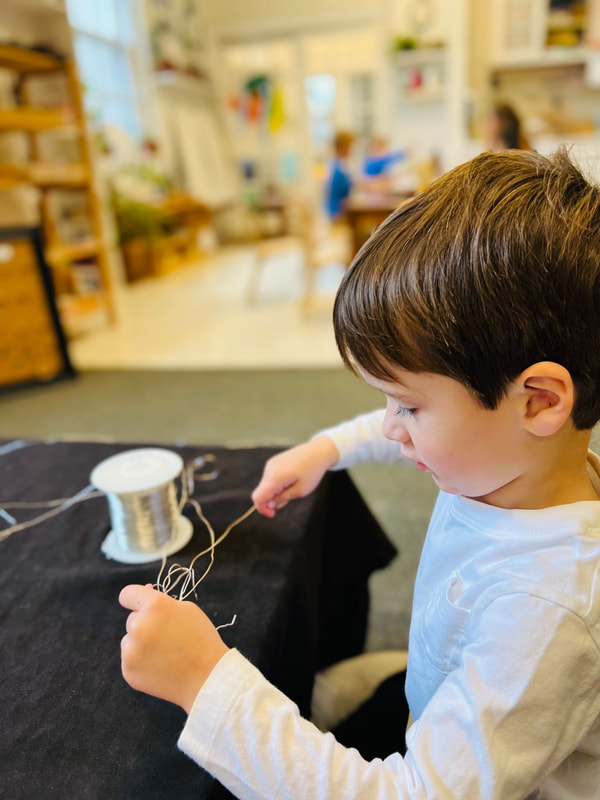
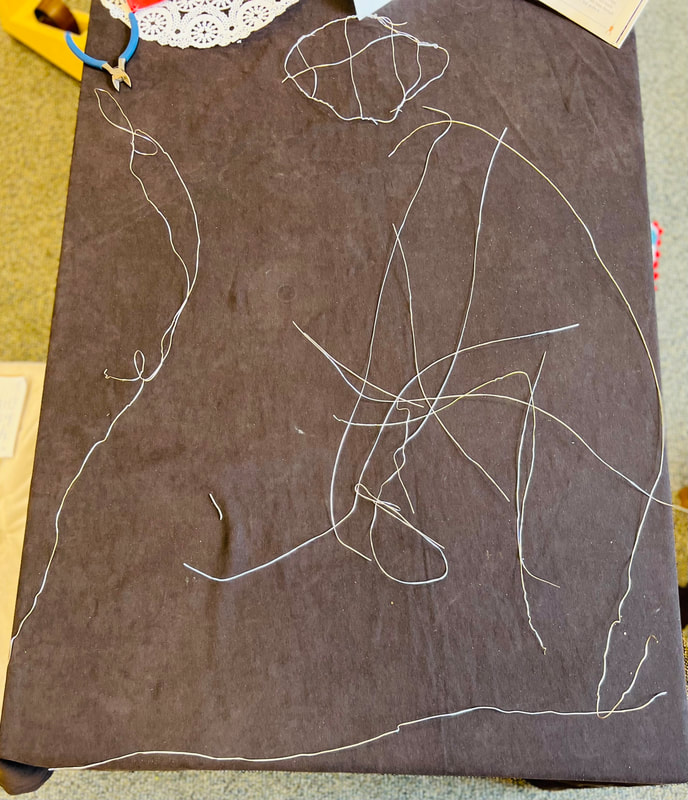
A Web For Spider ManAt morning meeting while making our plans for the day, Ford shared that he wanted to make a web for Spider Man. We asked him how he might do that and he responded, “with string.” We helped him gather different kinds of yarn and he began work on the web at the house in the classroom. Other children were intrigued by his project and began helping Ford create the web. They wrapped yarn around the house in intricate patterns, just as a spider would spin their web. Problem solving began as they tried to capture animals and objects such as small blocks and airplanes in the web. How could they make these objects stay in the web? How could they ensure they wouldn’t fall down? The giraffe is trapped. - Charlton 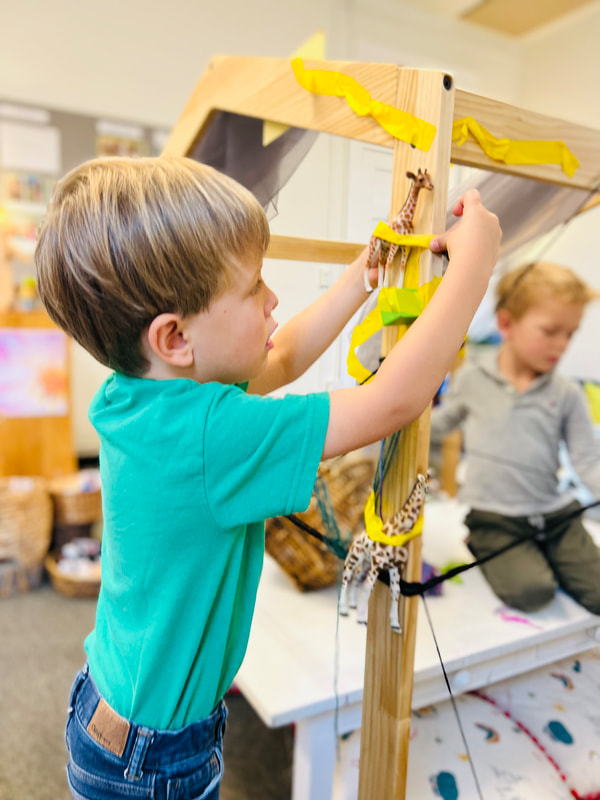 While using the yarn, they realized they needed something stickier to capture the objects. Ford suggested they use tape. The tape is kinda like a spider web. - Ford 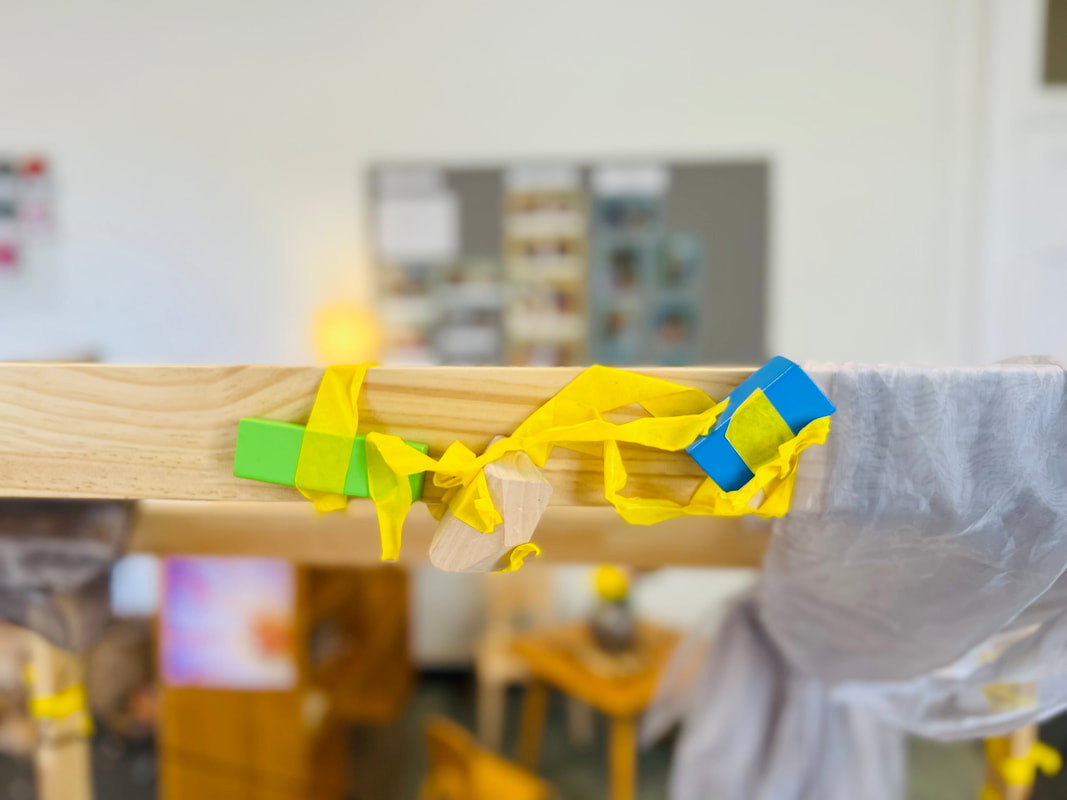 The children spent hours over the course of a week, collaborating on ways they could add to the web. They wrote signs to show who had been working on it and to show others what it was. I’m writing a sign that says do not break it. Remember the spider web thing that we built. That’s the sign. - Charlton 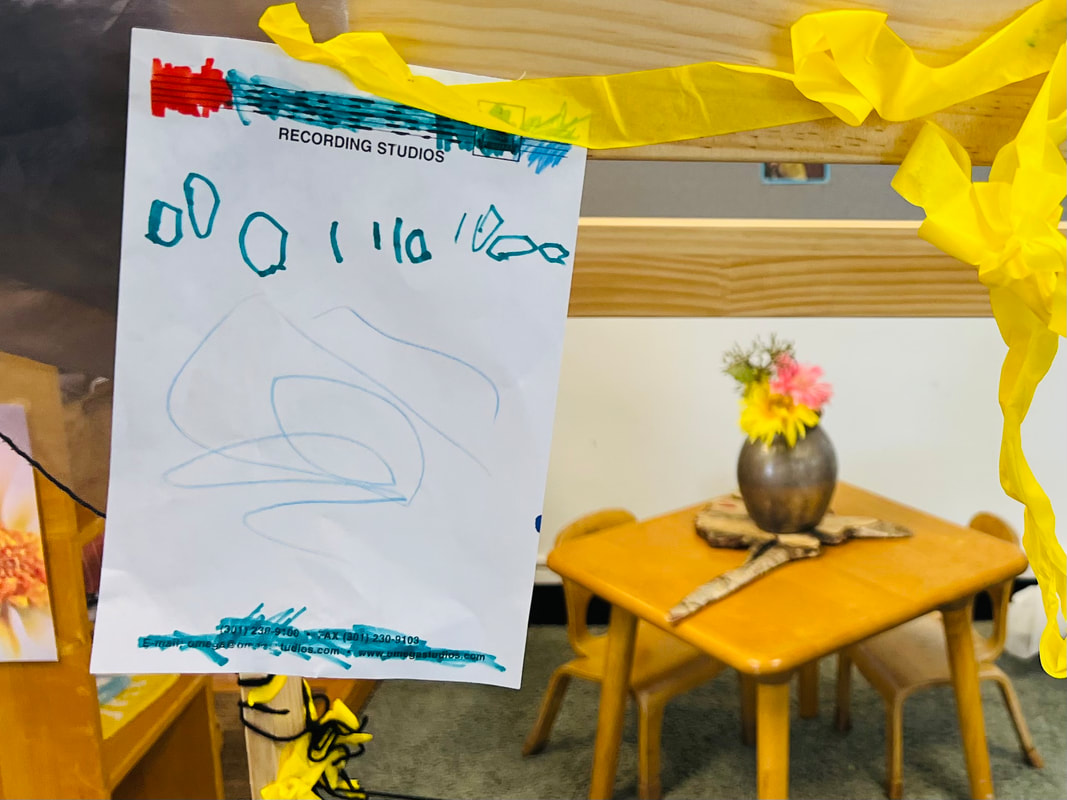 They thought of ways to save the things that had been captured in the web. I’m saving the airplane with my horsey. It’s trapped. I’m using scissors. - Louisa 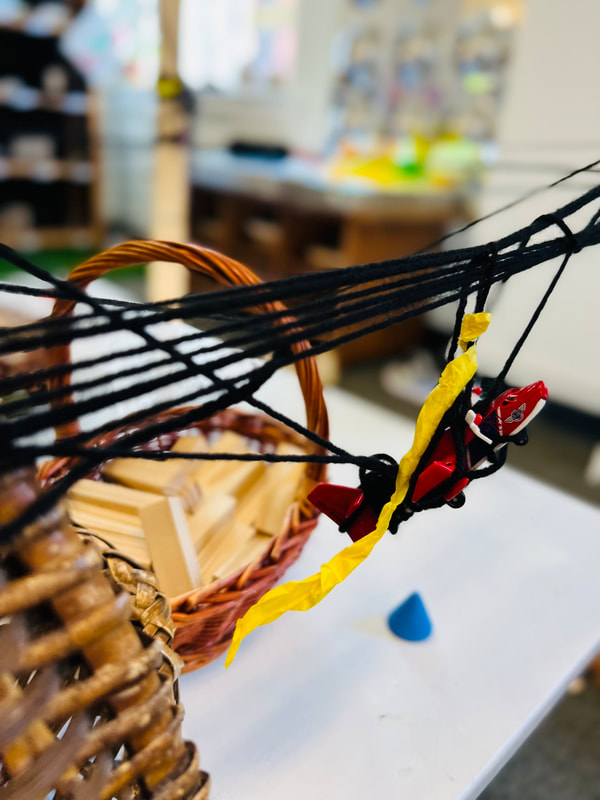 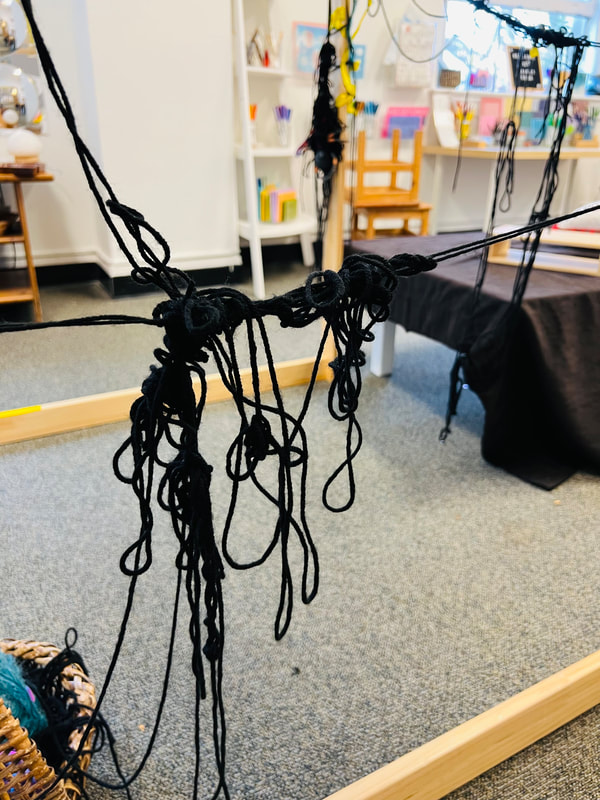 The web for Spider Man posed interesting questions about webs and spiders. How do spiders make webs? How do they spin the webs? What patterns and designs do they create? We went to the research shelf to find books about spiders and their webs. The children noticed the spiders and pictures of their webs. Seon, Charlton and Whit count the legs of a spider. It looks like a big ocean and there are lines. - Zari 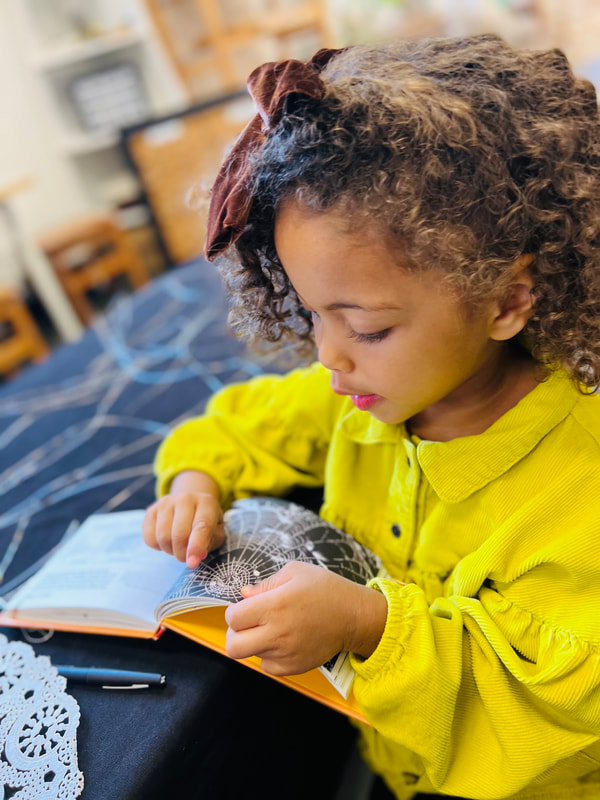 Together we thought of ways we could make all kinds of webs just like the spiders. Webs of WireDuring this time of Spider Man’s web, the children had also been working with wire in the studio. Wire, although thicker than yarn, is another material that lends itself to wrapping and web-like characteristics. One morning, the children explored a provocation of wire, wire cutters, and books and images of various spider webs.
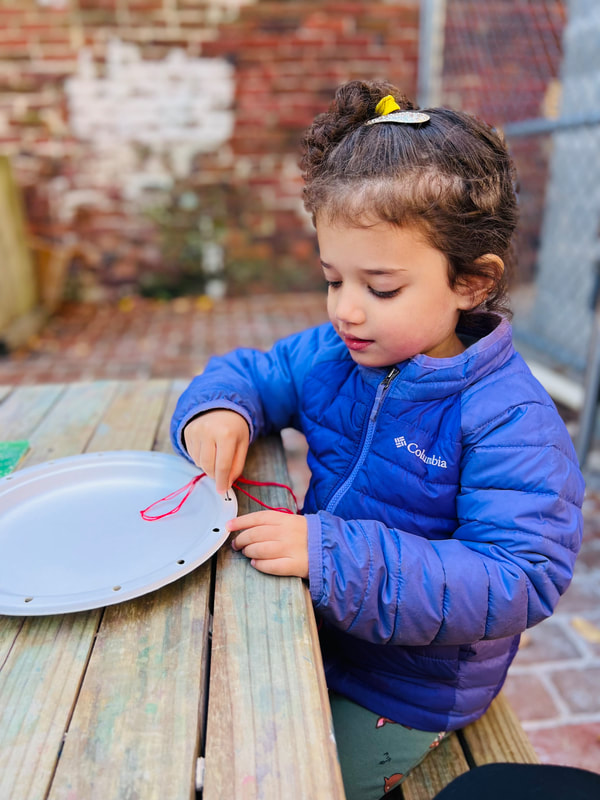
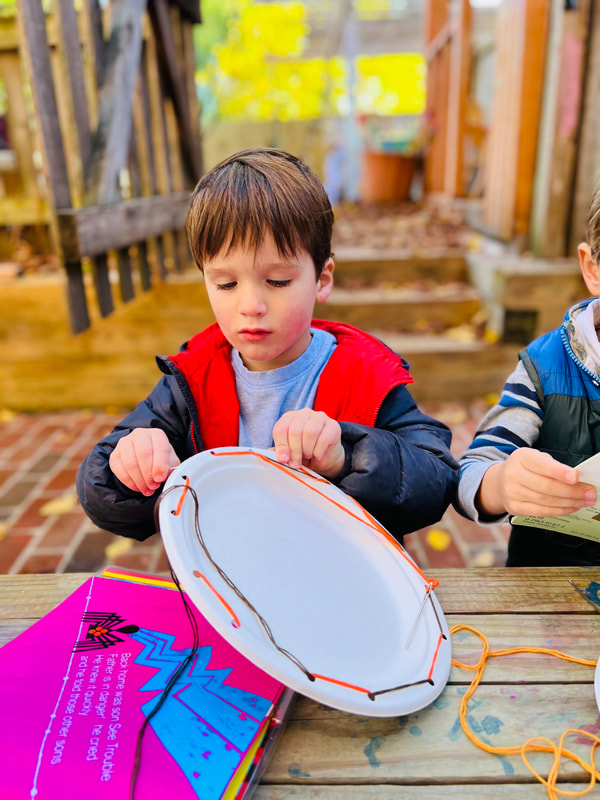
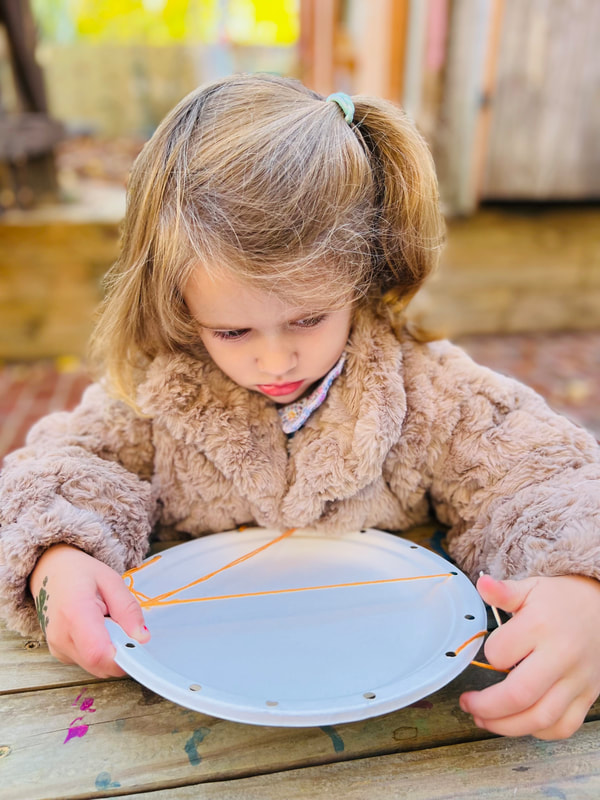
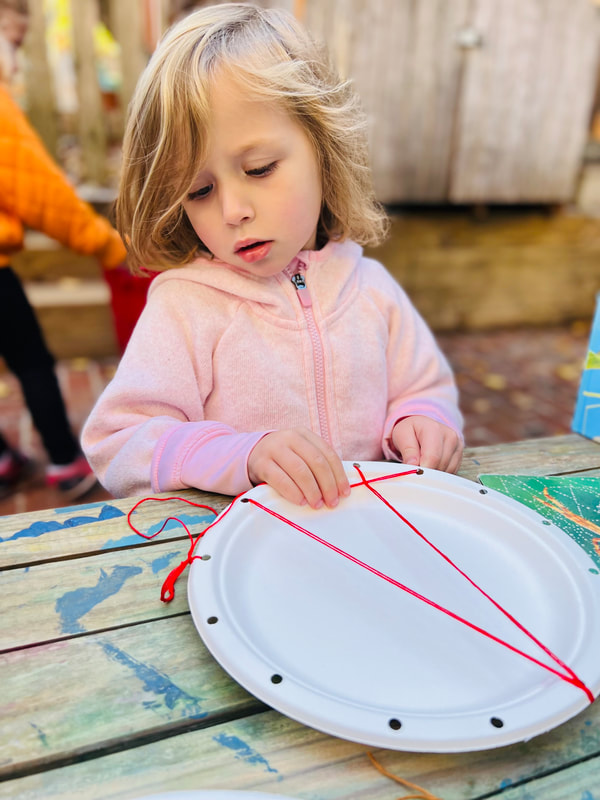
Zari: Loop it through that one. A web for spiders. It’s around my hand. Help me, my finger’s stuck.  Zari's Webs Cal notices the wire web provocation as well: It’s a spider web. I want to make one. I’m gonna make a big one. Around the table. I’m gonna connect this one with that one. Tracing WebsIn the studio, children had been tracing large projected leaves. Charlton noticed that the veins of the leaves reminded him of a spider web. It’s a spider web because of the lines. - Charlton Although technically small, this noticing was big. Lines make up our world. Lines are in the letters of the words we read, the numerals we write, the shapes which compose the buildings around us, and even the rivers, roads, and trails on a map. Tuning into these fine lines is essential to developing symbolic, mathematical, and geometric thinking. With Charlton’s noticing, we projected a large spider web onto the screen for the children to observe and trace. 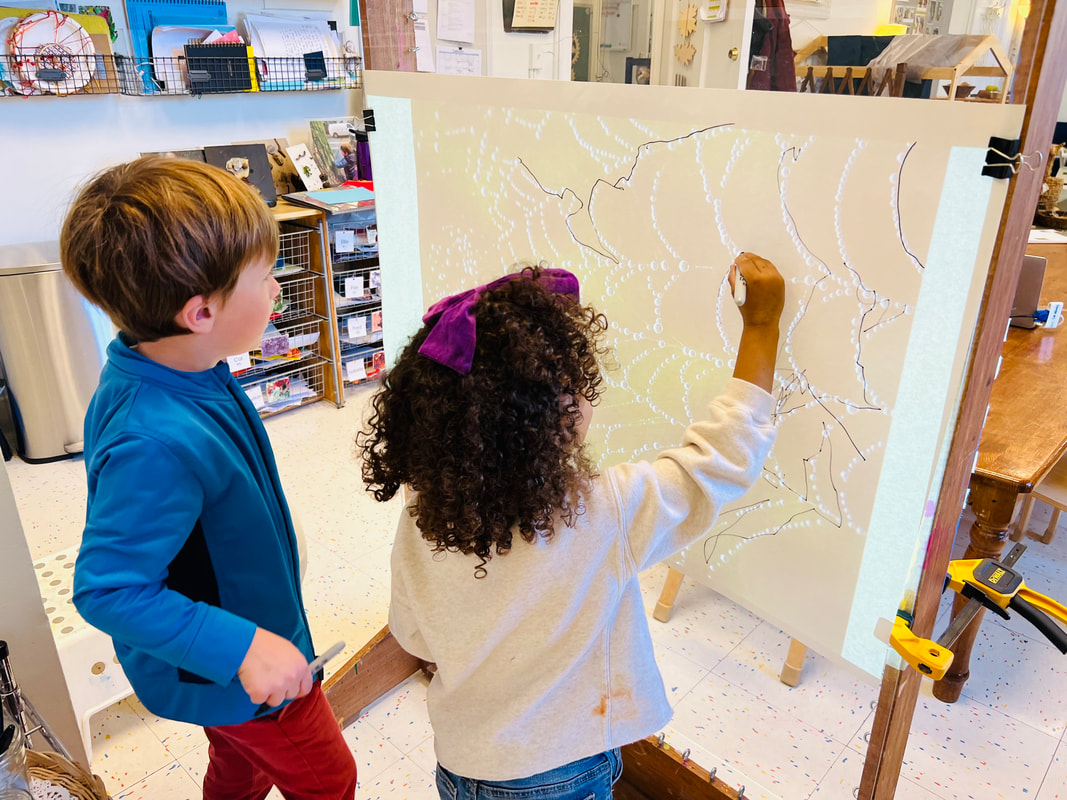 What do you notice about the lines? Ellie: They look like big tracks. Whit: I see polka dots. Rain polka dots. Zari: I tracing a spider web. I need some dots. Fay: It’s the spider. I made another mama spider. It’s almost done, see. We need to do another spider. It’s a spider family. The baby spider. The spider web is all done. Whit and Zari trace the spider web projection in the studio. Sewing WebsWhile making a web for spider man, the children recognized that the yarn around the house was like sewing. Although we hadn’t introduced sewing yet in the Rainey Room, many of them had fond memories of it in the Brown Room. We invited the children to sew spider webs using embroidery thread, a needle, and a paper plate with holes punched around the edges. How can you sew a spider web using these materials? Do the web’s lines go around, across or both? Ava sews a spider web in the outdoor studio.
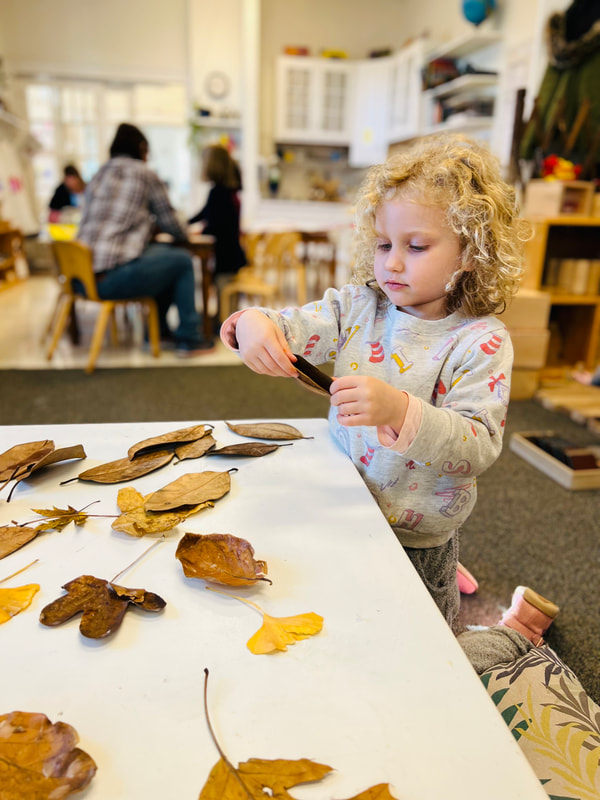
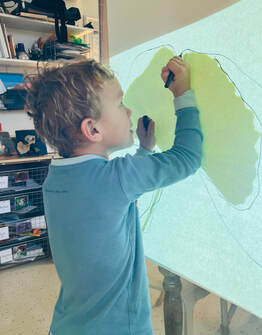
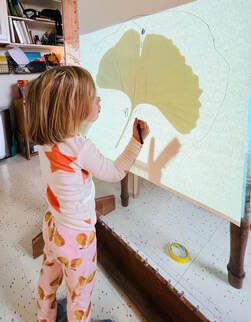
Naturally, the children asked to sew with real fabric and soon after we began our sewing projects. Keep an eye out for next week’s blog showing more of the children’s sewing creations. We also look forward to observing how the children's interest with investigating spiders and their webs continues to build and evolve. To dig deeper into the thread of nuts, trees, and seeds, provocations were developed that gave the children more opportunities to investigate leaves. Each of the provocations focused on different learning concepts, whether it be at the light table or in the studio. Examining Leaves At The Light Table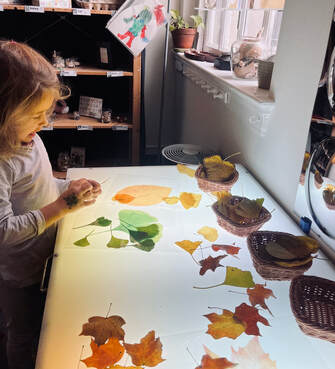 Fay: I put all the green ginkgo leaves in my collection. Only the green ones, that’s how my collection. Fay: I put all the green ginkgo leaves in my collection. Only the green ones, that’s how my collection. At the light table, the children found a variety of leaves alongside transparencies showing the different types of leaves that were represented in the collection. Some children matched the leaves and created their own "collections" of just one type, while others sorted the leaves by their attributes, including size, color and shape. The addition of magnifying glasses encouraged children to observe the leaves even more carefully.   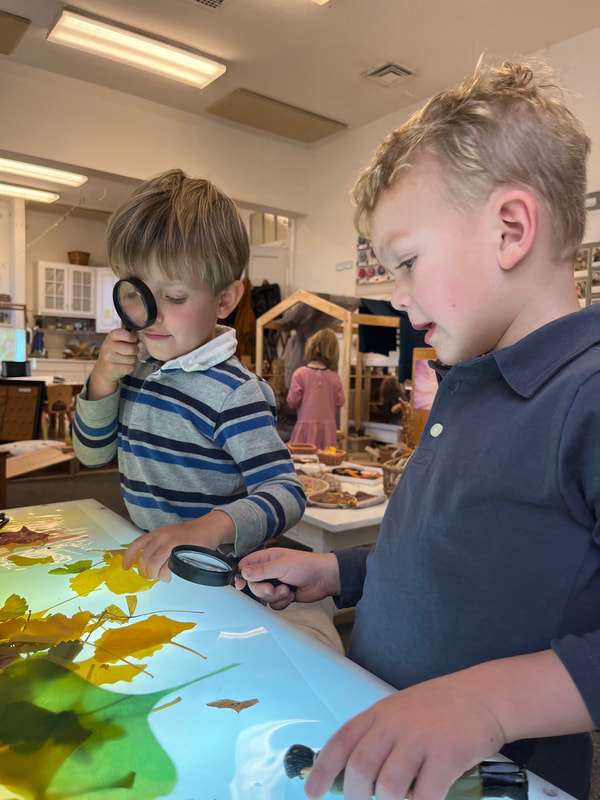 Tracing Leaf Projections In the StudioIn the studio, the children examined leaves from a different perspective, with attentive eyes, paying attention to the intricate details of each leaf projection while tracing. Capturing the leaves with such detail required persistence on the part of each child. To support developing strength in the small muscles of the hands needed for precise movements such as writing, drawing, cutting and painting, the children first traced the perimeter of each leaf with larger sharpie and then moved onto the smaller details within each leaf, tracing with finer, felt-tip pens. As the children conversed with one another during tracing, they talked about not only the types of leaves that they had chosen, but also the parts of their leaves, showing an understanding of domain specific vocabulary.
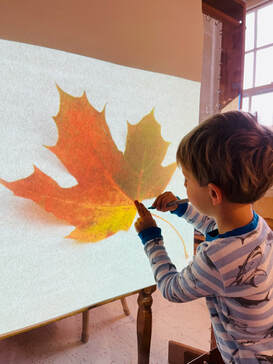 Charlton first looked at the Gingko leaf and then opted for another type: I want to change the leaf. The maple leaf. My favorite leaf. Seon: Let me look closer, because I can’t see the little bits. Oooh…It looks like the gingko leaf. I drew the lines of the Ginkgo leaf..the veins...When we draw the leaf, we can see what kind of leaf it is. 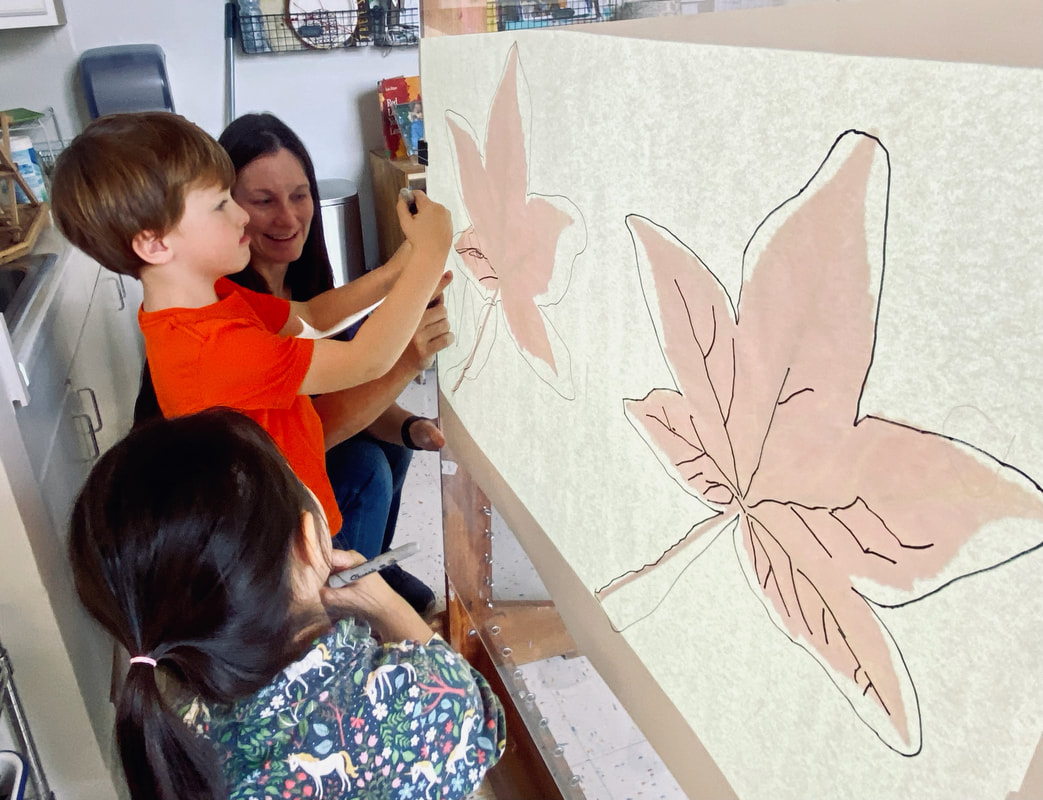 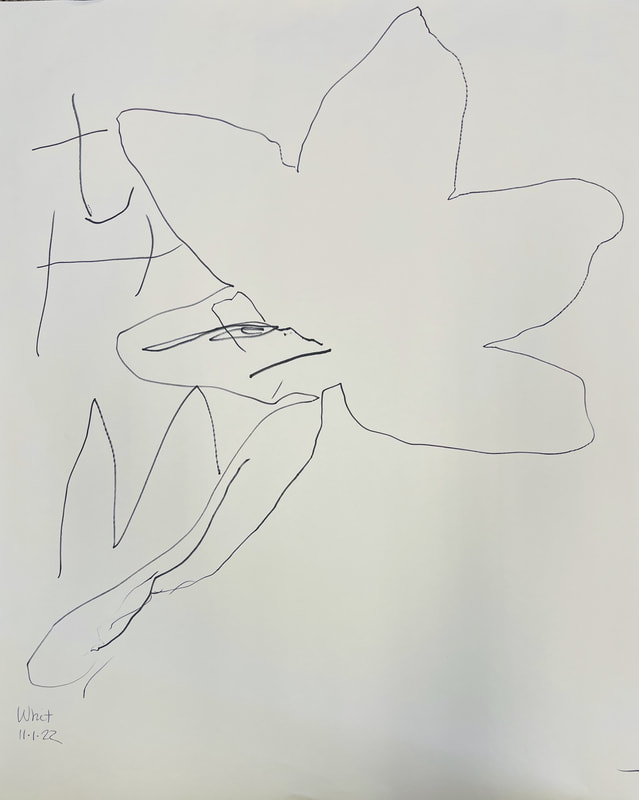  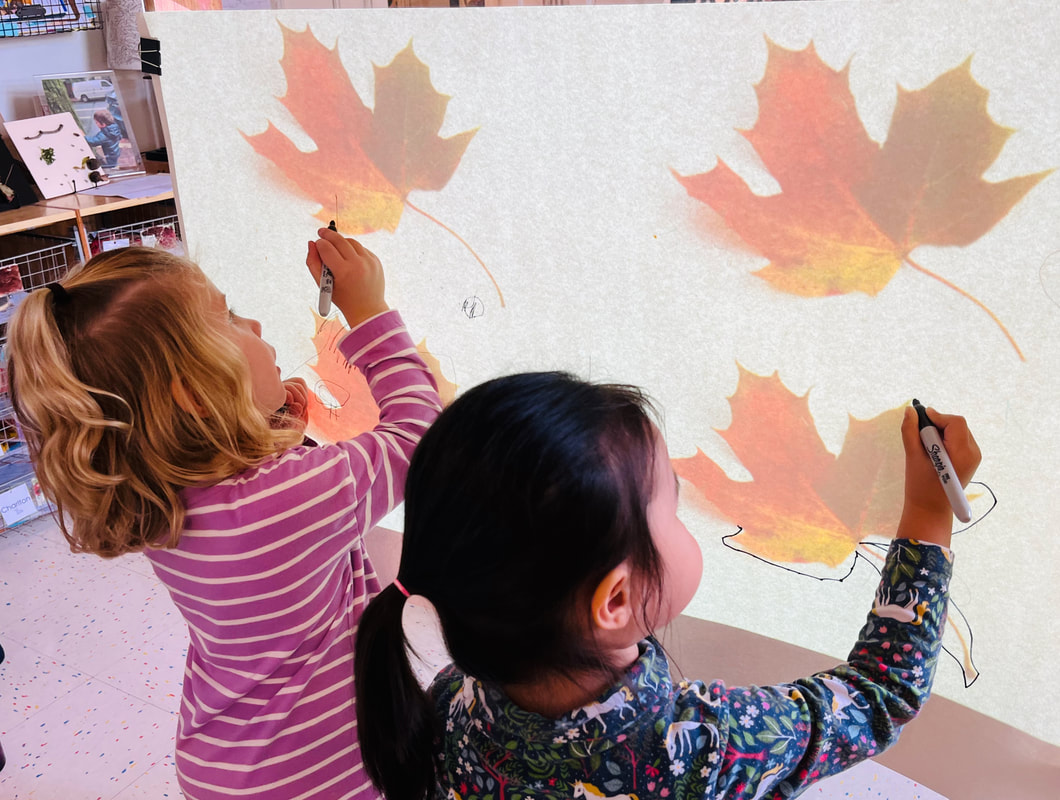 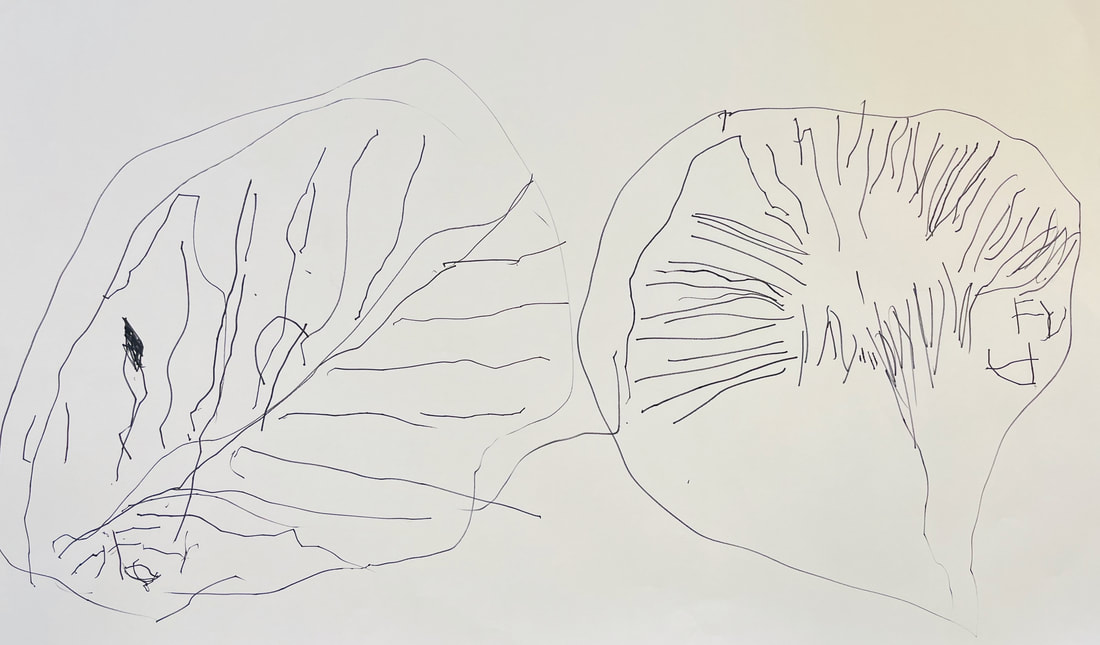 Fay traced two Gingko leaves and wrote her name on each. Bringing Life to Our Tracings with WatercolorsWe returned to our tracing another day and used an additional material to add to our work, watercolors. While using watercolors at the easel, some children began to notice how the force of gravity worked on the paint and others noticed how colors could blend or "be neighbors" not touching as we had talked about earlier. Ava: I painted with this color and all these things. I traced leaves. Cal noticing a drip going down the paper: It’s like a stream of water going all the way down. It’s going dripping down. It gonna go all the way down. 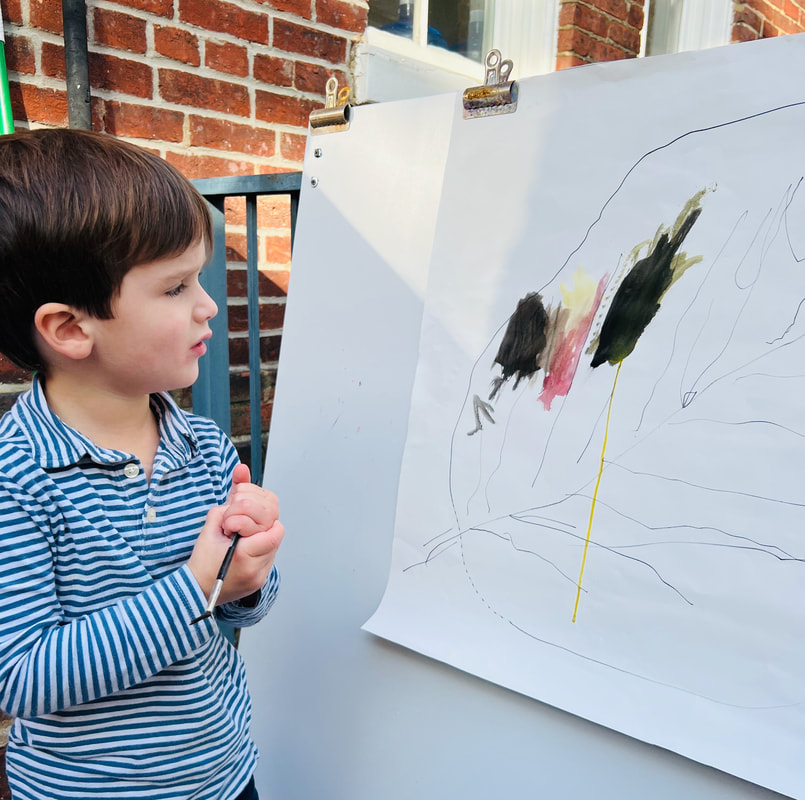  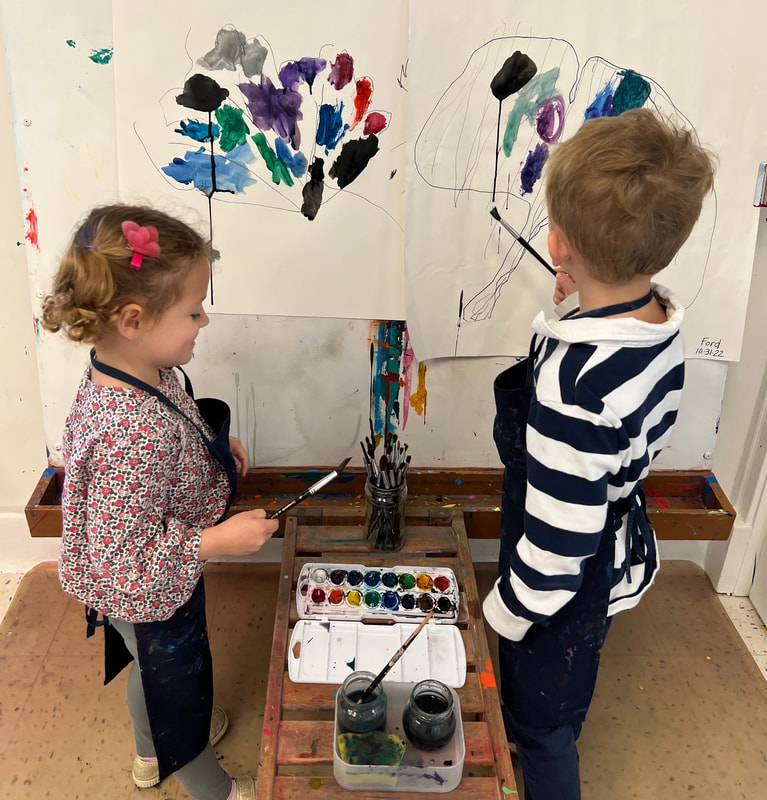 Bailee and Ford painted their leaves at the ease side by side. They both began painting by filling in the segments of the leaves between the veins in their tracings. While Bailee focused on keeping her colors from touching, Ford blended the edges. Elsewhere in the Rainey RoomThe creativity isn't confined to the studio. The children been creating intricate designs and amazing structures in the construction area. Charlton: My house. Louisa: My horse farm. My special farm. Isabelle's design which she made using string as an outline first, then lining up "butter stick" blocks inside the circle.    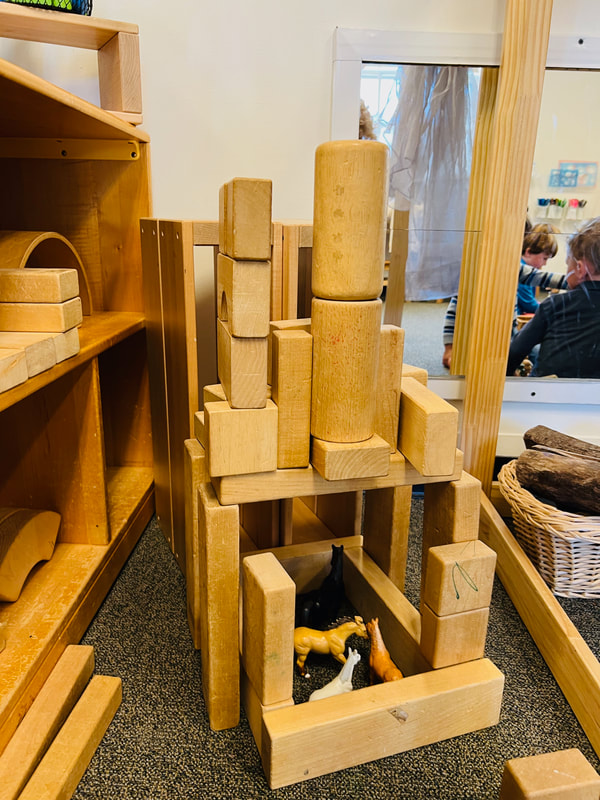  In the outdoor classroom, working together to move larger building materials has been a big part of our days as well this week. Simple Complexity“How can I bend this? It’s so hard.” - Bailee
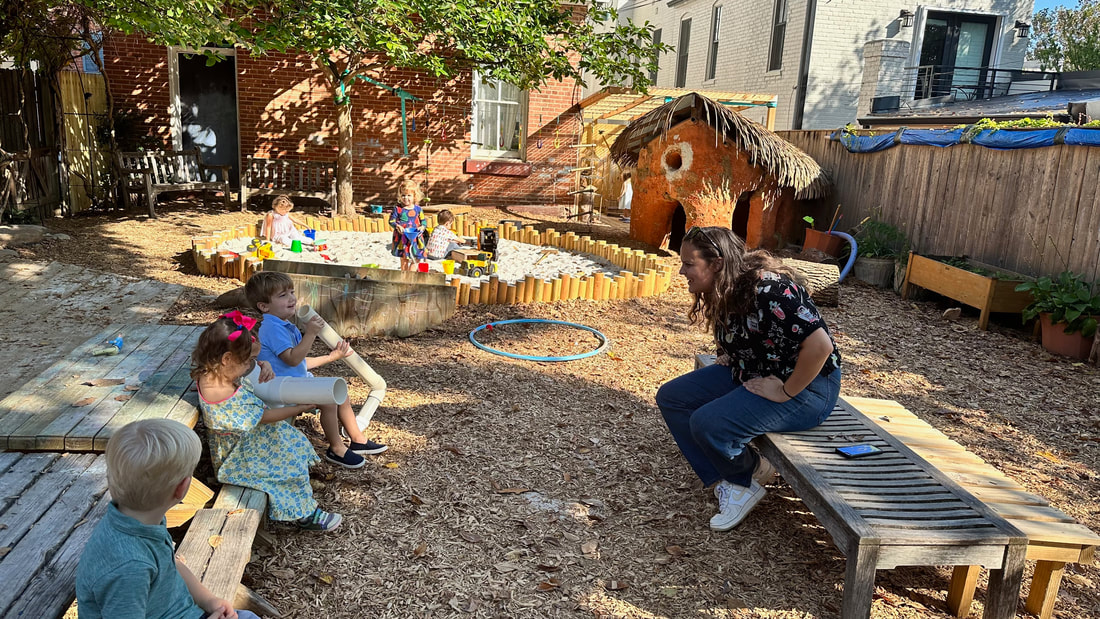
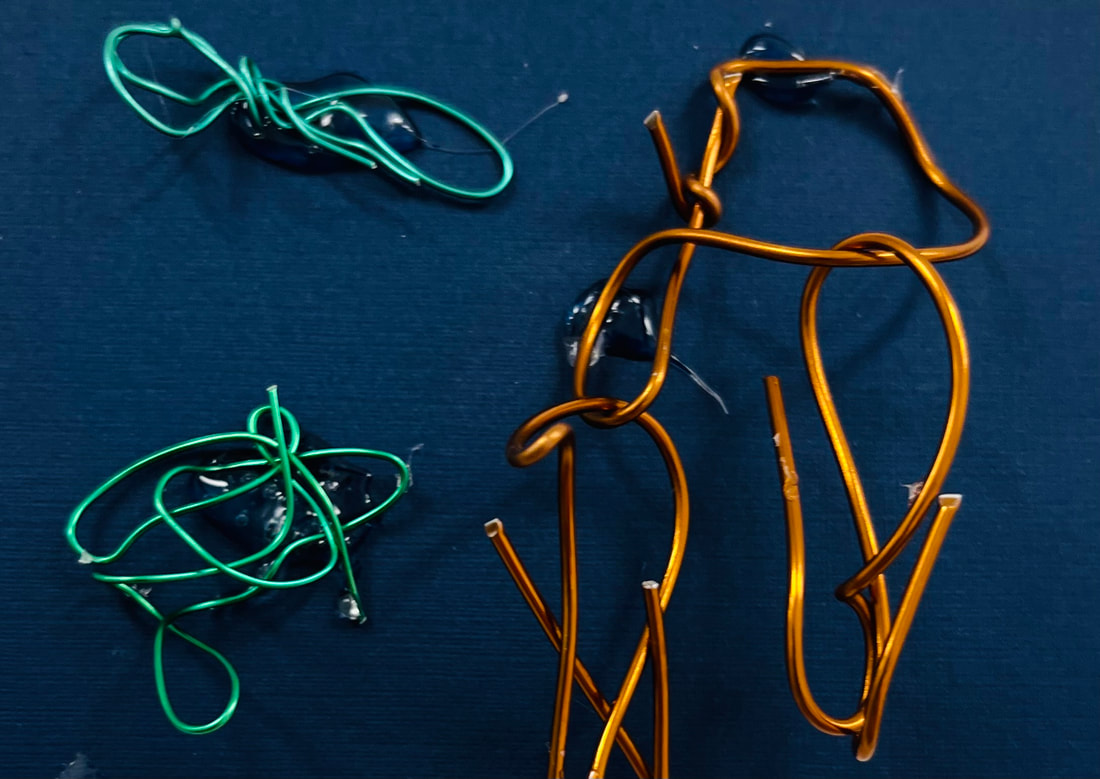
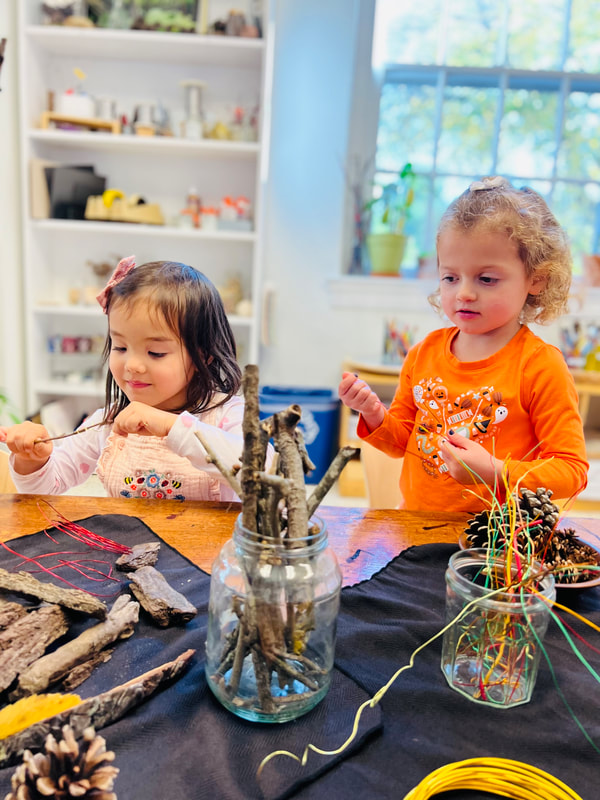
Incorporating Natural Materials
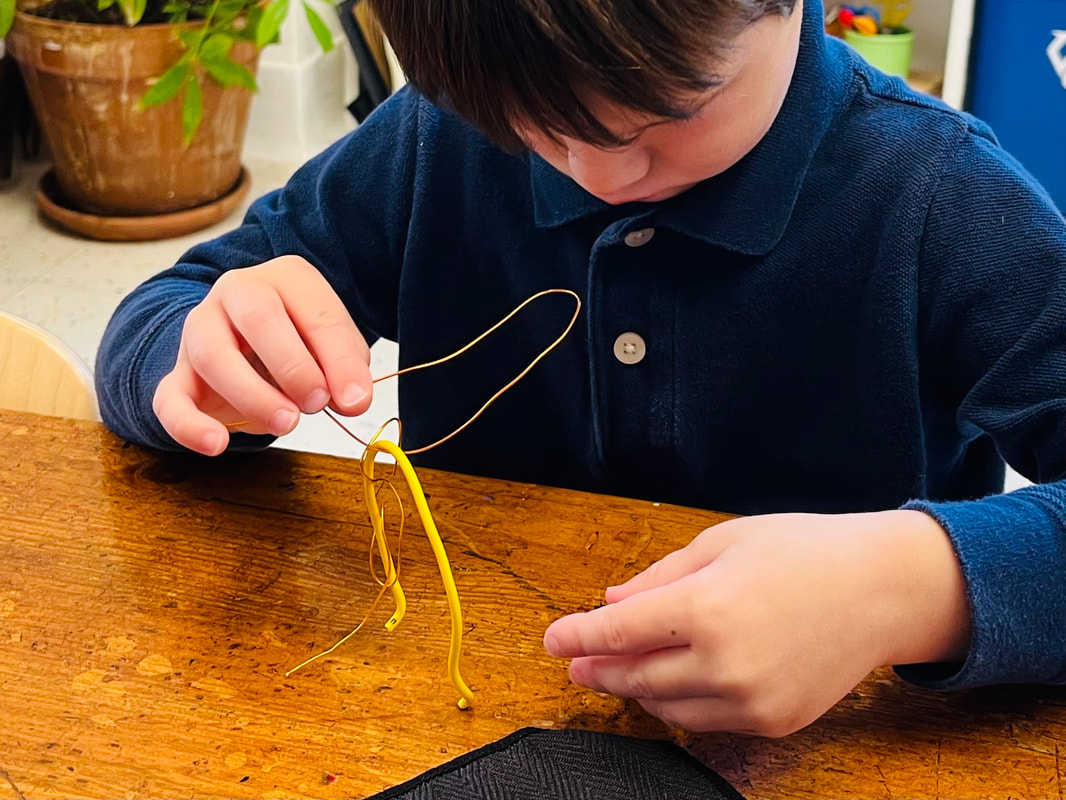
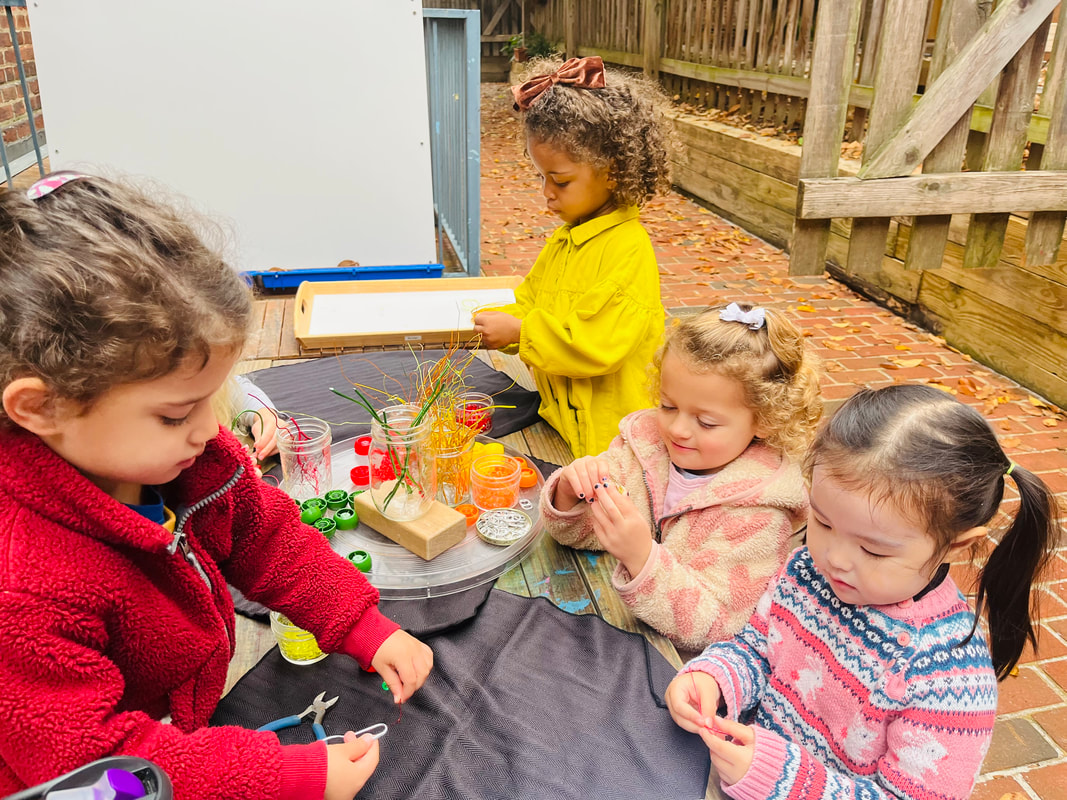
Louisa and Zari work in the outdoor studio with wire and natural materials. Threading with Wire
|